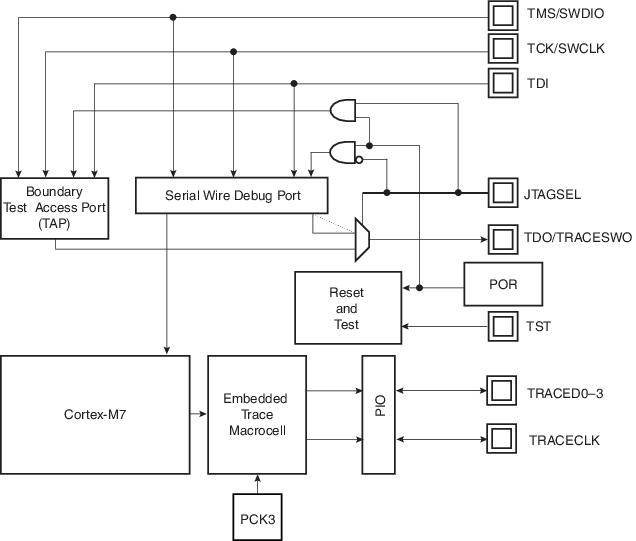
Debug and Test Block Diagram
Figure 1.
Debug and Test Block Diagram
Parent topic:
Debug and Test Features