- 1.Create a new project in MPLAB® X IDE (for ex: ATmega4808)
- 2.Open MCC by clicking Tools→ Embedded→
MPLAB® Code Configurator or click on the MCC icon

- 3.Navigate to Versions[MCC] → MPLAB® Code Configurator (Plugin) → Libraries → Microchip Technology, Inc. → AVR-IoT Google Sensor Node. Check the version of AVR IoT Google Sensor Node to ensure selection of library version 2.0.1. If any other version is selected, double click on Library version 2.0.1.
- 4.In the Device Resources panel navigate to Internet of Things → Examples → AVR-IoT Google Sensor Node
- 5.Double click on AVR-IoT Sensor Node to add this to the Project Resources panel
- 6.In the Project Resources panel navigate to Internet of Things → Examples → AVR-IoT Google Sensor Node
- 7.Select AVR-IoT Google Sensor Node
- 8.Google IoT Core
- Configure the Project ID, Project Region and Registry Id accordingly in Cloud Configuration.
- The default values configured in
there is to get the sensor node connected to Microchip’s Sandbox account.
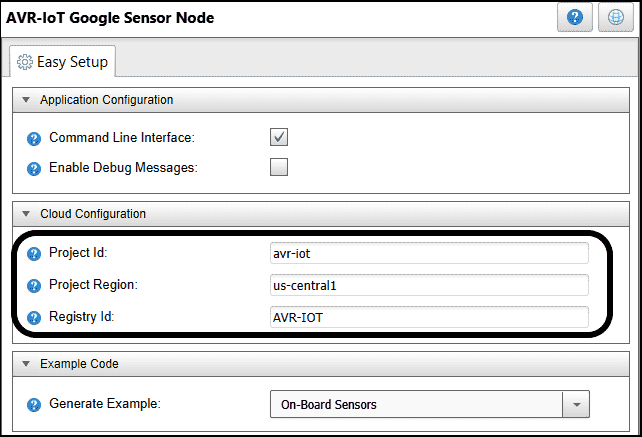
- 9.Click on the tooltip
 for more
information on each UI option.
for more
information on each UI option. - 10.Click Generate button
- 11.Connect the AVR-IoT WG Development Board to the computer using a standard micro-USB cable
- 12.Build the firmware and program the hardware.
- 13.Additional information is available in AVR IoT WG User Guide (Documentation and Software → Documents).