Band Gap Ready Graphs
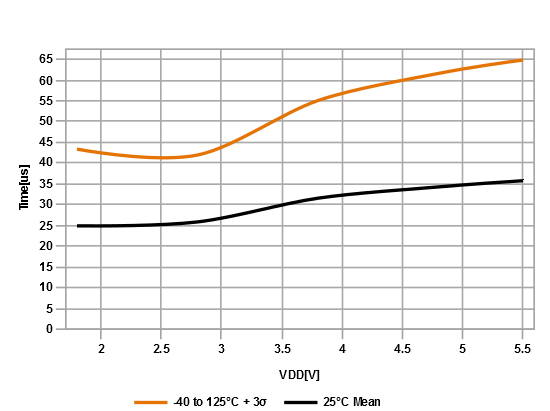
Figure 1.
Band Gap Ready Time
Parent topic:
DC and AC Characteristics Graphs and Tables