Issue: Blank UI Components When Reopening Projects in MCC
Issue Summary
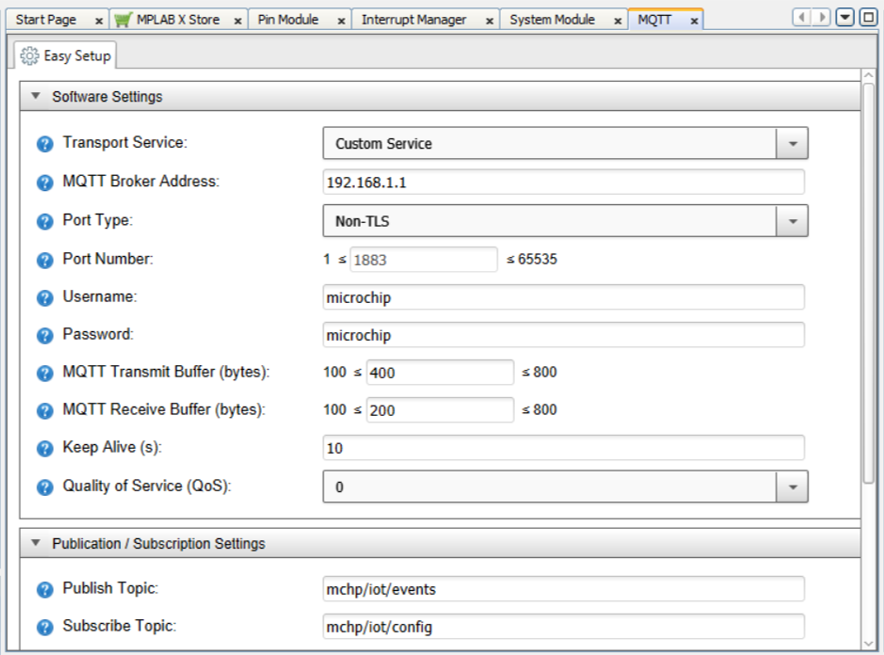
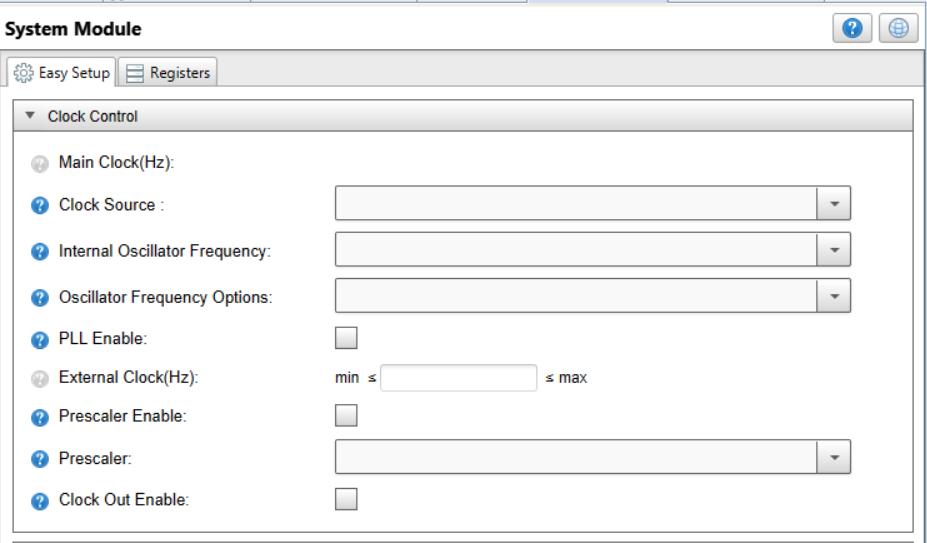
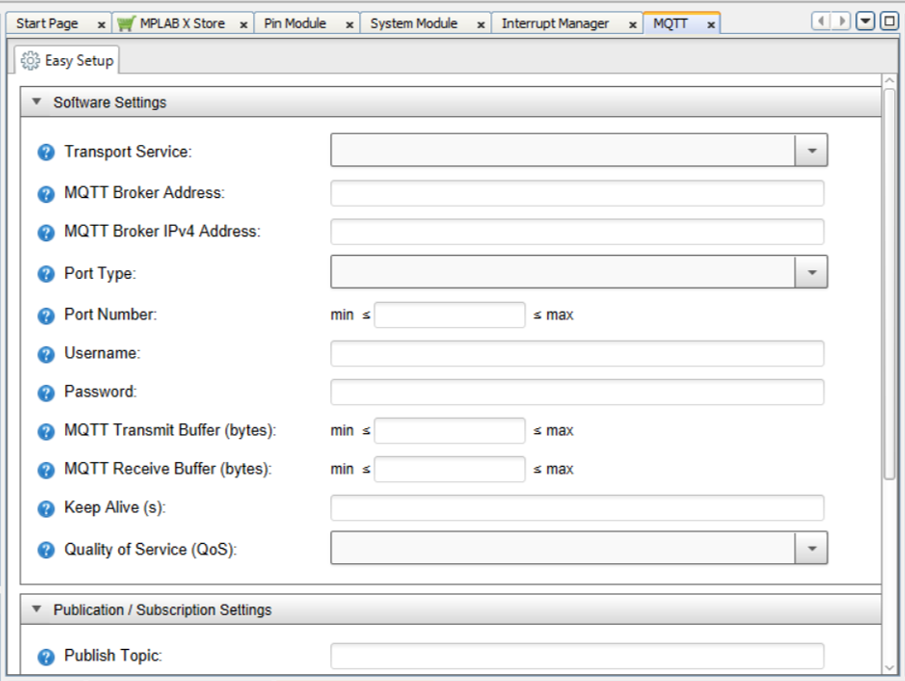
In MPLAB® X v6.05, launching MPLAB® Code Configurator (MCC) in projects previously configured using MCC Classic will result in an error where the contents of the GUI components in the Easy Setup interface will appear blank, similar to the screen captures below:
Affected Versions
This issue only appears when using MPLAB® X v6.05 and only for MCC projects previously configured in MCC Classic, using MPLAB® X v6.00 or earlier.
Workaround
To fix the issue, users must update the project to use the latest MCC Core version and/or the latest versions of their library. Update steps vary depending on the MCC Core version used to configure the project and if the modules involved are System/Peripheral Modules or Library/Driver Modules.
Updating the MCC Core Version Used In A Project
- 1.Open project in MPLAB® X v6.05.
- 2.Launch MCC.
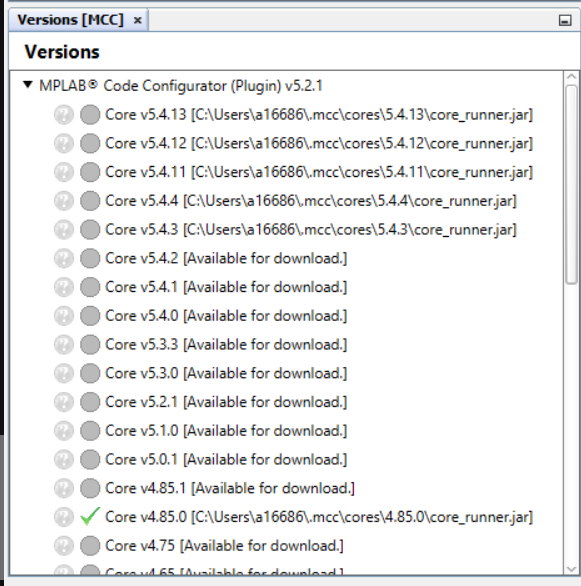
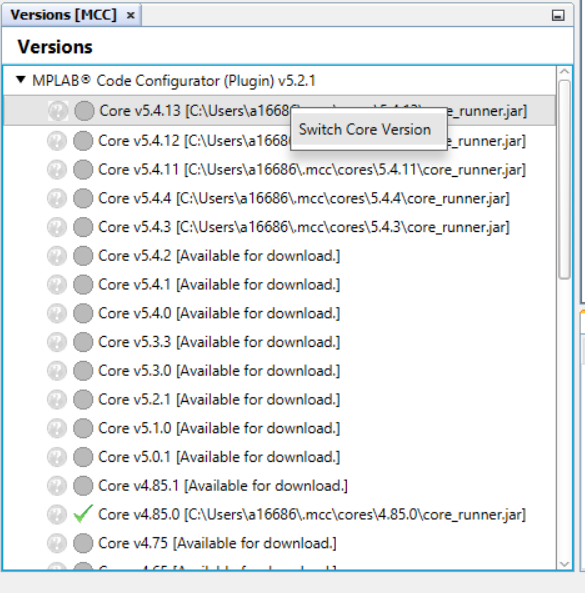
- 3.In the lower left-hand part of
the window, in the Versions tab, expand the MPLAB® X Code Configurator
Plugin header to check the core version used in your project. Figure 3. Versions Tab
If the project is already using the latest available MCC Core, skip to Updating Module Versions Using Content Manager.
- 4.If the project is not using the
latest MCC Core, right-click on the latest version available and select
Switch Core Version.Figure 4. Switching To A New Core Version
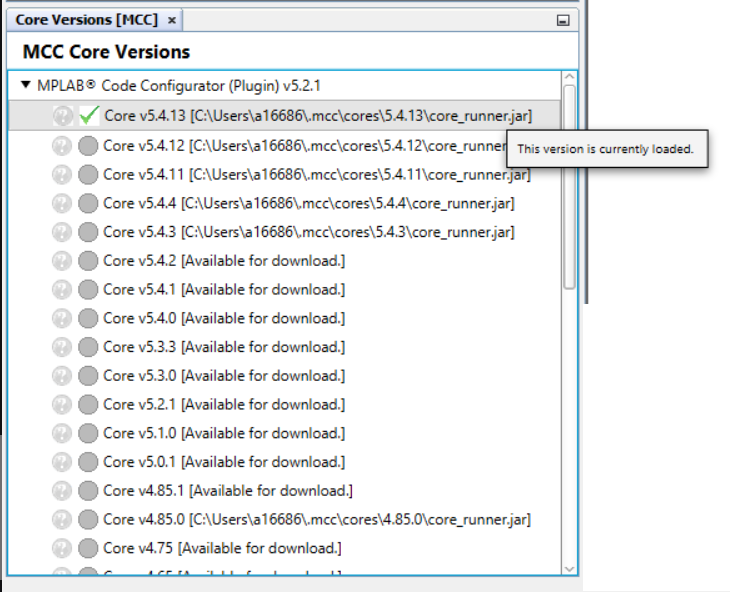
- 5.Confirm that the MCC core has
been updated by looking for a green check beside the latest version. Hovering
the cursor over it should also display a message that says, "This version is
currently loaded."Figure 5. New Core Version Loaded
- 6.For System and Peripheral Modules, the latest device library will be selected and loaded automatically. This can be verified in Content Manager. For Library and Driver Modules, manual update to the latest versions using the Content Manager is needed.
Updating Module Versions Using Content Manager
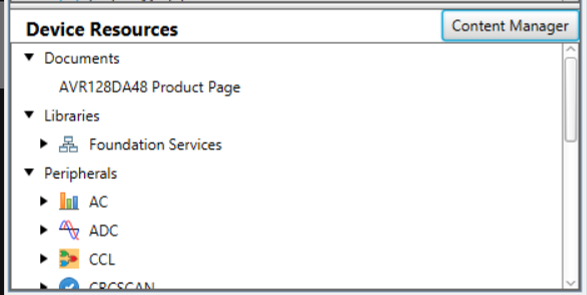
- 1.Click on Content Manager
in the Device Resources panel.Note: If the Content Manager button is missing, follow the steps indicated in Updating the MCC Core Version Used In A Project to update the MCC Core version.Figure 6. Location of Content Manager Button
- 2.In the Content Manager tab, find
the module to be updated and verify that a new version is available. Click the
new version to download it. To download the latest versions of all modules
simultaneously, click Select Latest Version(s) on top of the tab
window.Figure 7. Location of Select Latest Version(s) and Apply Buttons
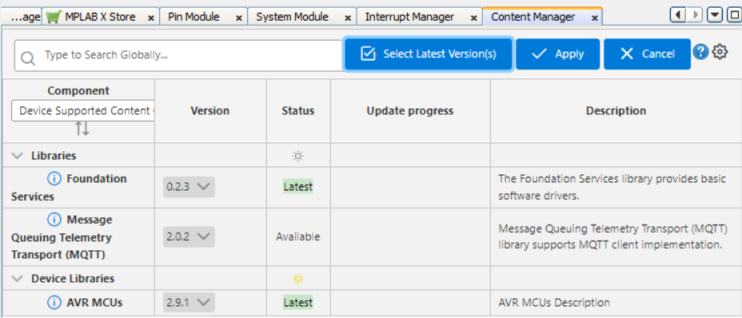
- 3.Click Apply.
- 4.Wait for MCC to update the
components. The UI components should now appear normally.Figure 8. System Module Easy Setup Window After Fix
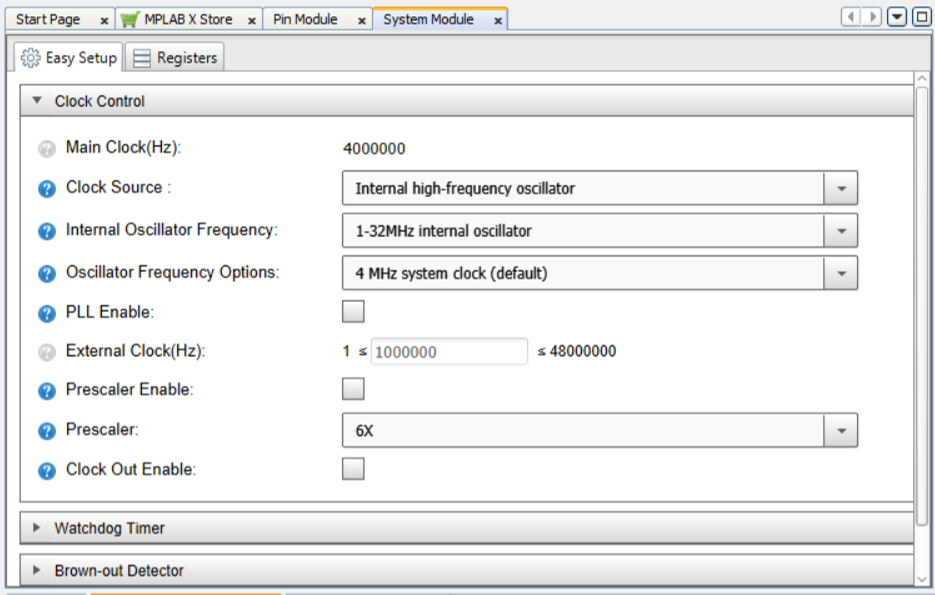 Figure 9. Library Easy Setup Window After Fix