Once the RTC drivers have been added to ADC and Power Optimization, the RTC
initialization function will be automatically called when the
atmel_start_init(); function in the main.c file is executed. The
CPUINIT and SLEEPCTRL modules are also required to be configured for this assignment.
Todo: Configure the RTC, CPUINIT, and SLEEPCTRL
modules.
- 1.Configure the RTC driver by following the
configuration steps, as marked with numbers in Figure 1.
- 1.1.Open the RTC driver configuration page by clicking RTC_0 in the Atmel | START window.
- 1.2.Ensure the RTC is enabled after initialization by selecting RTC:Enable.
- 1.3.Configure the RTC clock prescaler value
by clicking the PRESCALER drop-down menu and select 32. Info: This will configure the RTC count frequency to 1 KHz since the default RTC clock source is the 32 KHz Internal Ultra Low Power Oscillator.
- 1.4.Entering 512, equivalent to heximal
number 0x200, in the PER text box to define the RTC period.Note: It may not allow changing this field due to an ATMEL | START bug. It works by typing the value anywhere, and copying/pasting it in this field.
- 1.5.Tick the Run in Standby checkbox to enable RTC to run in the Sleep Standby mode.
- 1.6.Tick the Include ISR harness in driver_isr.c checkbox to include interrupt harness in driver_isr.c.
- 1.7.Tick the OVF checkbox to enable the RTC overflow interrupt.
Info: The RTC overflow interrupt is configured to trigger twice per second since the period is set to 512 with an RTC clock frequency of 1 KHz.Figure 1. RTC Configuration in Atmel | START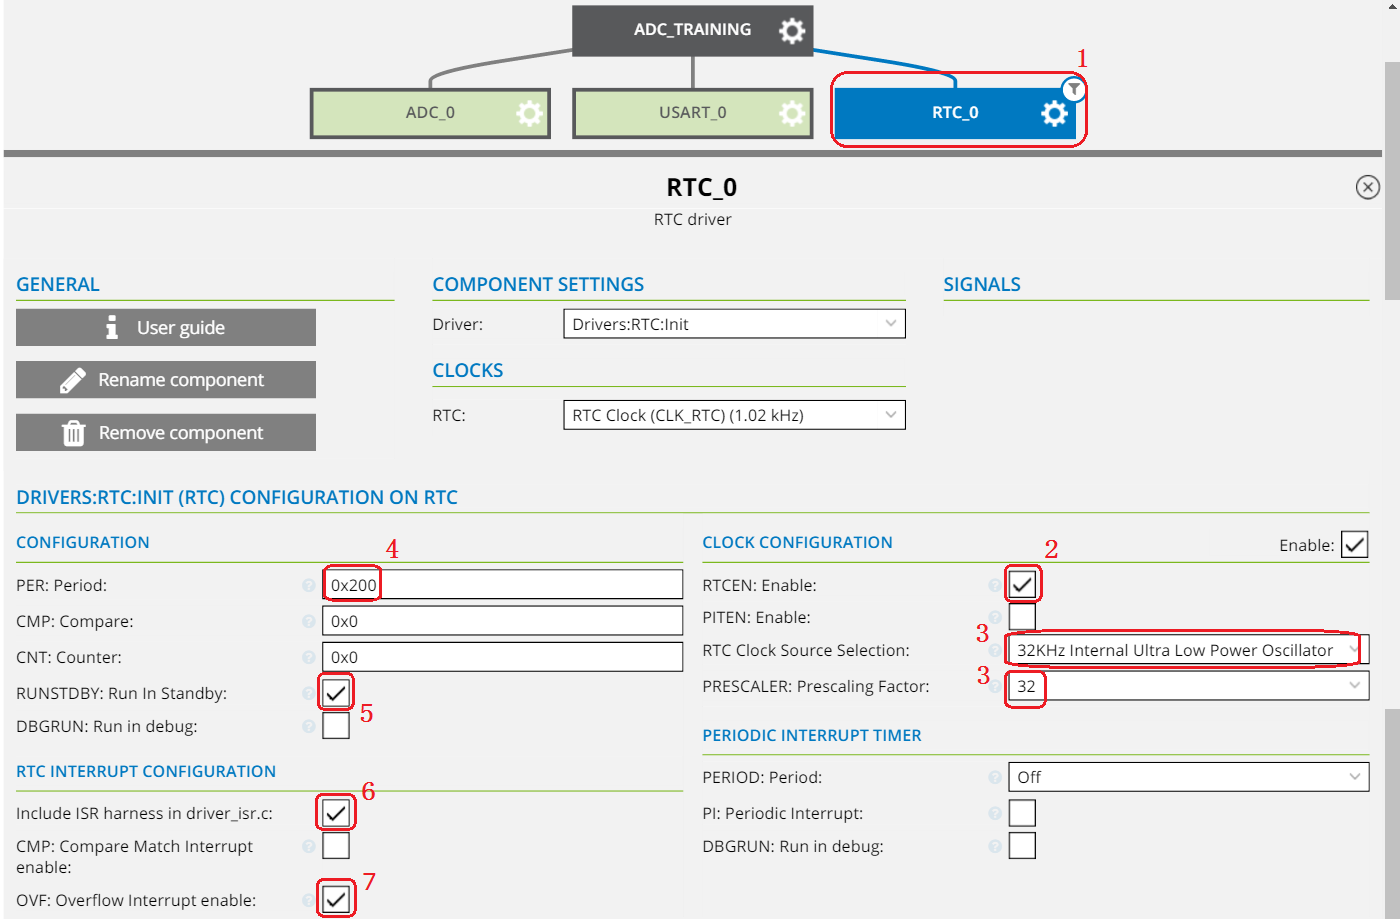
- 2.Enable CPUINT Global Interrupt in three
steps as illustrated in Figure 2.
- 2.1.Enable system driver visibility by toggling the Show system drivers slider in the top right corner of the "DASHBOARD"-view.
- 2.2.Click CPUINIT to open the CPUINT configuration view.
- 2.3.Tick the CPU_SREG: Global Interrupt Enable checkbox so that the initialization routine generated by Atmel | START will enable global interrupts.
Figure 2. CPUINT Configuration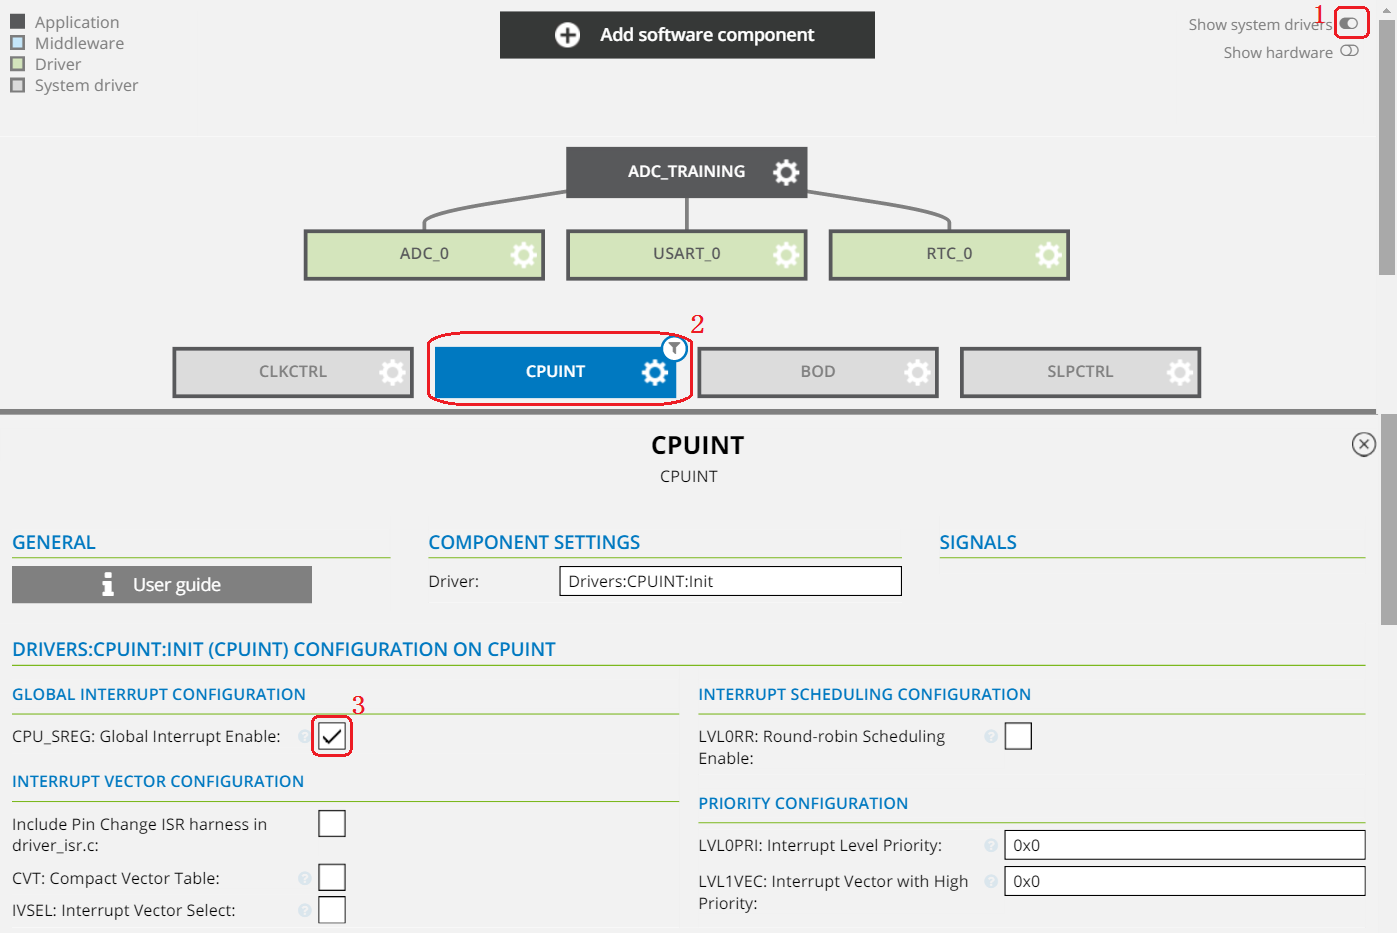 Info: The RTC and CPUINIT are now configured. The RTC will now be able to trigger its overflow interrupt.
 - 3.Configure SLPCTRL by clicking it in
the Atmel | START window and following the configuration steps as marked in
Figure 3.
- 3.1.Tick the SEN checkbox to set sleep enabled.
- 3.2.Select "Standby Mode" in "SMODE:Sleep mode" column.
Figure 3. SLPCTRL Configuration in Atmel | START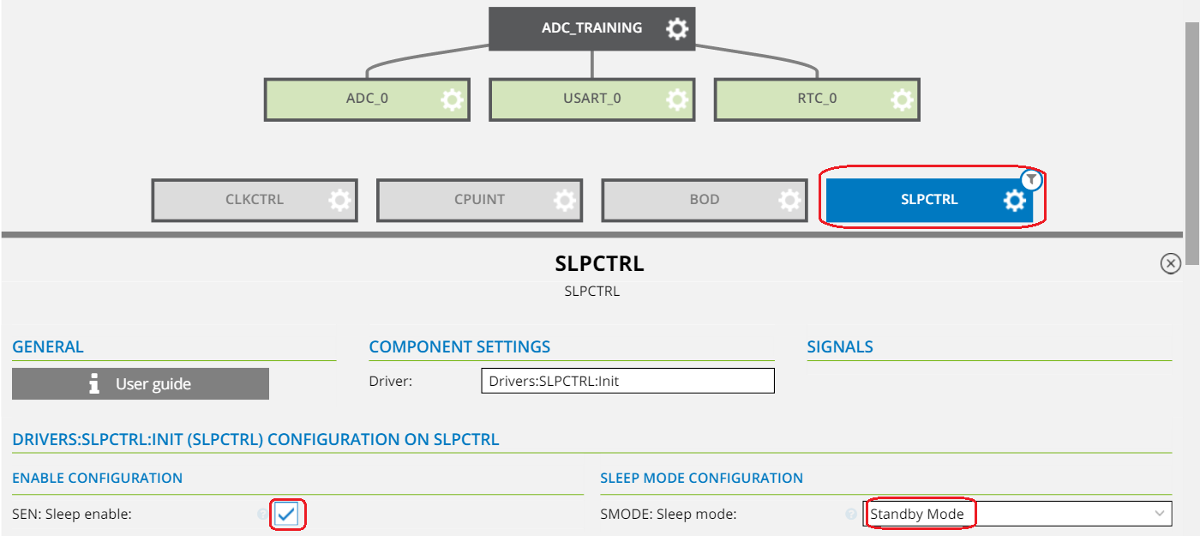 Info: Figure 4 is a snapshot from the data sheet and gives the Sleep mode overview. It shows that the RTC can be used as a wake-up source while the RTC and ADC clocks run in Standby Sleep mode. Standby mode is chosen for this assignment since it will result in much lower power consumption than in idle mode.Figure 4. Sleep Mode Overview
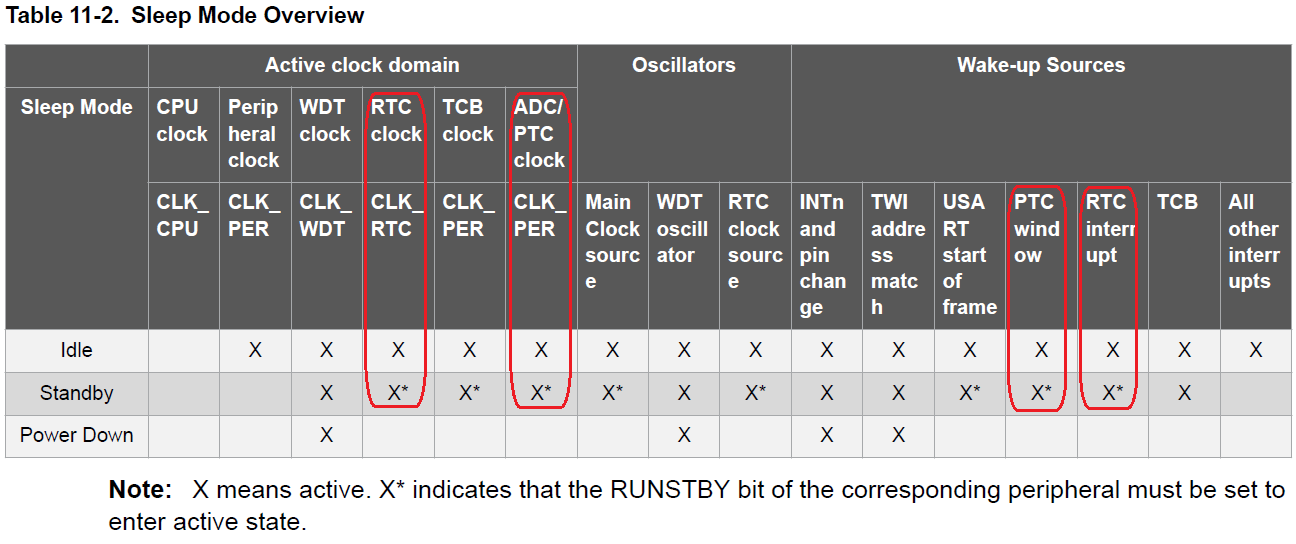
- 4.Generate the project by clicking
 . Info: The project summary window should appear.Figure 5. Summary of Project Code Generated by Atmel | START
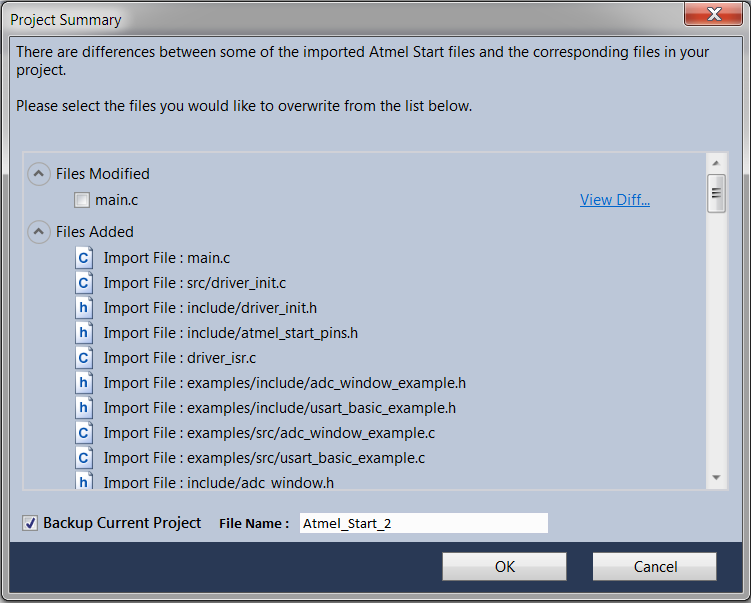
Figure 5 gives an overview of the files that have been changed between the original and the reconfigured Studio project. As shown, the only modified file is main.c.
- 5.Compare the changes for the selected file
by clicking View Diff for the only modified main.c file and an external
installed tool, WinMerge, will be opened. Tip: This external WinMerge tool is not installed within Studio by default. Here is the info on how to install it.The difference for main.c between the version already present in Atmel Studio and the version re-generated by Atmel | START is compared as shown in Figure 6:
- Download the tool from http://downloads.sourceforge.net/winmerge/WinMerge-2.14.0-Setup.exe
- Install it at the default path (i.e. C:\Program Files (x86)\WinMerge) or a user-defined path
- In Atmel Studio, go to menu Tools
Options -> Atmel Start -> File Compare. In “Path of the application
used for comparing files”, fill in
C:\Program Files
                (x86)\WinMerge\WinMergeU.exe
. In “Command line arguments to be used for file comparison:”, fill in%original %mine /s /uand click OK. - Click View Diff... as shown in Figure 5 and now it should work.
Figure 6. main.c Difference Between Atmel Studio Version and Regenerated by Atmel | START
- 6.Regenerate the project by clicking the OK button in Atmel | START without ticking the checkbox for the main.c file. The main.c file will be kept as it is without being overwritten by the Atmel | START regenerated version.
Result: The Atmel | START project has been regenerated in Atmel Studio, including the newly
added RTC, CPUINIT, and SLPCTRL drivers.