Todo:
- Reconfigure the ADC module with WCMP mode configuration in Atmel | START.
Reconfigure the project in Atmel | START:
- 1.Select the project by right-clicking the ADC_Training project in the Solution Explorer window from the previous assignment.
- 2.Reconfigure the project by clicking the Re-Configure Atmel Start Project option in the menu, the same way as described in the previous assignment.
- 3.Reconfigure the ADC module by clicking
the ADC component in the Atmel | START window and then configuring
it as shown with red markings in Figure 1.Figure 1. ADC Reconfiguration in START
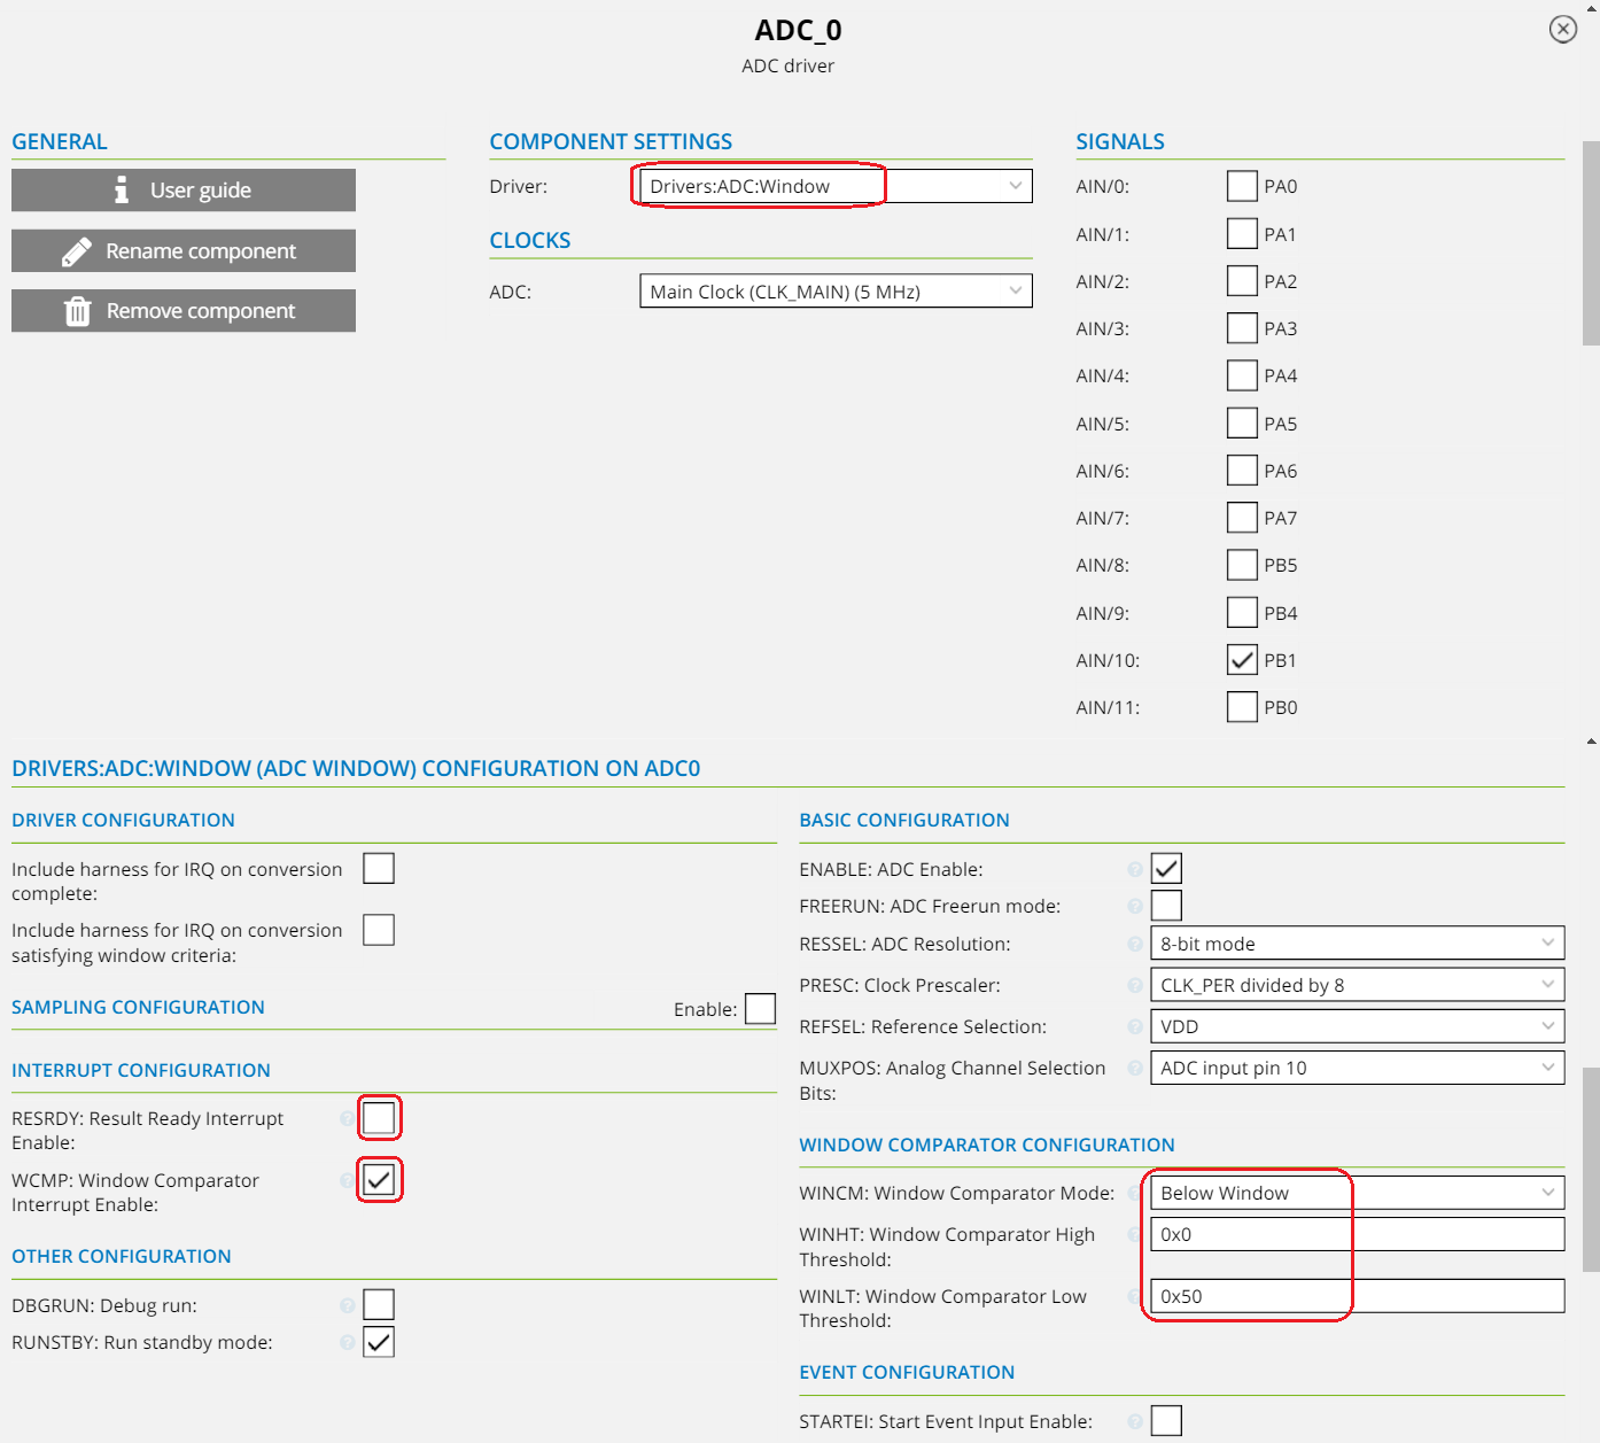
- 3.1.Select Drivers:ADC:Window for window compare mode drivers in the driver column.
- 3.2.Unselect the checkbox for the RESRDY: Result Ready Interrupt Enable field.
- 3.3.Select the checkbox for the WCMP: Window Comparator Interrupt Enable field as it now replaces the just unselected RESRDY interrupt.
- 3.4.Select Below Window from the WINCM: Window Comparator Mode drop-down menu.
- 3.5.Enter 80 (0x50 hexadecimal value) in the WINHT: Window Comparator Low Threshold field.
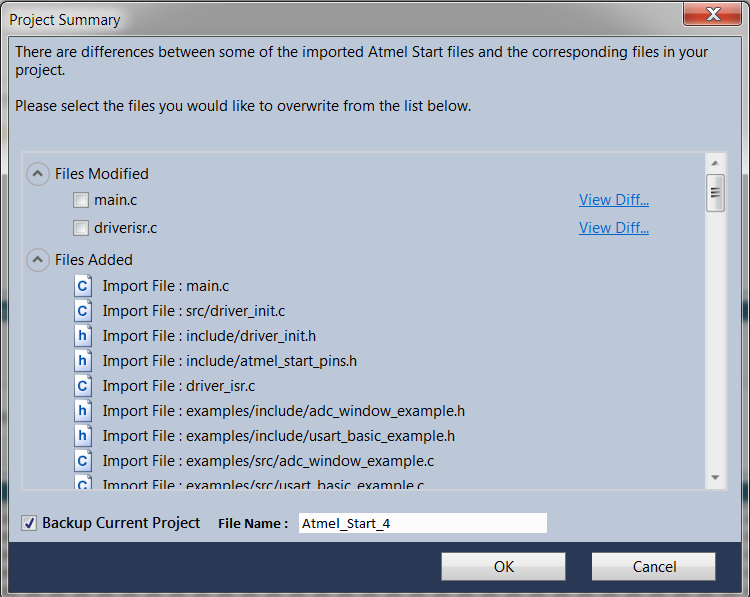
- 4.Regenerate the project by clicking the
GENERATE PROJECT button at the bottom of the window. Info: The project summary window should appear as shown in Figure 2.Figure 2. Project Code Regenerated
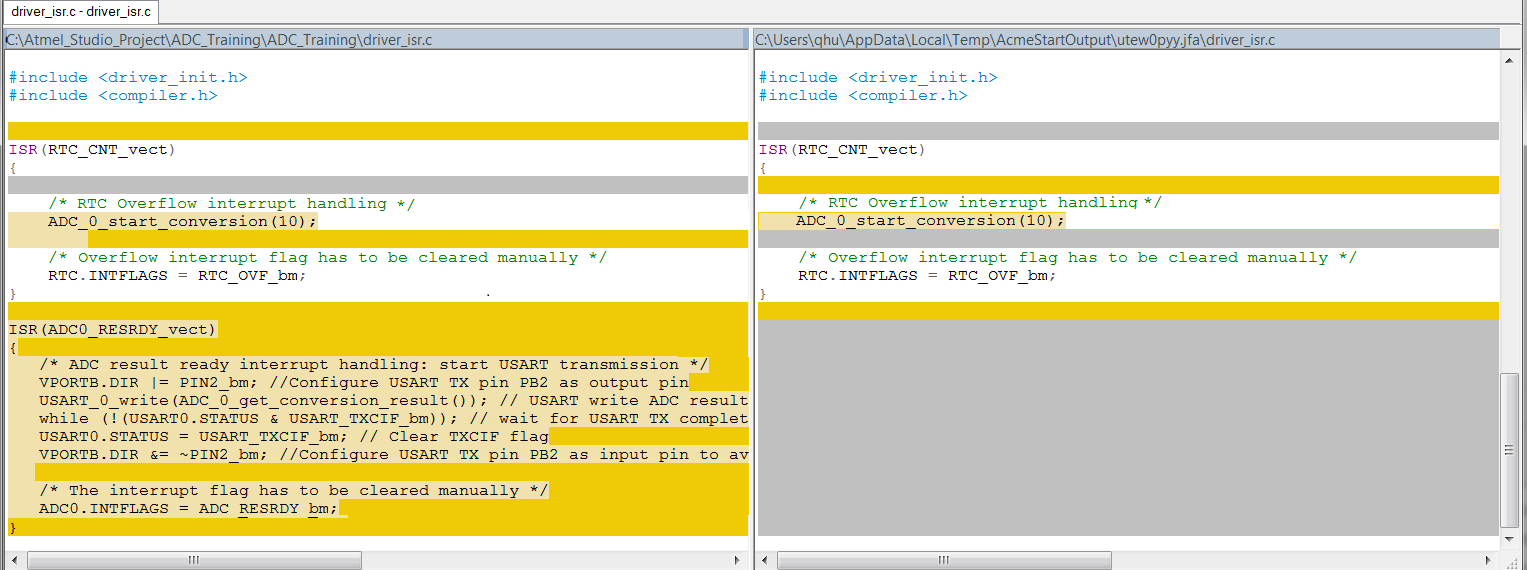
- 5.For driver_isr.c, click View
Diff to see the difference between the previous and the newly generated project as
shown in Figure 3. The ADC interrupt routine needs to be updated.Figure 3. Driver_isr.c View Diff
- 6.Update the project by clicking the
OK button. Info: The main.c and driver_isr.c are not selected and need to be manually updated afterward.
Result: The
Atmel | START project has been regenerated in Atmel
Studio.