- 1.Self-Cap Sensor
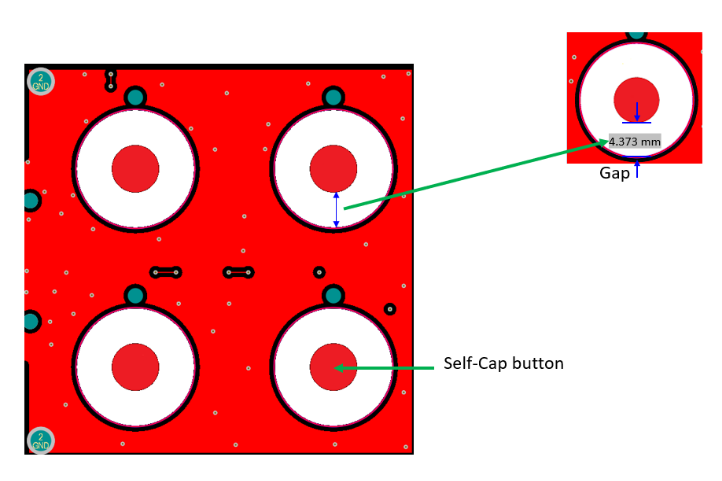
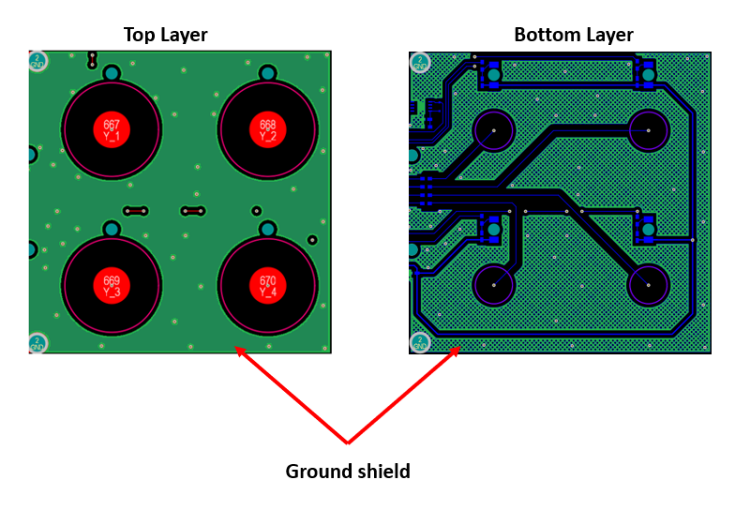
- 2.Ground Shield
- 3.Mechanical Stack-Up
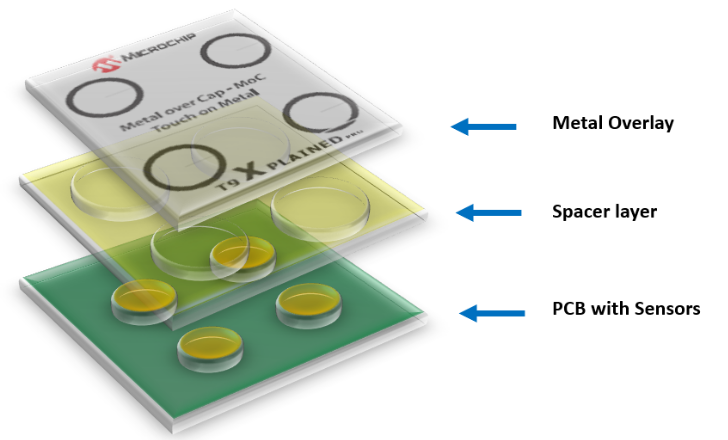
- 4.Metal Overlay
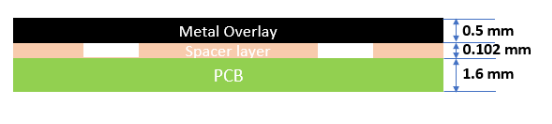
The typical choices for the metal overlay are stainless steel or aluminum. For the T9 Xplained Pro, stainless is used with the following dimensions: 50 mm x 50 mm x 0.5 mm (WxHxD). The print marks the locations of sensors.
The metal overlay is connected to the PCBA ground through the conductive adhesive spacer layer. This also provides a non-destructive path for the ESD energy.
- 5.Spacer Layer
Changing the state of the MoC sensor is based on the deflection of the metal overlay towards the touch electrode, caused by the press of the user. This deflection results in increasing the capacitance of the sensor due to the decreased distance between the plates of the capacitor. In consequence, MoC buttons can be activated by any thick glove or even sticks pressing the button surface. MoC buttons are, therefore, also inherently waterproof.
The T9-Xplained Pro uses Electrically Conductive Adhesive Transfer Tape 9707 with the thickness of 0.102 mm from 3M, as the spacer. This material serves two purposes:
- It creates the intended distance between the metal overlay and the touch electrodes.
- It connects the metal overlay to the PCB ground.
It is recommended that the spacer layer be made from a rigid non-deformable adhesive material. It may also be necessary to provide rigid mechanical support to the back of the PCB to prevent flexing of the entire target/spacer/PCB stack and potential loss of sensitivity.
Sensors are copper fills on the FR4 PCB and they form a capacitor with the metal overlay. In the T9 Xplained Pro, the top layer solder mask is limited to the electrical traces and the sensor electrodes area, while the whole ground plane on the top layer is copper exposed. This is to provide the ground connection to metal overlay through the electrically conductive adhesive spacer.