2.1.1 Getting Started With the Touch Host Driver
MTCH2120 and SAMD21 XPRO are used as an example.
Create a New 32-bit MPLAB® Code Configurator (MCC) Harmony project.
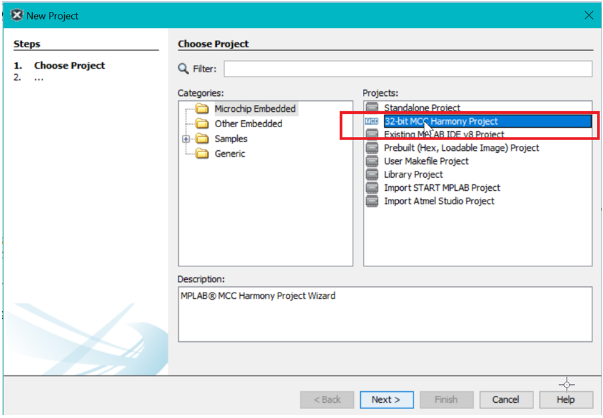
Upon clicking the Finish button of the New Project Wizard, the MCC Content Manager will open along with the newly created project.
Note: Refer to the Create a New MPLAB® Harmony v3 Project section for more details on how to create your project.-
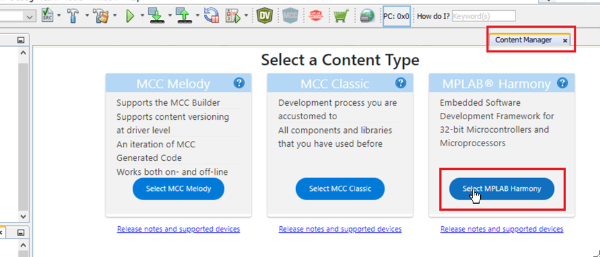
Add the Touch Host Driver to the MCC content.
-
From the Content Manager, click the Select MPLAB Harmony button.
-
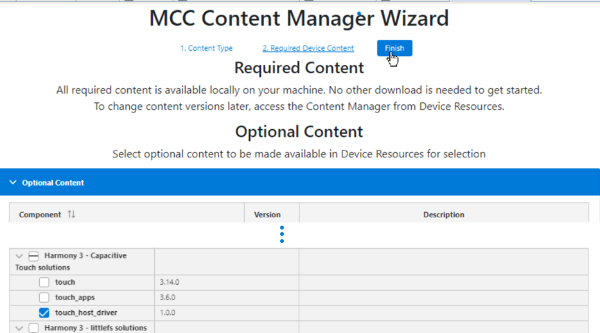
Select touch_host_driver from the optional content and click Finish.
-
This will close the Content Manager and open the Resource Management [MCC] and Project Graph tabs.
-
- Add the Touch Host Driver to the project
-
In the Device Resources tab of the Resource Management [MCC] tab, expand the Touch Turnkey library to find the Touch Host Interface component.
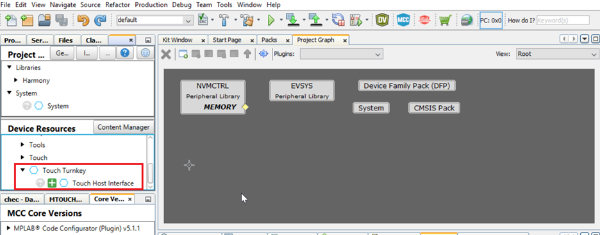
-
Click the Add button (green square with white cross) next to Touch Host Interface to add it to the Project Graph. The configuration options are shown in the right-hand pane.
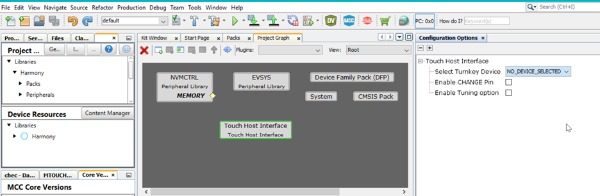
-
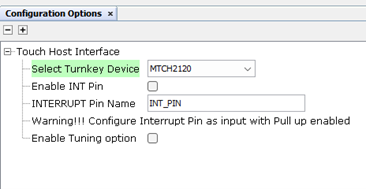
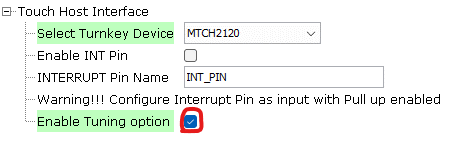
- Choose a turnkey device.
Select the turnkey device from the supported list of devices. MTCH2120 is selected in this example.
-
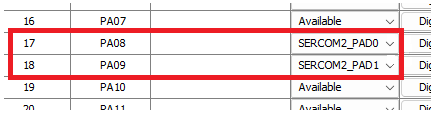
Add the SERCOM module.
I2C is the only interface for the host driver and the selected MTCH2120 turnkey device. Choose a satisfying Serial Communication (SERCOM) and select the corresponding pins from the PIN configurator.
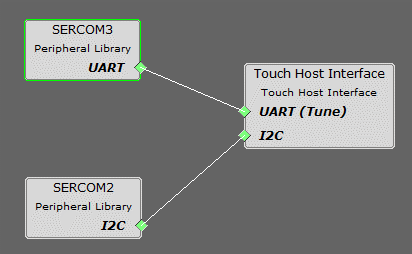
- Add the tuning option.
Check the Enable Tuning option, select a SERCOM for the Universal Asynchronous Receiver Transmitter (UART) and choose the corresponding pins from the pin manager.
- Configuring the SERCOM module.
-
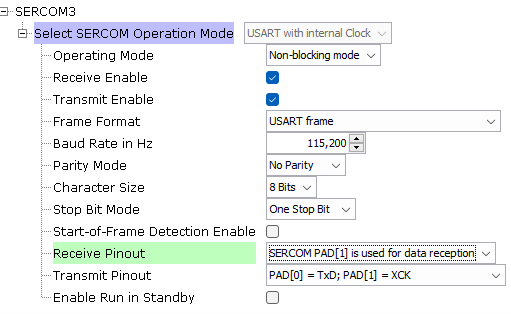
Configuring UART
Configure UART settings as follows:
-
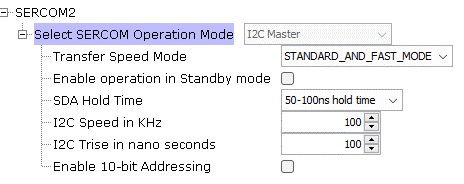
Configuring I2C.
Configure I2C settings as follows:
-
-
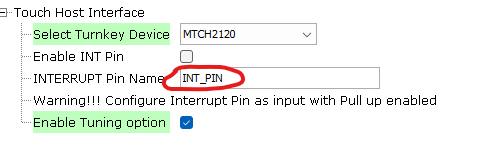
Configure INTERRUPT.
-
Change the INTERRUPT Pin Name as needed and copy the name.
-
-
Pin configuration.
-
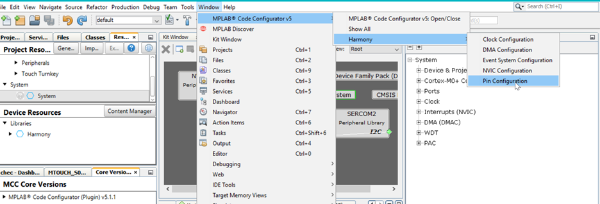
Open Pin Configuration.
-
Configure the UART pin.
Configure the UART pins in the Pin Configuration window.

- Configure the I2C
pin.
Configure the I2C pins in the Pin Configuration window.
- Configure the Interrupt
pin.
Configure the Interrupt pin in the Pin Configuration window.

-
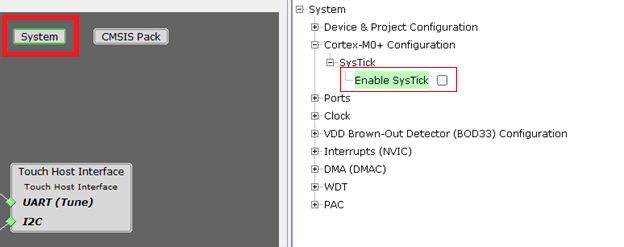
Disable SysTick.
- Click System in Project Graph.
- Go to the Cortex-M0+ Configuration.
- Go to the SysTick.
- Uncheck the Enable SysTick
option.
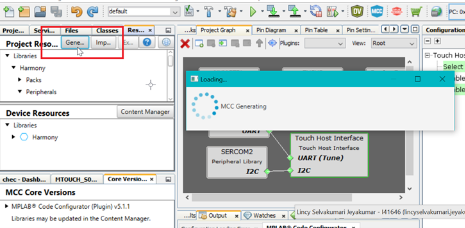
Generate the files.
Click the Generate button to start generating the MCC files for the project.
Add the code and compile.
Add code (
touch_init_example()andtouch_mainloop_example()) tomain.c. Refer to thwmtch2120_host_example.cfile for reference and compile the project.
-
How to Connect to the Data Visualizer.
Refer to the How to Connect to Data Visualizer section for more details on how to connect the kit to the Data Visualizer.
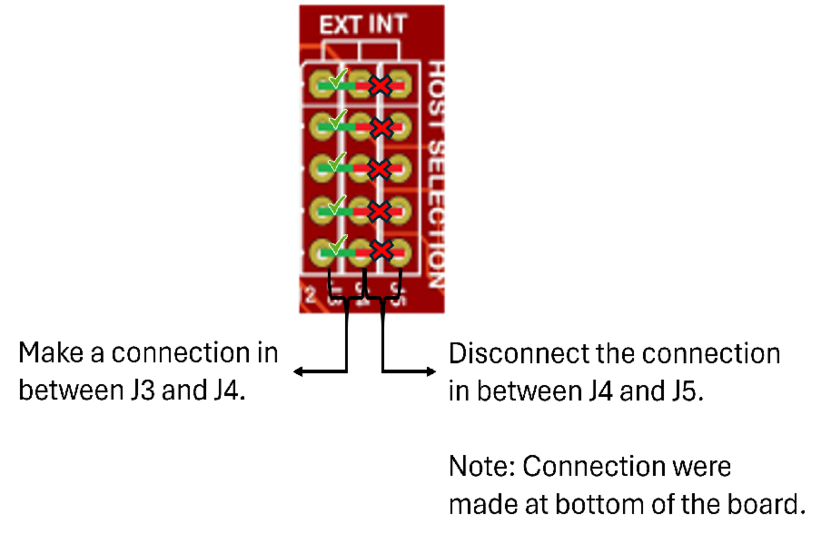
External Host Interface Connection Procedure
Connection between SAMD21 Xplained Pro With MTCH2120 (EVK)
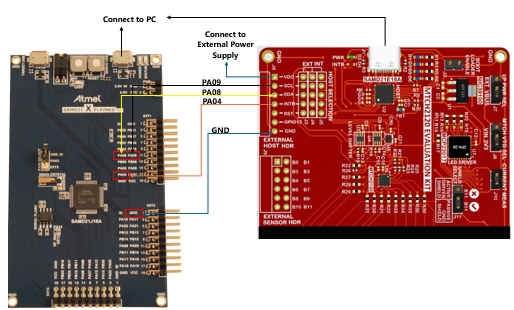
External Host Jumper Settings