
4.5 Atmel Studio 6.2 Users Getting Started
Prerequisites:
- Atmel Studio 6.2 SP2 or above installed
- ASF version 3.26.10 or above installed
- SAM L22 Xplained Pro board connected to PC through embedded debugger USB connector. The kit is powered through USB.
Getting started with Atmel Studio 6.2, ASF, and SAM L22 Xplained Pro:
- Launch Atmel Studio 6.2
- Connect the SAM L22 Xplained Pro board to the PC using a USB cable
- A page on SAM L22 Xplained Pro description will open in Atmel Studio
- This page contains external link to Device Technical Documentation, Datasheet, Kit user guide, and Kit specific details like serial number and target name. Also, there will be an option to open ASF example projects.
- To open ASF examples, click
File-> New -> then Example Project.
Figure 4-1. Creating New Example Project in Atmel Studio 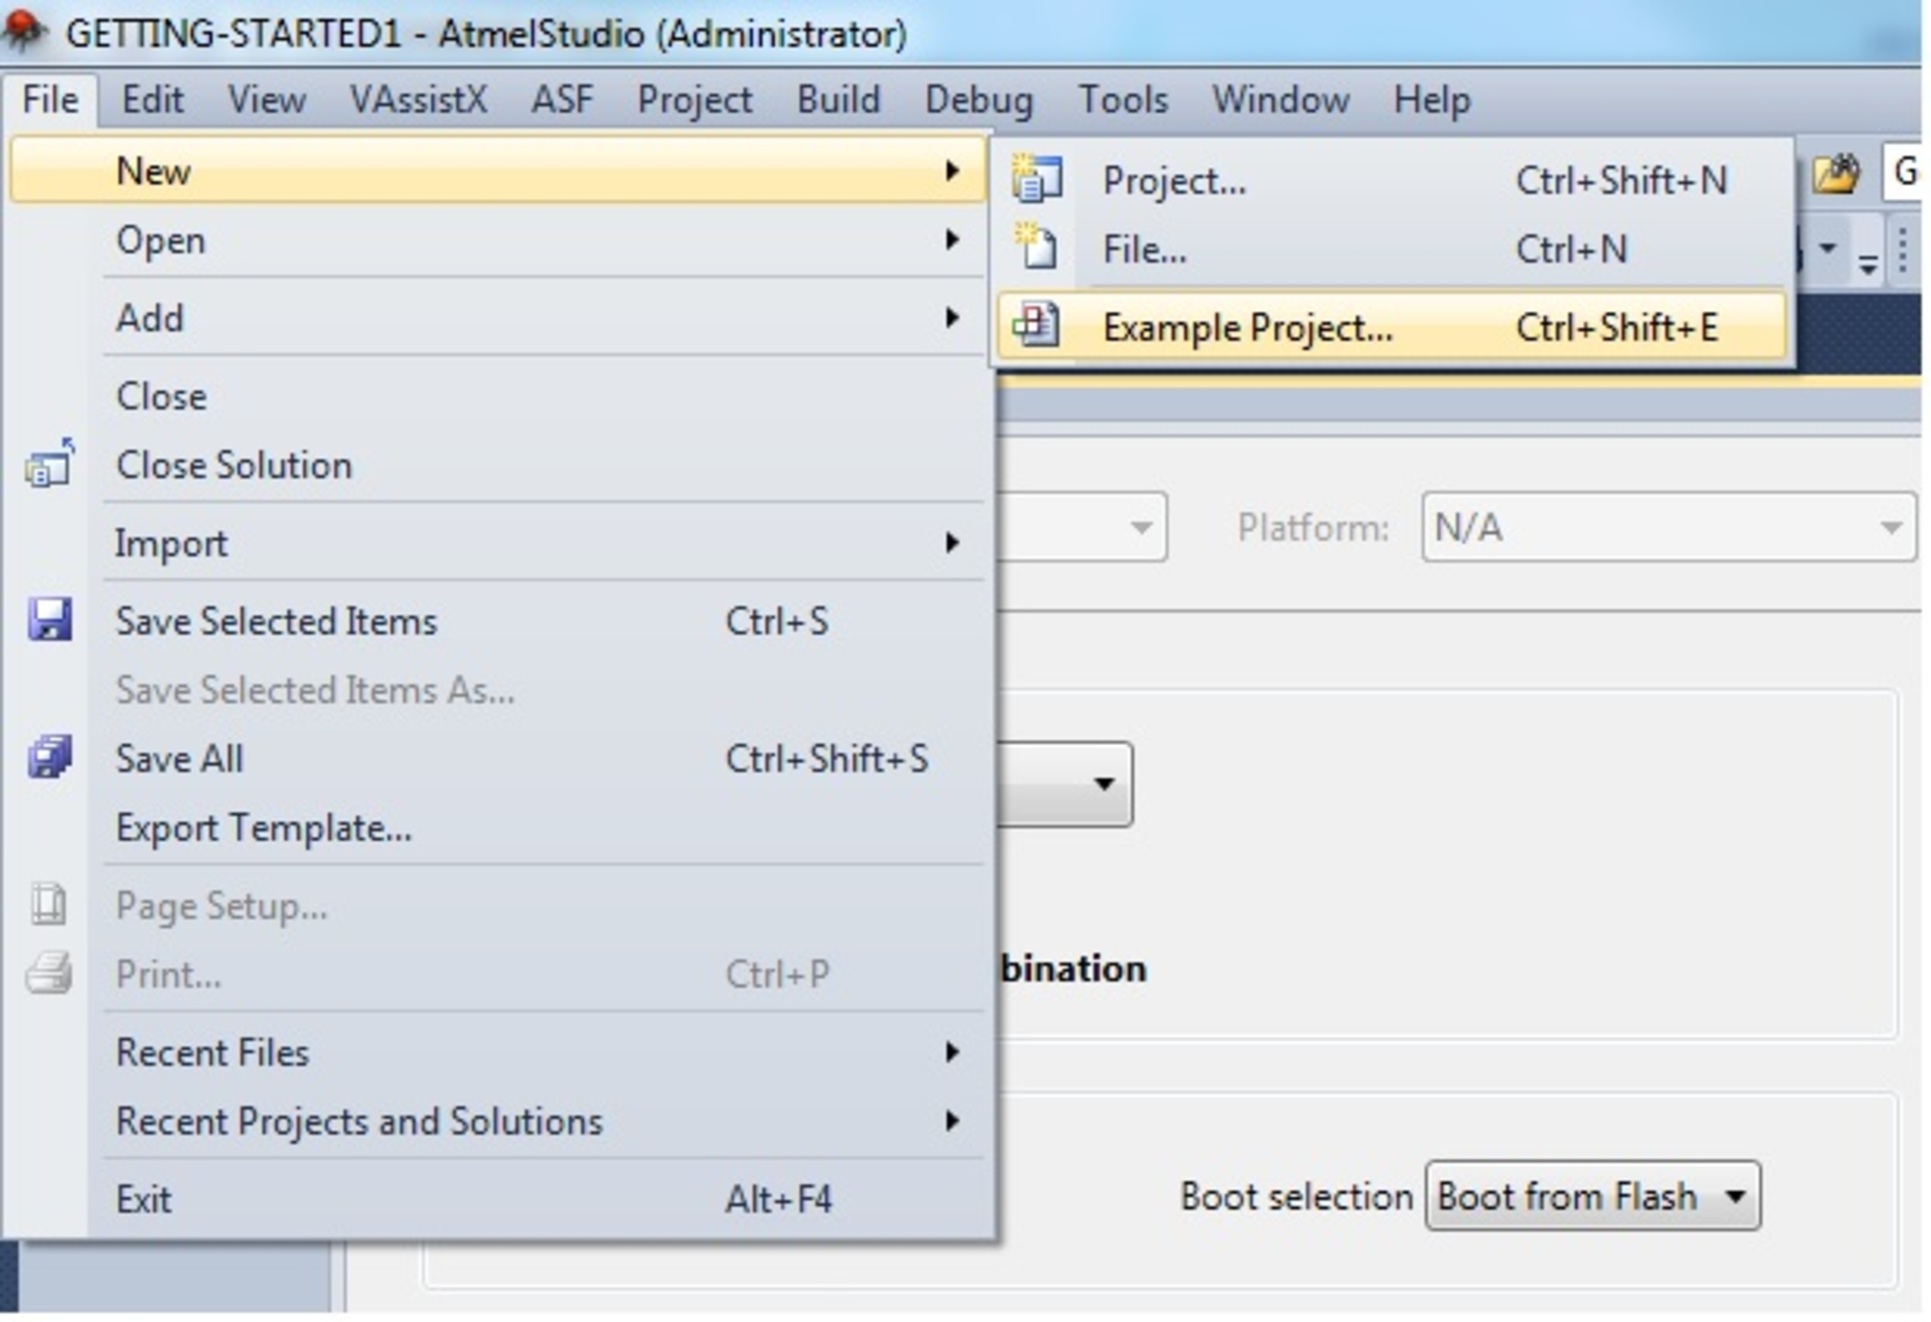
- Select ‘Getting started
application-SAM L22 Xplained Pro’ as shown in Figure 4-2, press OK and accept the license agreement. Then
the project will be created and opened
Figure 4-2. SAML22 Getting started Project Selection 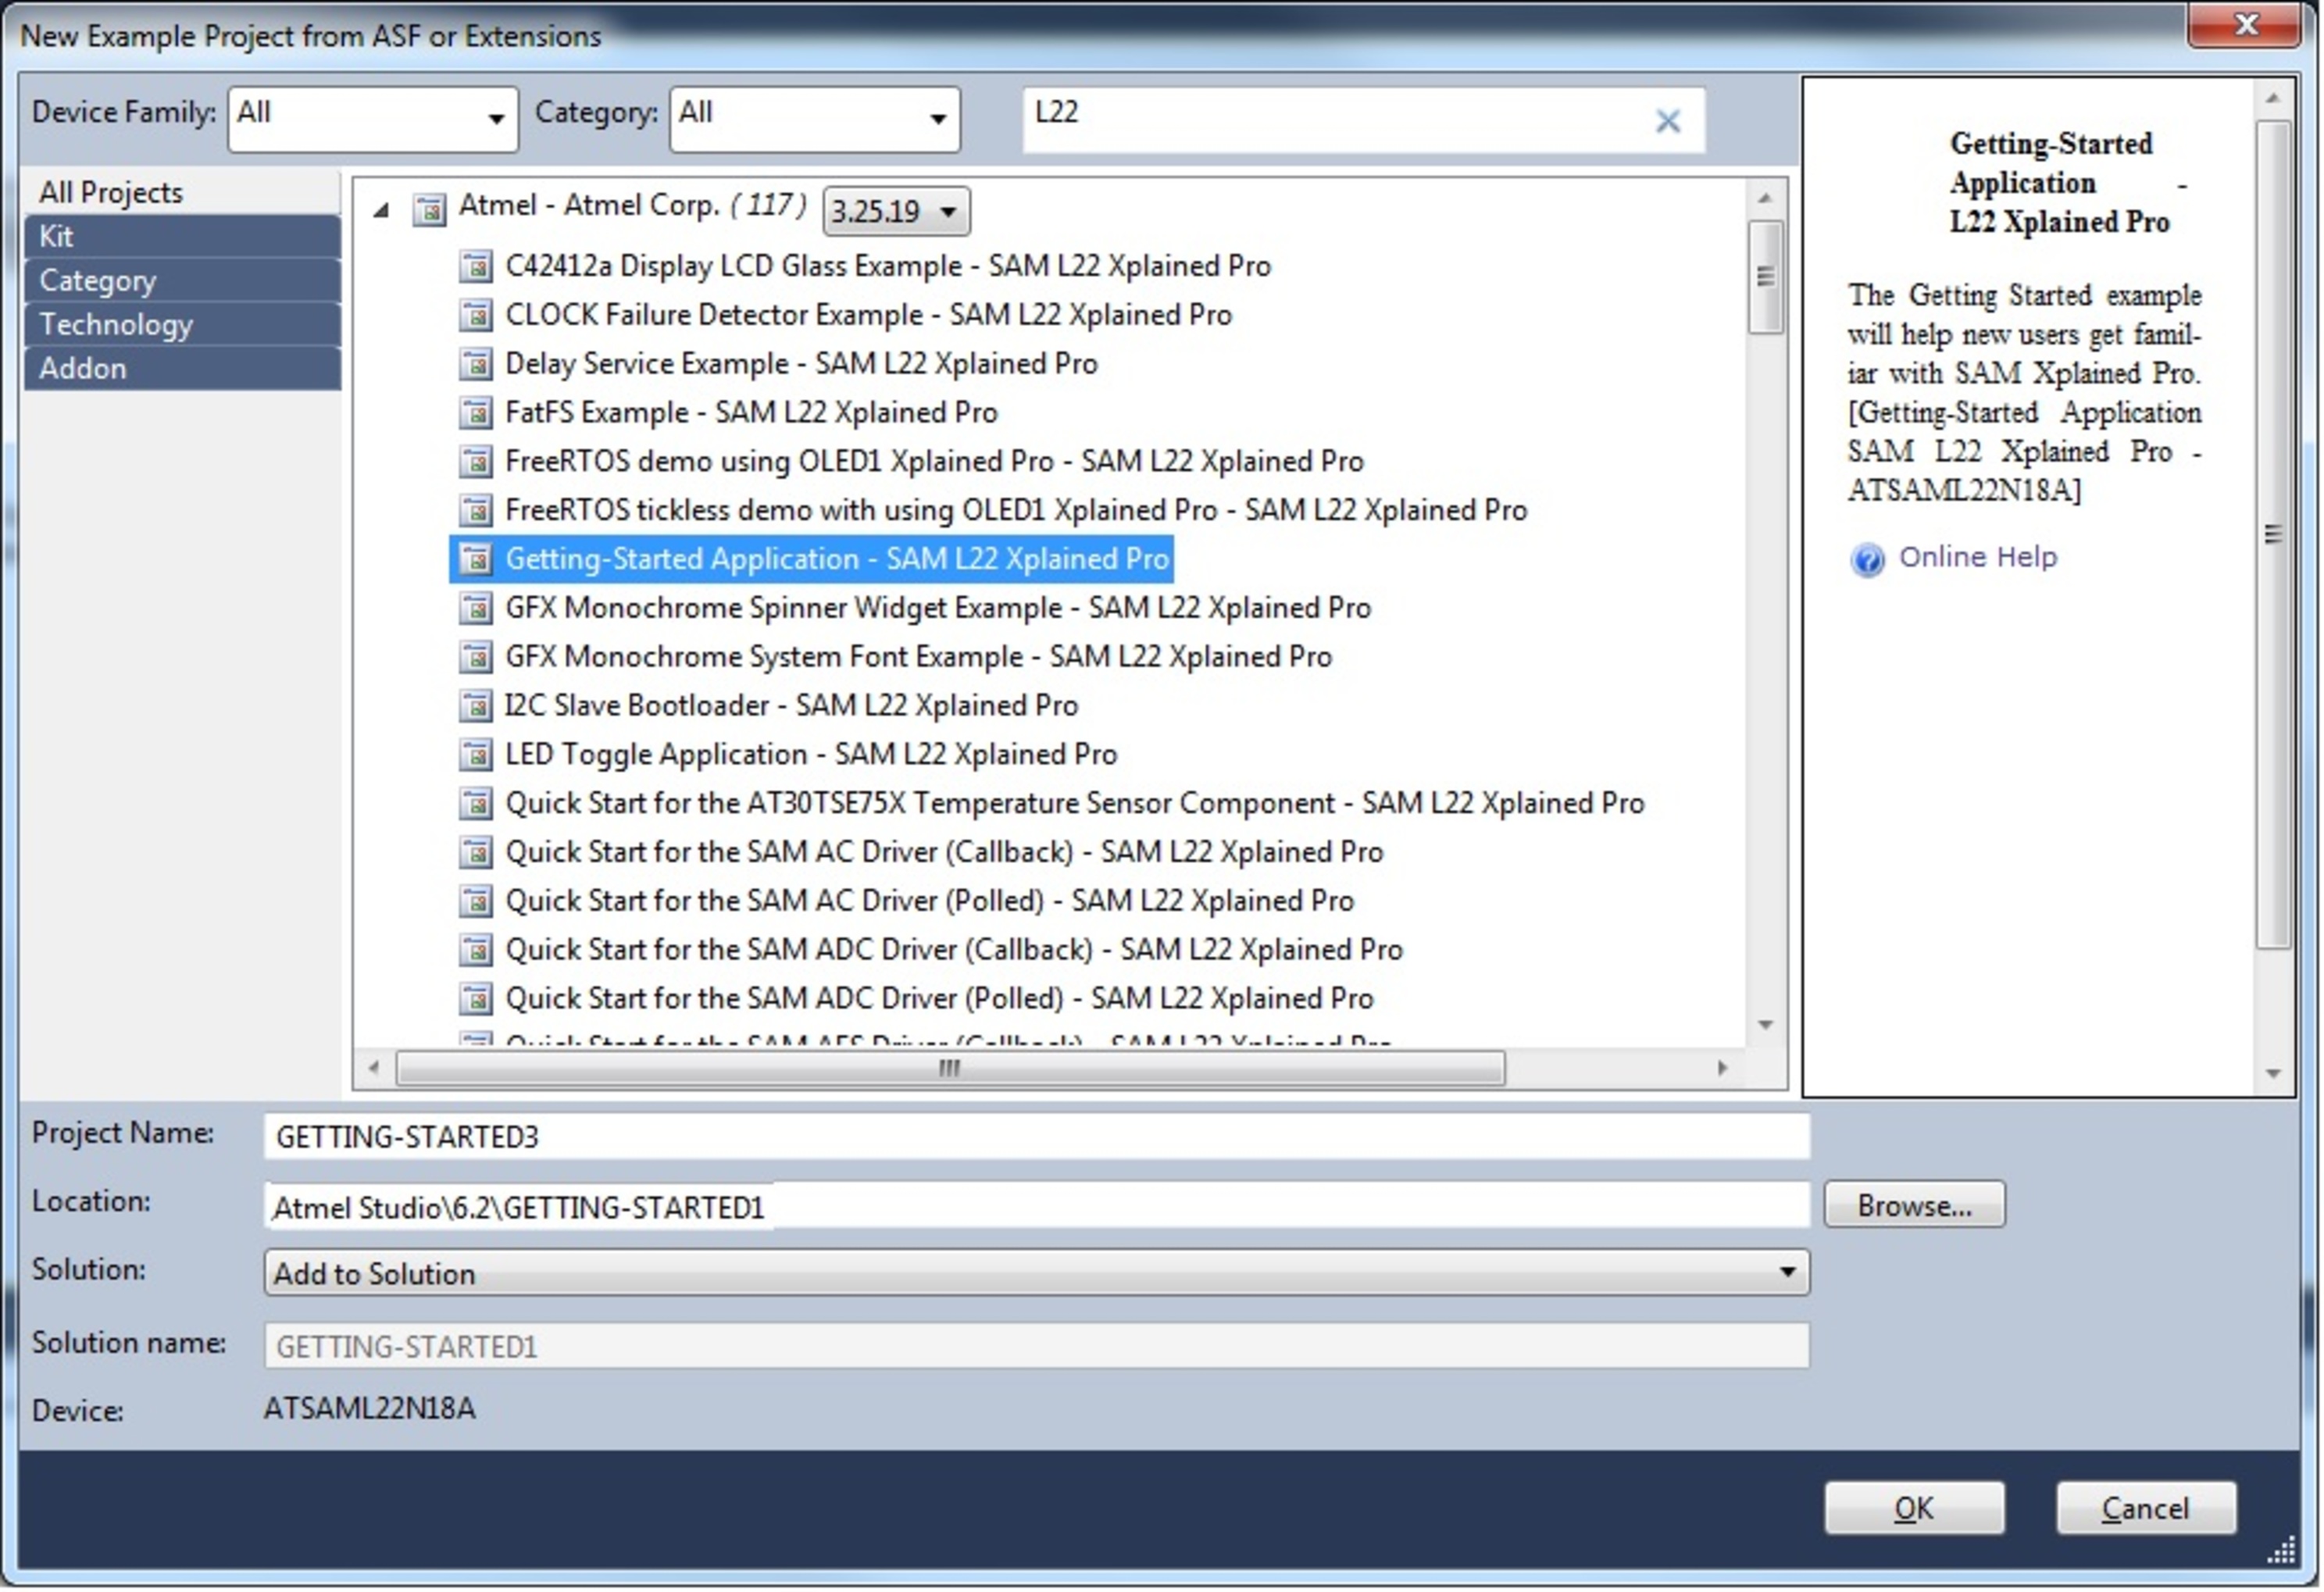
- Open project properties (Project -> Properties or shortcut Alt+f7)
- In Tool view, set ‘Select
debugger/programmer’ to XPRO-EDBG and interface to SWD as shown in Figure 4-3
Figure 4-3. SAML22 Atmel Studio – Tools Configuration 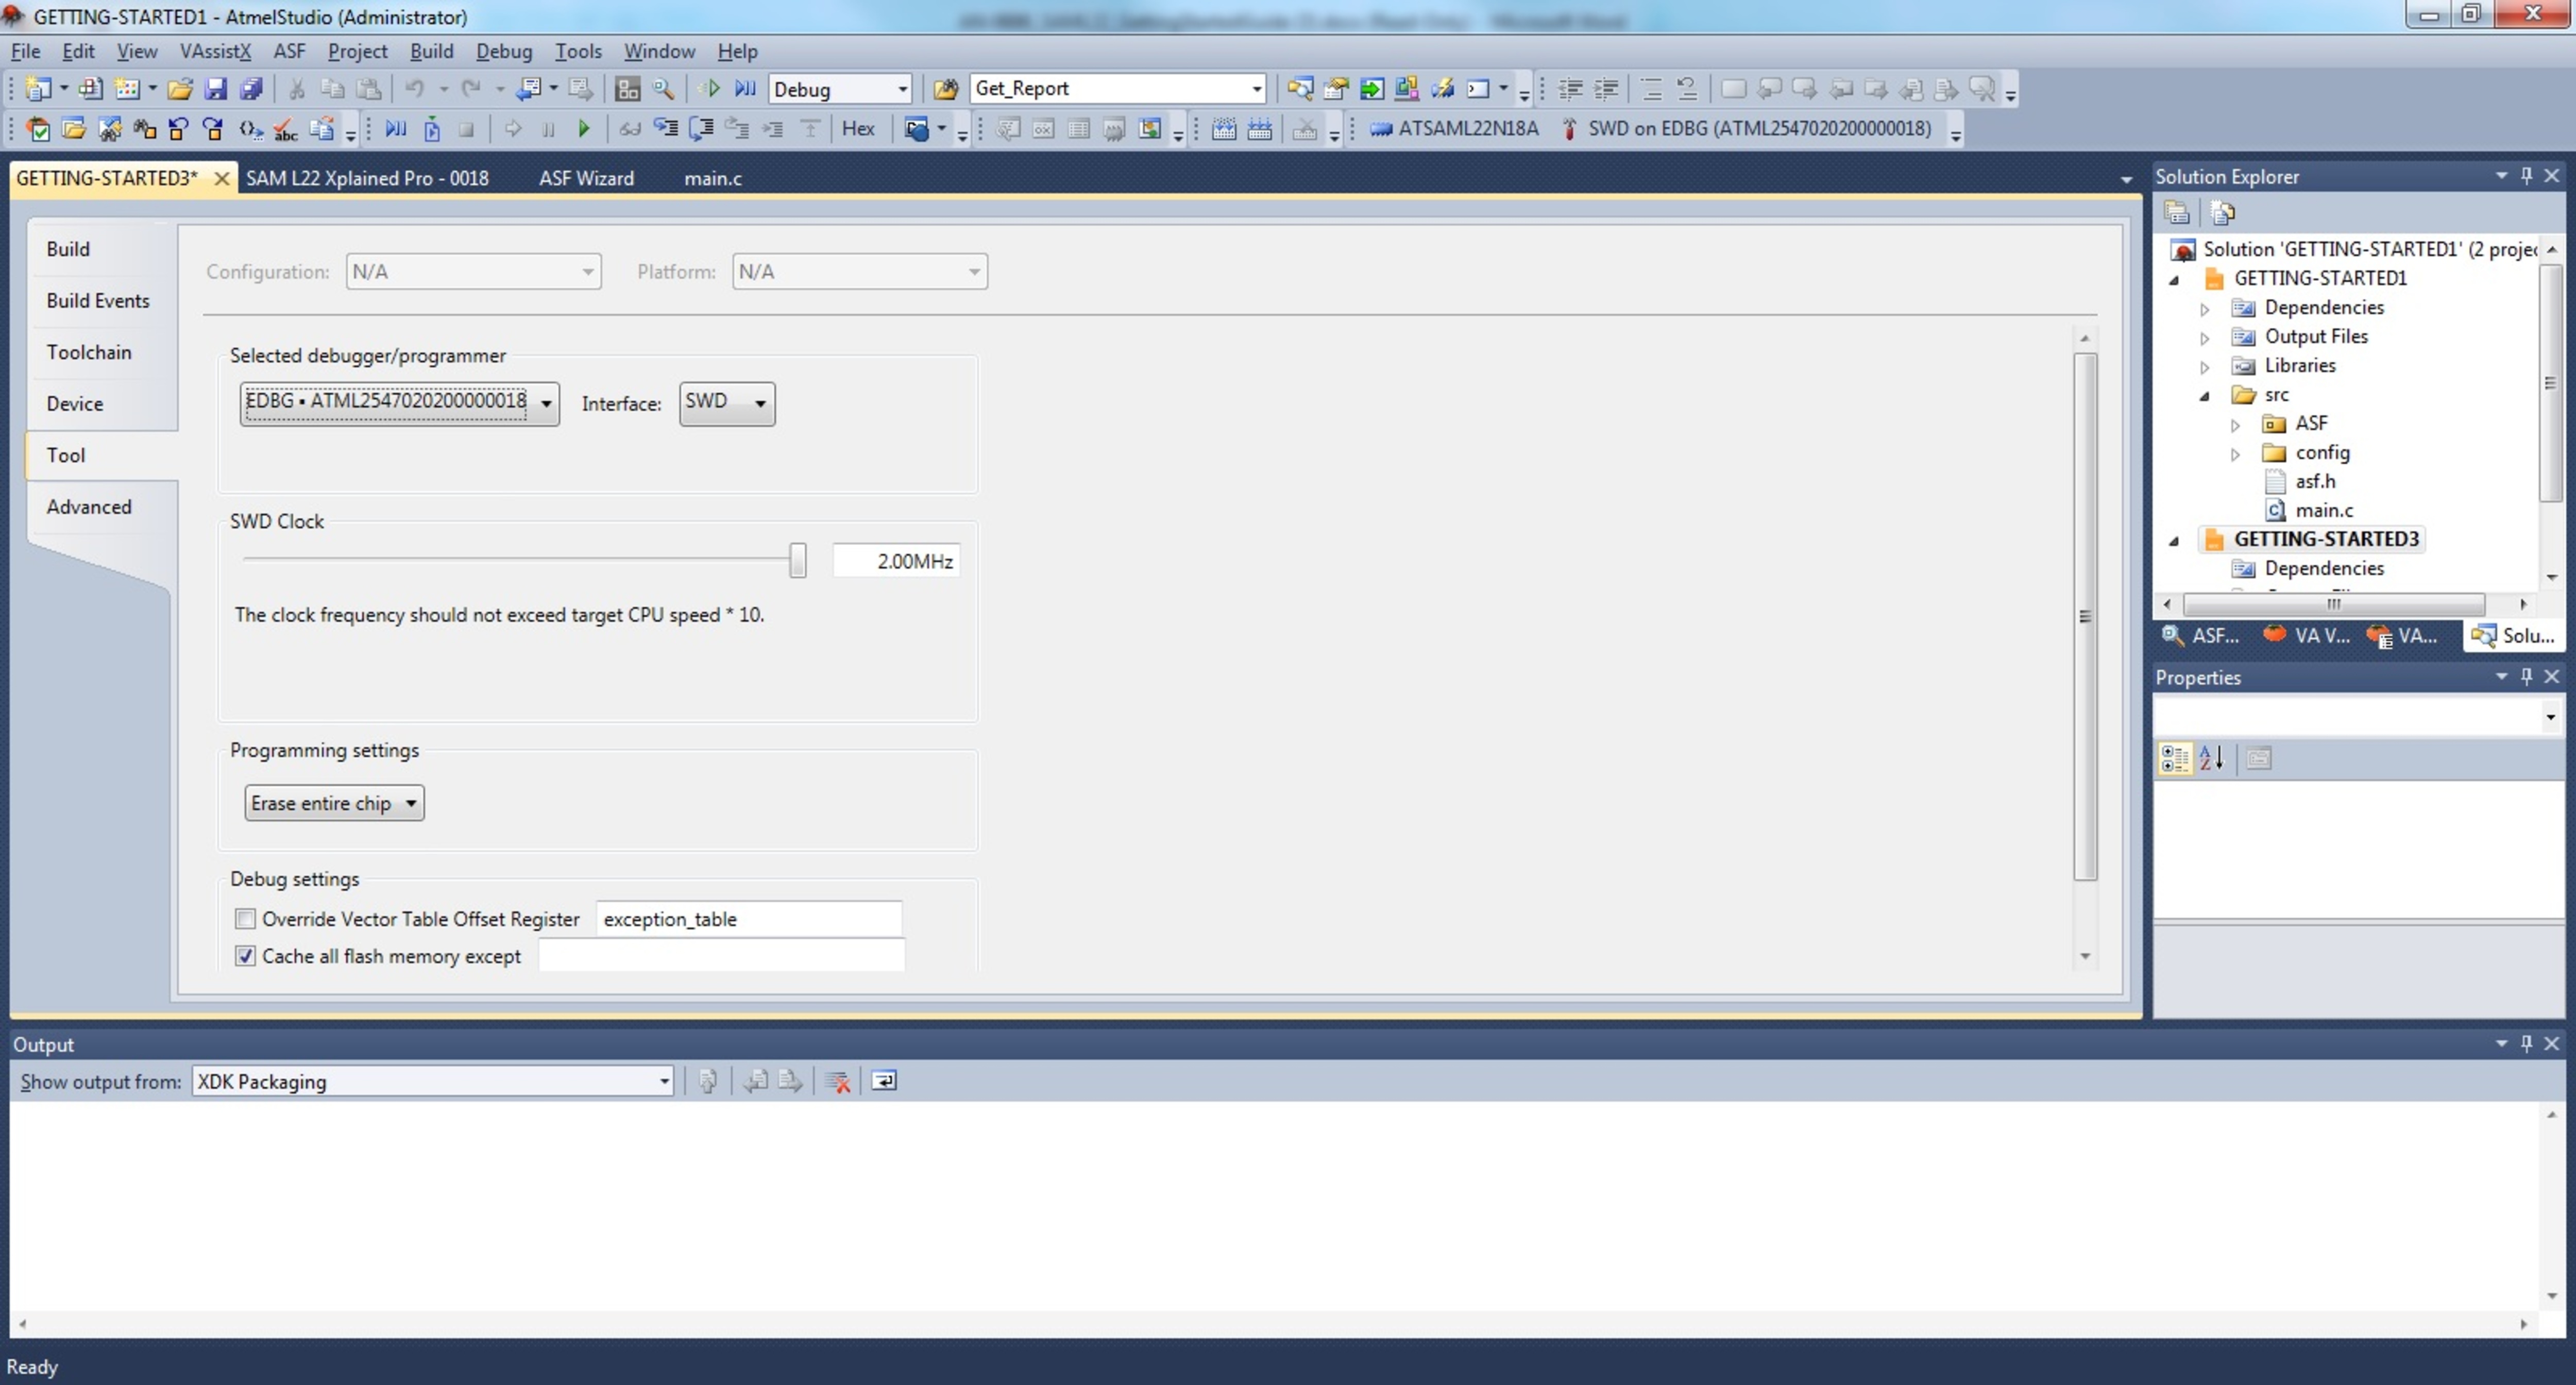
- Build the project: Build -> Build solution or shortcut F7
- To load the code in the SAM L22 Xplained Pro and debug, select Debug -> Start debugging and break (shortcut Alt + F5)
- The application is programmed and the debugger breaks in main
- To run the code, select Debug -> Continue (shortcut F5)
- On the computer, open and configure a
terminal application (e.g. HyperTerminal on Microsoft®
Windows® or Terminal application is available as an addon to
Atmel Studio) with these settings:
- 38400 bauds
- 8 bits of data
- No parity
- 1 stop bit
- No flow control
- Start the application
- The LED should start blinking on the
board. In the terminal window, the following text should appear (values depend on
the board and chip used):
- \code
- Getting Started Example xxx --
- xxxxxx-xx
- Compiled: xxx xx xxxx xx:xx:xx --
- \endcode
- \code
-
Figure 4-4. SAML22 Getting Started – Terminal Output 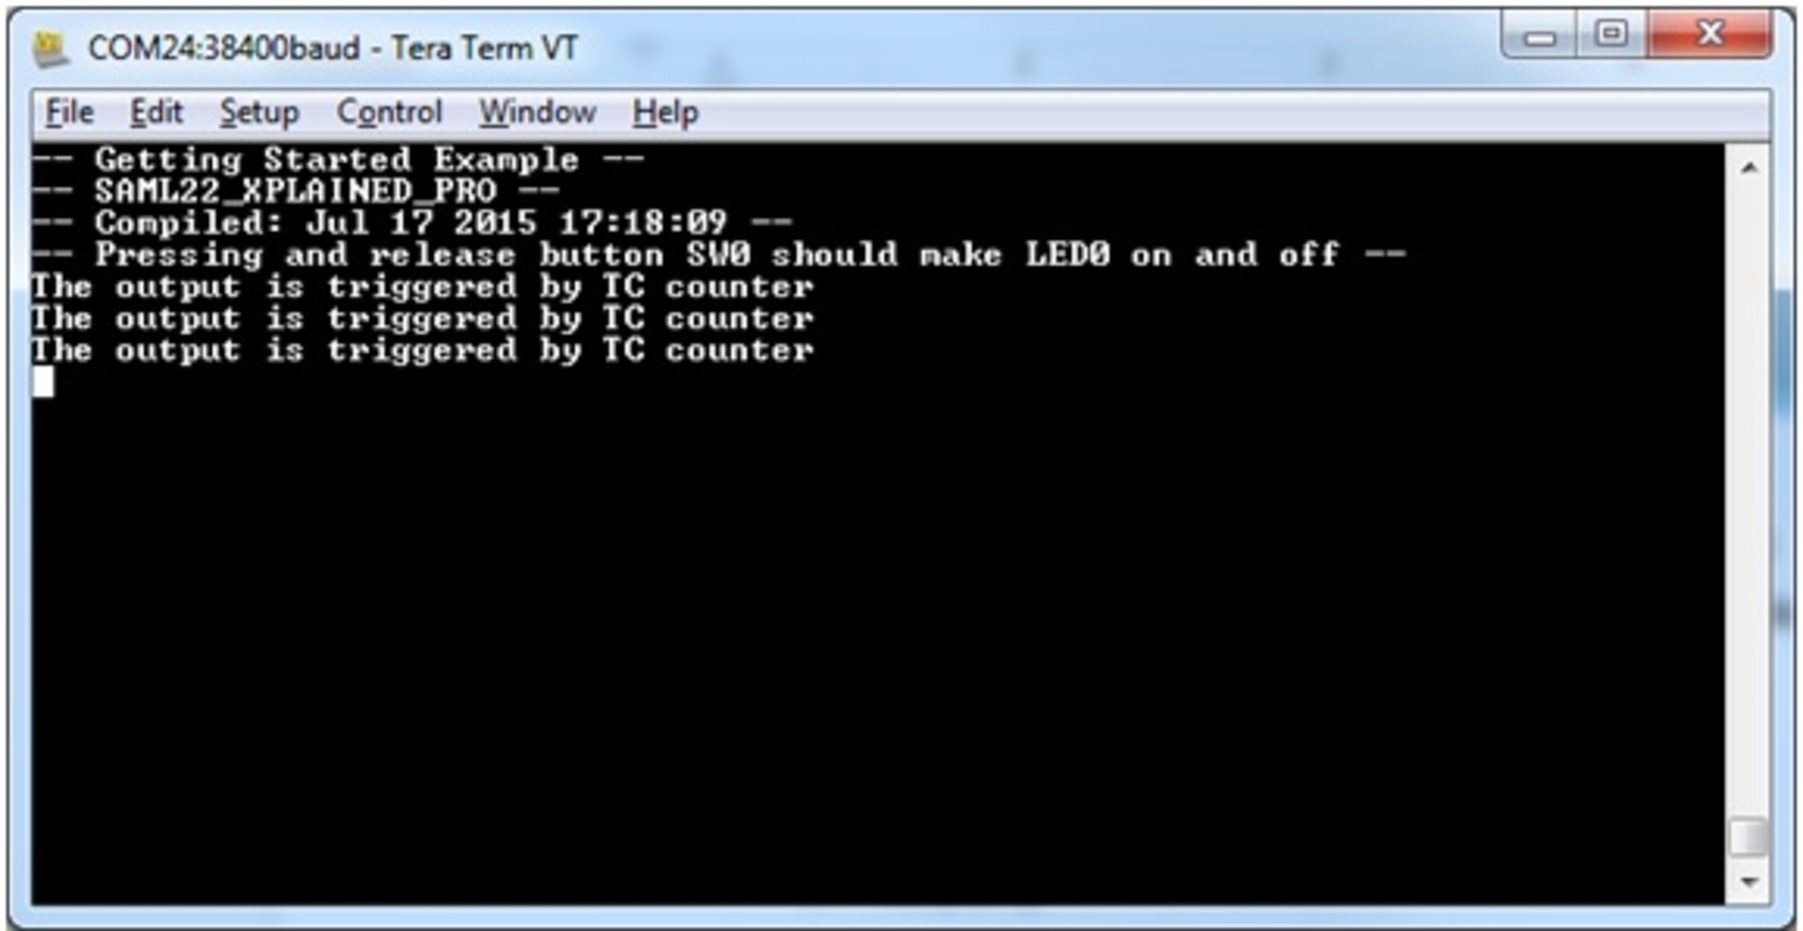
- Pressing and release button SW0 should make LED0 on and off blinking.