The page shown in Figure 5-1 will appear when AVR64DD32 Curiosity Nano is connected to MPLAB X.Figure 5-1. AVR64DD32 Curiosity Nano Page in MPLAB® X
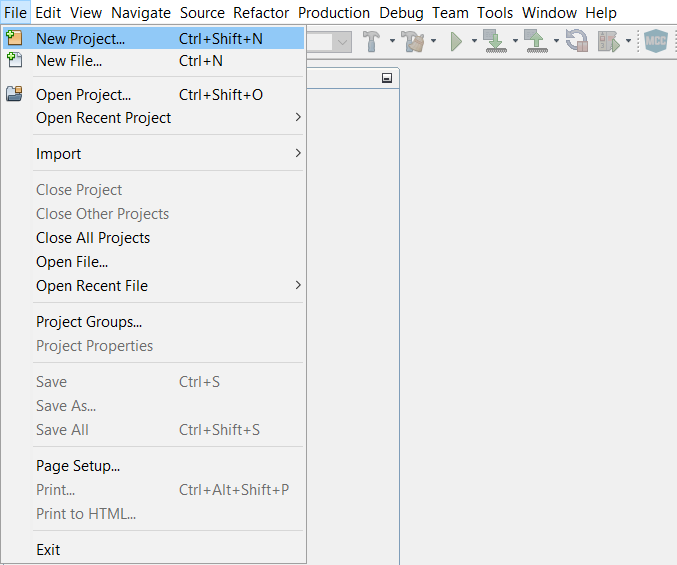
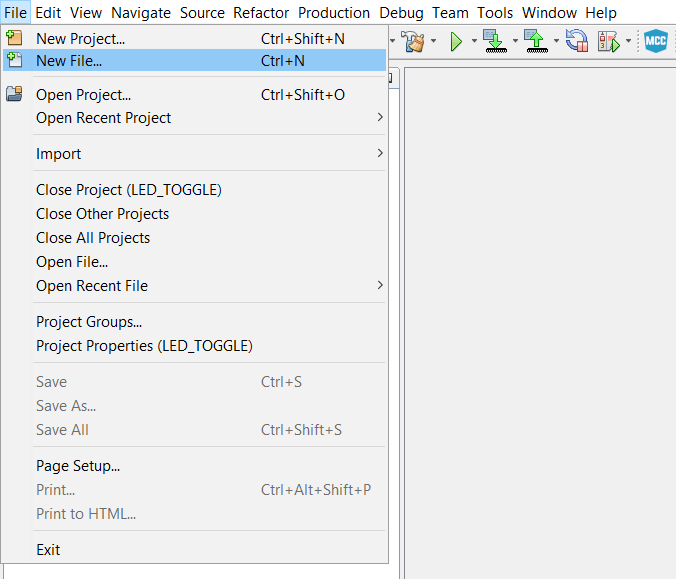
Start creating a new project by clicking
File → New Project... or by using the Ctrl+Shift+N shortcut, as
shown in Figure 5-2.Figure 5-2. Create New Project in
MPLAB® X
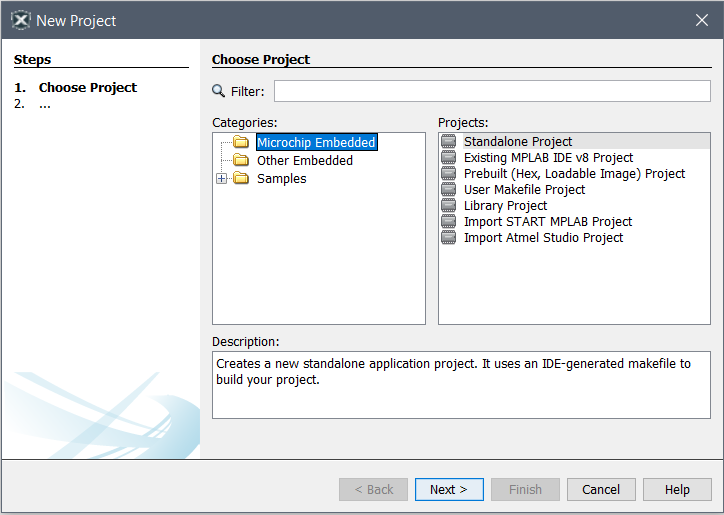
Select the Categories → Microchip
Embedded and Projects → Standalone Project template from Figure 5-6, and click Next.Figure 5-3. New Project Window
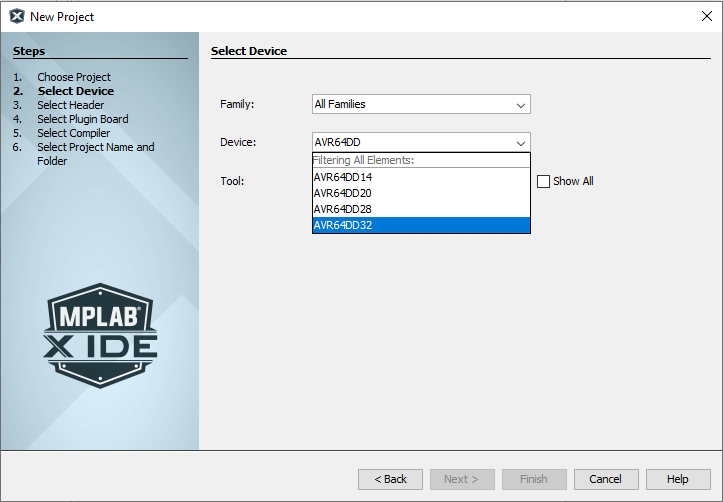
Select AVR64DD32 (see Figure 5-4)
and click Next.Figure 5-4. Device Selection WindowThen select the board and the desired compiler, if there are any.
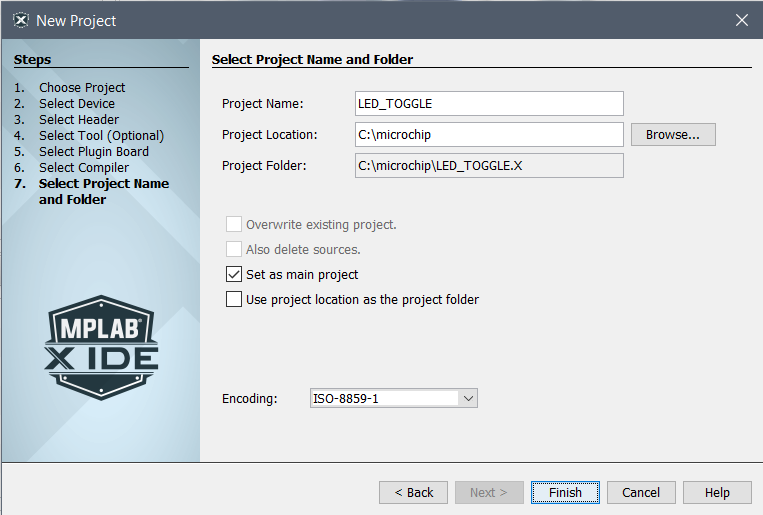
Type in the name of the project (e.g.,
LED_TOGGLE) and the project location (e.g., C:\microchip), and click
Finish.Figure 5-5. Project Name and Location Selection
Window
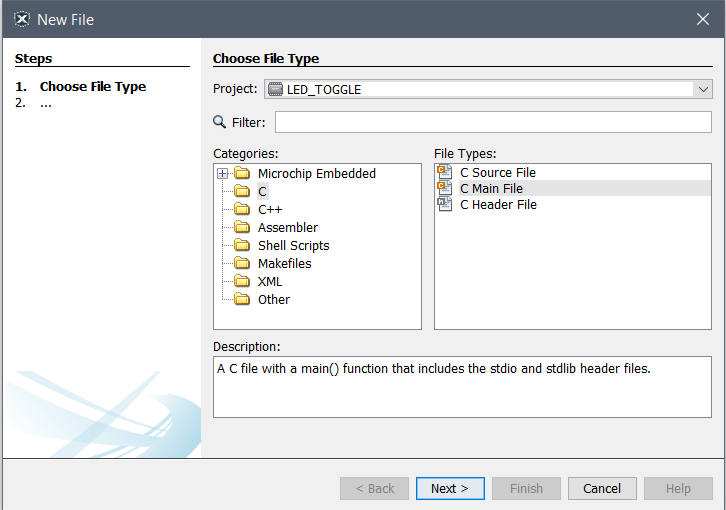
Create a new main.c file
by clicking File → New File... or by using Ctrl+N shortcut, as shown in Figure 5-6.Figure 5-6. Create a New File in MPLAB® X
Select the Categories → C and
File Types → C Main File template from Figure 5-7, and click Next.Figure 5-7. New File Window
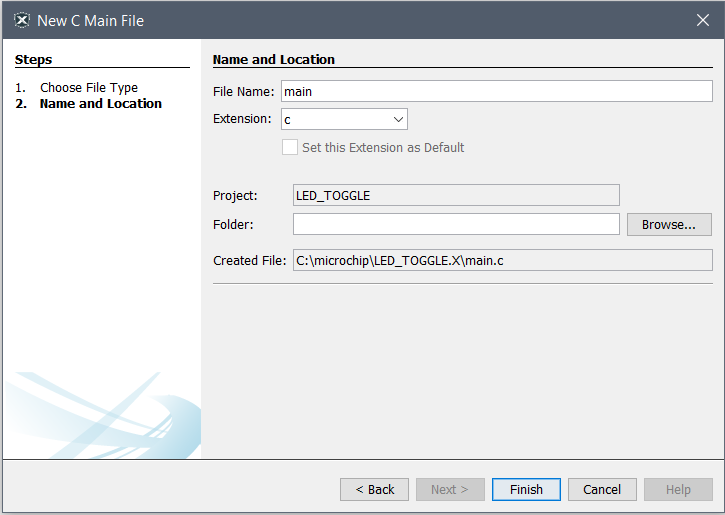
Type in the name of the file (e.g.,
main) and click Finish.Figure 5-8. File Name Window
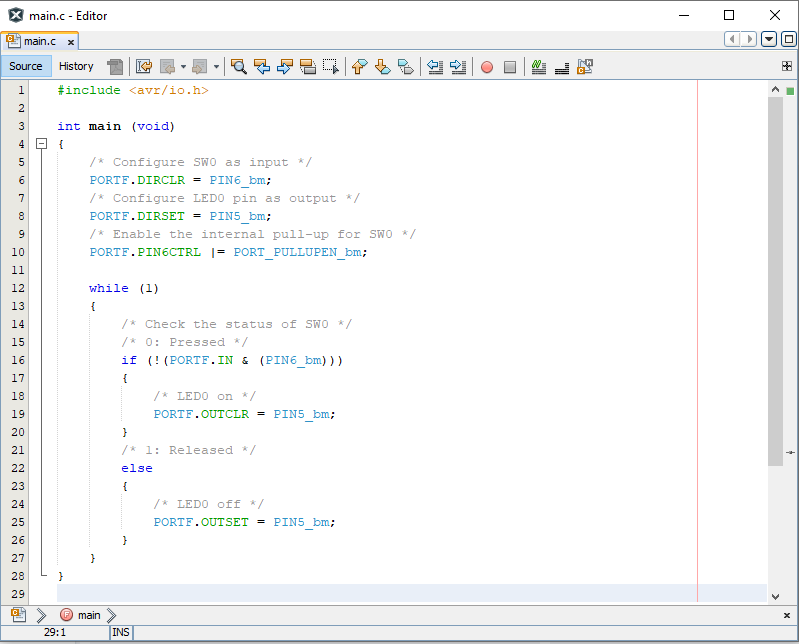
Replace the main.c file
with the following code snippet:
int main (void)
{
/* Configure SW0 as input */
PORTF.DIRCLR = PIN6_bm;
/* Configure LED0 pin as output */
PORTF.DIRSET = PIN5_bm;
/* Enable the internal pull-up for SW0 */
PORTF.PIN6CTRL |= PORT_PULLUPEN_bm;
while (1)
{
/* Check the status of SW0 */
/* 0: Pressed */if (!(PORTF.IN & (PIN6_bm)))
{
/* LED0 on */
PORTF.OUTCLR = PIN5_bm;
}
/* 1: Released */else
{
/* LED0 off */
PORTF.OUTSET = PIN5_bm;
}
}
}
Add
#inlude<avr/io.h> in main.c. In the code editor, the code will
appear as shown in Figure 5-9.Figure 5-9. Code Editor Window
Build the code by clicking on Production
→ Clean and Build Main Project or by using the Shift + F11 shortcut.
Verify that LED0 is lit when SW0
is pushed on the AVR64DD32 Curiosity Nano.
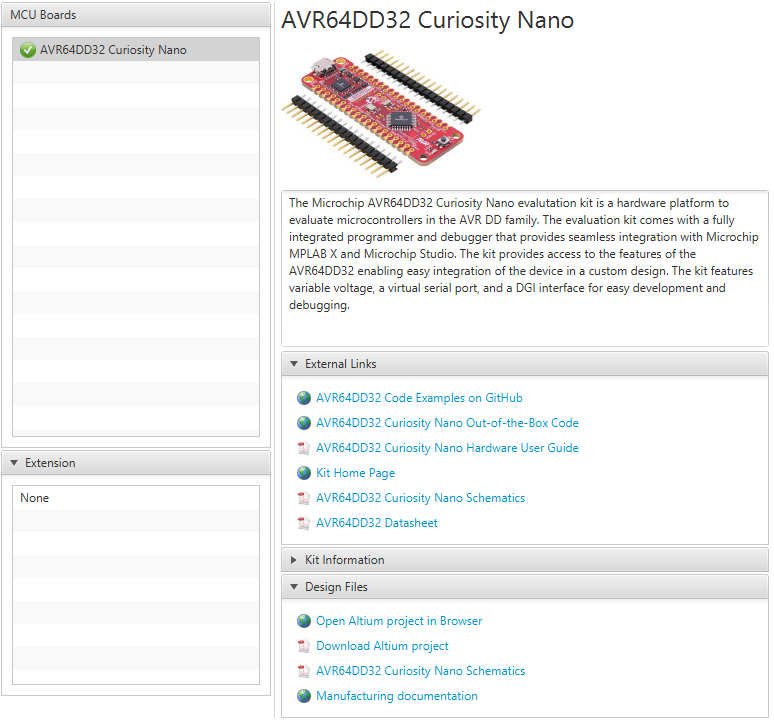
The online versions of the documents are provided as a courtesy. Verify all content and data in the device’s PDF documentation found on the device product page.