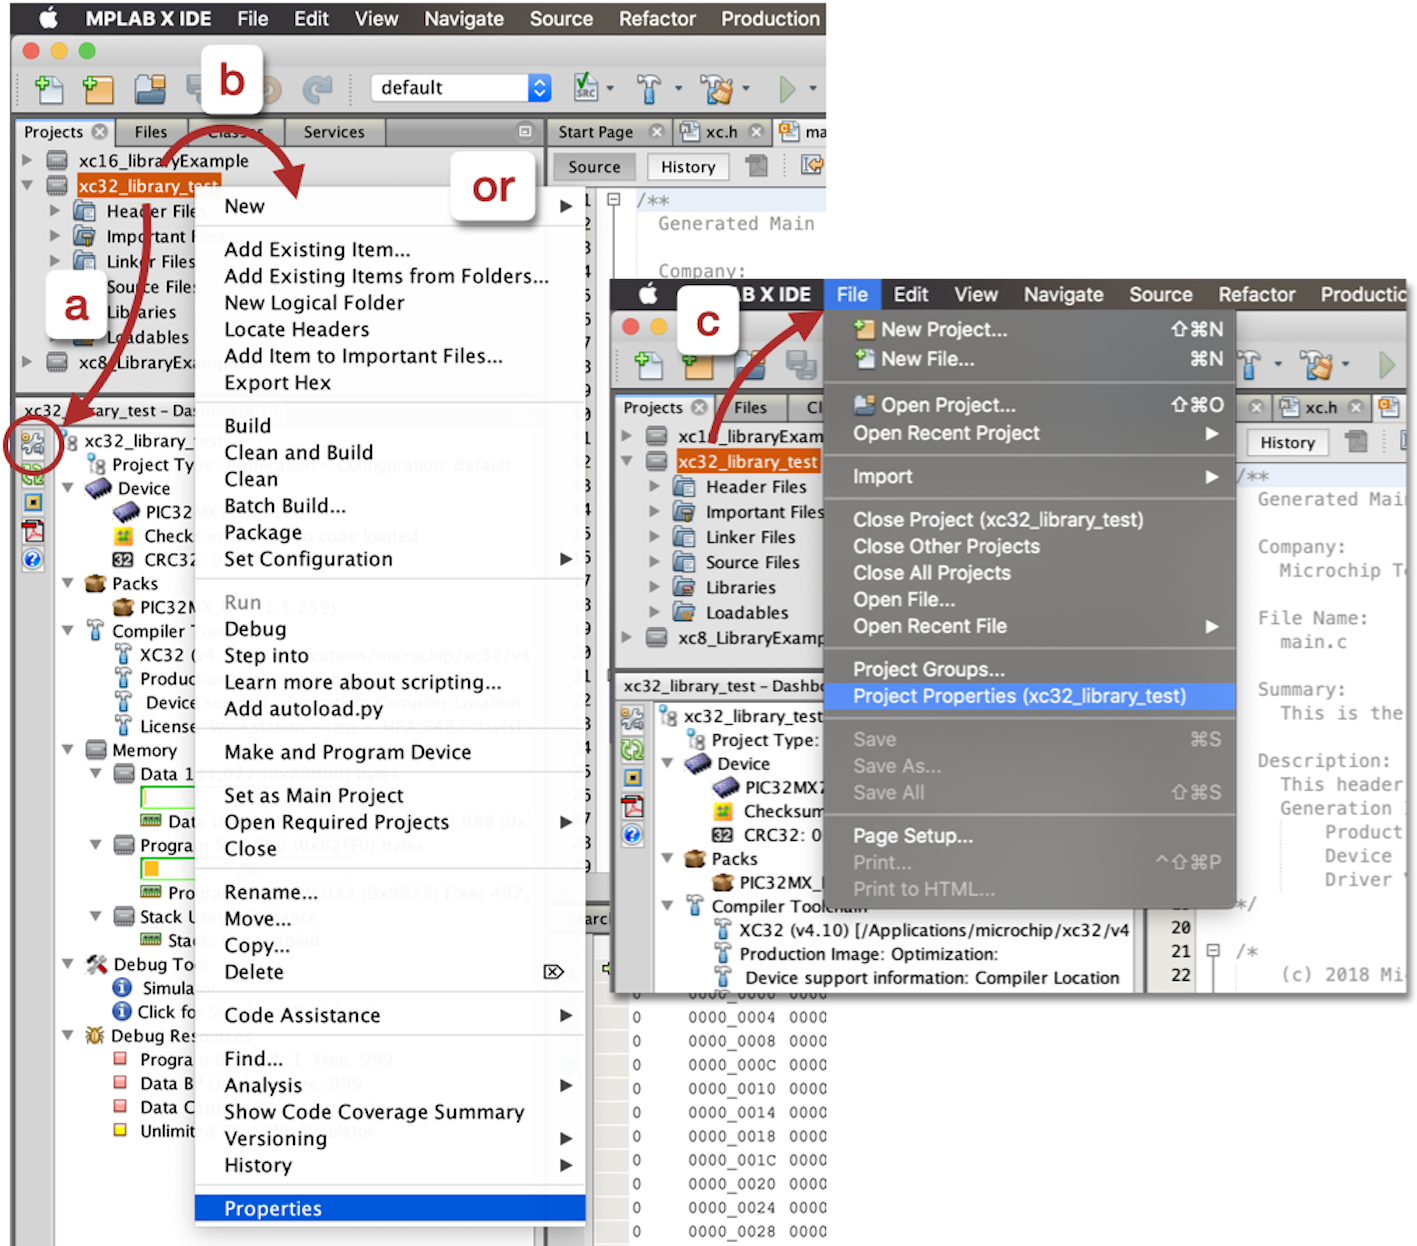
This brief shows you how to enable the optimizations that are available only with licensed MPLAB XC compilers. You would need to follow these steps if you have activated a compiler after purchasing a PRO license and you wish to take advantage of the more advanced optimizations that are now available.
The following steps assume you have a project set up in the MPLAB X IDE.
- Open the Project Properties dialog
for the project. You can do that one of several ways.
- Select the project's name in the Projects view and click the Project Properties button (upper left) shown in the Dashboard. If the Dashboard is not visible, select from the menus.
- Right click on the project's name in the Projects view and select Properties.
- Select the project's name in the Projects view and select from the menus.

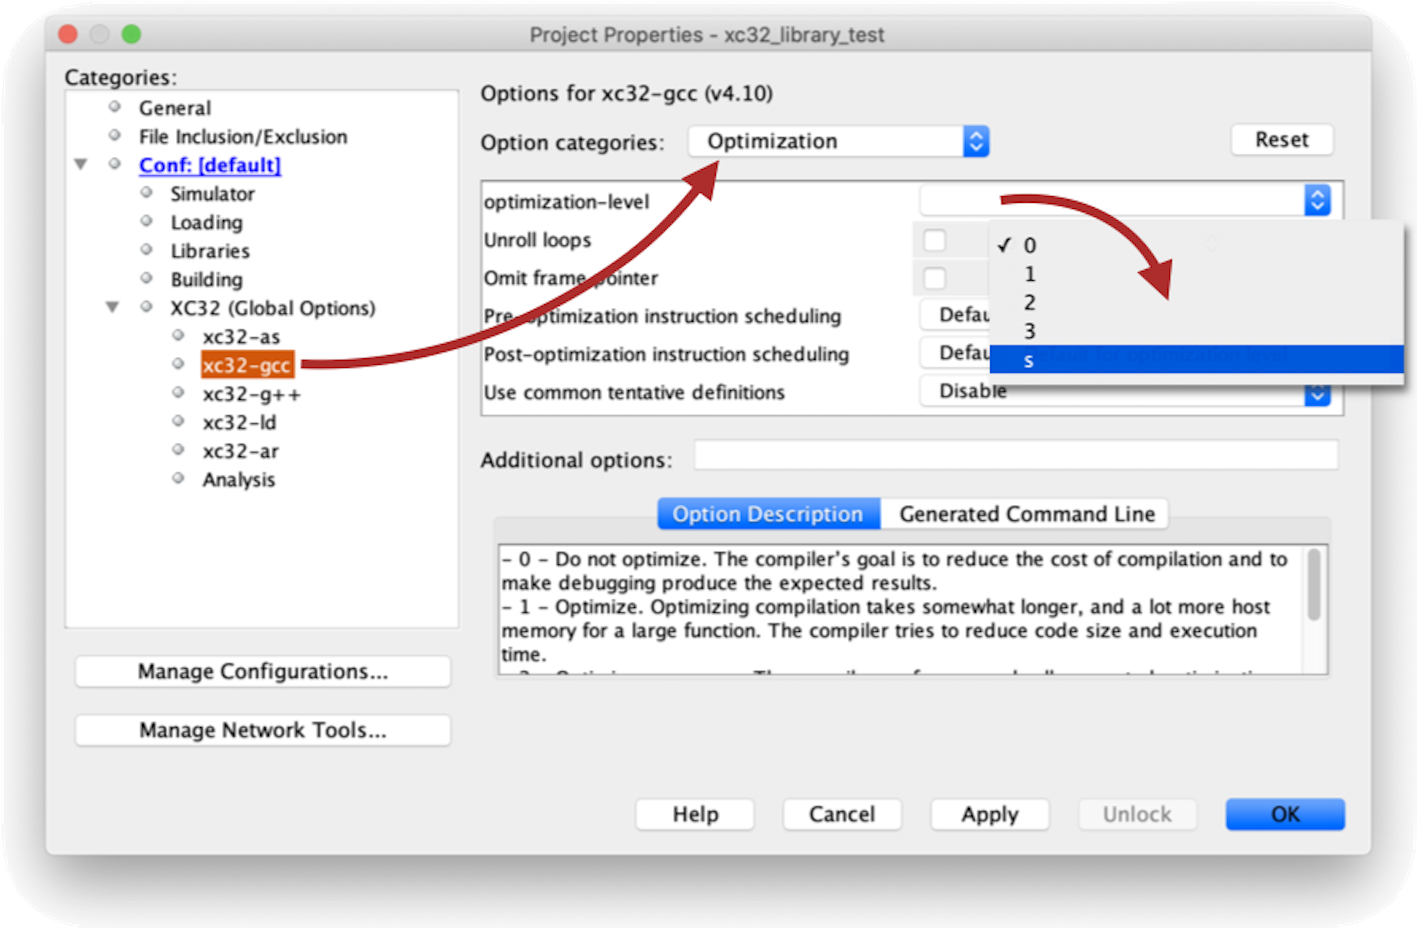
- Click the compiler category in the
Categories pane, shown at the left of the dialog. This category will be called
XC8 Compiler, xc16-gcc, or
xc32-gcc, depending on which compiler you have selected
for the project.

- From the Option categories drop-down menu, select Optimization.
- For the most significant
optimizations, select either the
sor3level from the Optimization level drop-down menu. These levels generate the most compact or the most fastest executing program image, respectively.
Note that the optimization levels enable different groups of optimizations, but there are many other independent optimization and feature options that can improve code size and execution speed. Consider using the Compiler Advisor to compare the size of your project when built with different sets of options. To access Compiler Advisor, select from the IDE's menus.
