ATA5831_EEPROM_config_Vxx_byy.zip file, where xx
indicates the version number and yy the actual build number with the following
content:ATA5831_Config\..
ATA5831_EEPROM_Config.jar JAVA executable
ATA5831_EEPROM_default.xml EEPROM default settings (source)
ATA5785_EEPROM_Default EEPROM default settings (source)
lib\.. library components
beansbinding-1.2.1.jar
AbsoluteLayout.jar
jsearch.jar
jhbasic.jar
jhall.jar
jh.jar
jhelp\.. help components
hs\..
html\..
latex\..
onepagehtml\..
presets\..
src\..
thumbnails\..
hsm.xmlThe EEPROM configuration tool generates and exports a *.hex file. Use
the *.hex file together with the programming tools for direct EEPROM
programming of the ATA8510 device family. For more details, refer to the
ATA8510/ATA8515/ATA8210/ATA8215 Getting Started Guide. Also, store the
configuration data as a *.xml file for later changes to the
configuration settings. The EEPROM configuration tool can read such
*.xml files for editing and exporting *.hex file
data. The EEPROM configuration tool also allows a *.hex file import,
but this is restricted and requires the proper XTO frequency setting.
The following figure illustrates an example of the start-up window of the EEPROM configuration tool. The Log window at the bottom shows the status of the performed operation. The Log window also gives hints in case of errors during data entry or when performing the Calculate & Check operation after clicking the appropriate button in the other tabs.
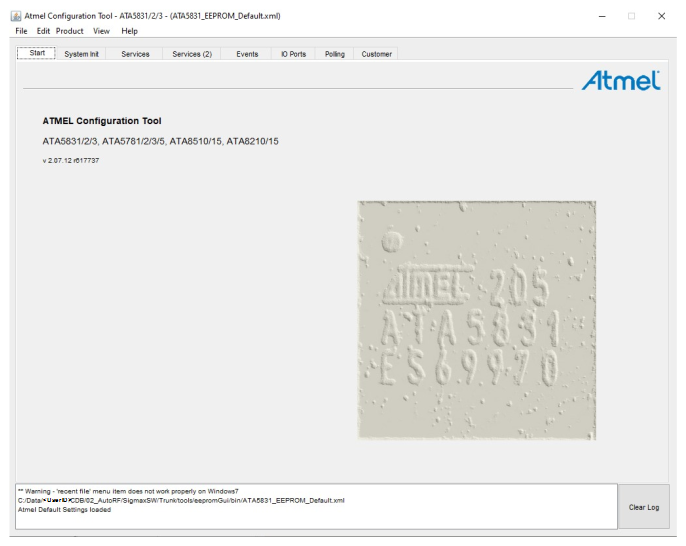
Upon start-up of the EEPROM configuration tool, the tool loads a default
*.xml file with configuration data that comes along with the tool,
which is the ATA5831_EEPROM_default.xml file. The location of the
*.xml file is in the same directory as the Java executable. Use the
File menu to change the settings for this default file, go to
Edit>Preferences. For more details on the Edit menu and other menu entries,
see Menu Entries. The
following figure illustrates the loading of a *.xml file using the File
menu entry. Go to File>Open Configuration File.
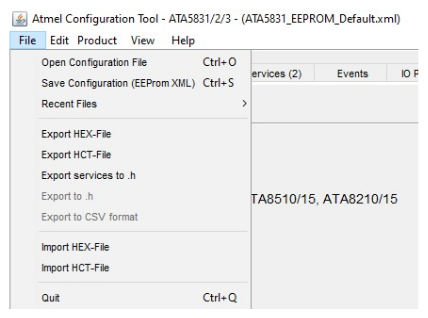
The following figure illustrates the File menu and comes with the following options:
- Open Configuration File – Open a
*.xmlfile with configuration data. - Save Configuration (EEPROM XML) –
Save a
*.xmlfile with configuration data. - Recent Files – Select recently opened files for reopening.
- Export HEX-File – Export a
*.hexfile with programming data. - Export HCT-File – Export a
*.hctfile with programming data. - Export services to
.h– Export the*.hfiles with service settings. Five files are generated, one for each service including C code declarations for a global variable array with the initialization data. The initialization data contains the configuration data for this service. - Import HEX-File – Import a
*.hexfile with programming data. Use this feature with care because some of the data settings are ambiguous because they are generated in reverse direction. - Import HCT-File – Import a
*.hctfile with programming data. Use this feature with care because some of the data settings are ambiguous because they are generated in reverse direction.
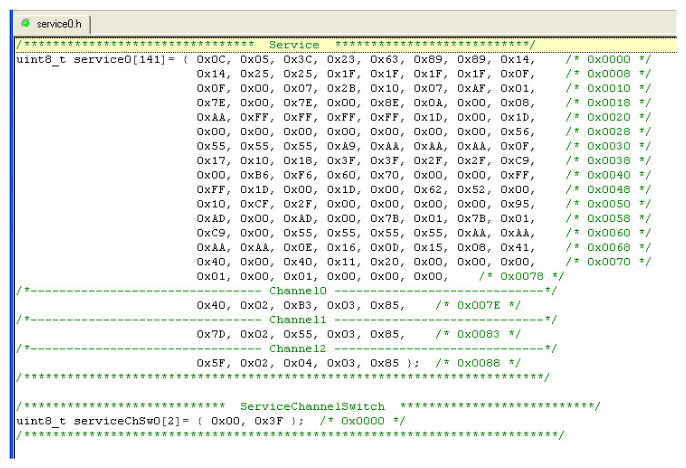
The Export.h menu entry in the file menu generates the following files
with the service settings for all five services. The following figure illustrates the
generated C source code, and there is a possibility of including the C source code in
the host CPU or Flash application program. This initialized array includes the binary
values for the EEPROM and SRAM content.