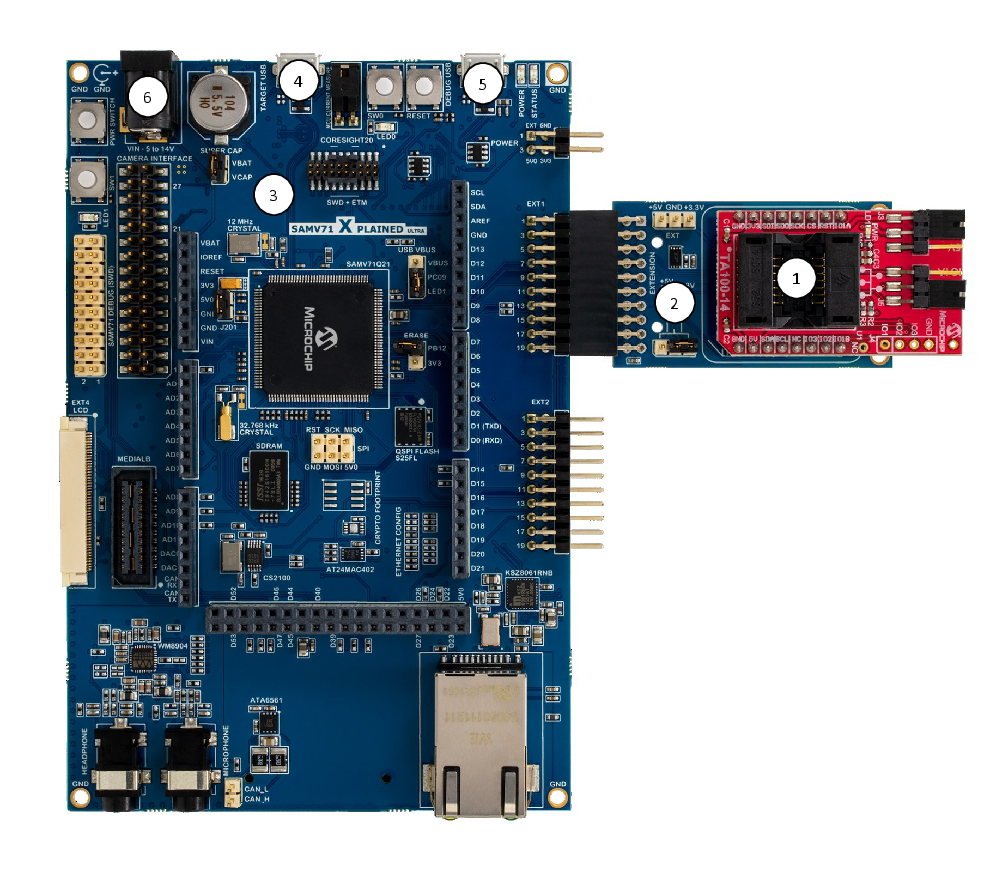
By using an adapter board, the AC164166 development board can still be used with Microchip development boards that only support the Xplained Pro interface. Figure 1 shows the full assembly of the AC164166 TA100 14-Pin SOIC Socket board, the ATMBUSADAPTER-XPRO and an ATSAMV71-XULT Development Board.
 |
|
Powering the SAMV71-XULT Board
Multiple options exist for powering the SAMV71-XULT Development Board. Depending on the total current requirements, different options are allowed. See the SAMV71-XULT User Guide for more information.
- External Power Jack Input
- 2.1 mm barrel connector
- 5-14V input supply Maximum current of 2.0A
- 12V 18W Power Adapter Option: Triad Magnetics WSU120-1500
- Embedded Debugger USB Connection; max. of 500 mA
- Target USB Connection; max. of 500 mA
- External Power Header
- 2-pin 100 mil Header
- Direct 5V Supply
- Max. 2A of current
ATMBUSAdapter Power Settings
The ATMBUSAdapter allows power to be connected to the MikroBus Host adapter either directly through the XPRO interface or by providing external power through the EXT header. It is important that all jumpers are connected correctly before connecting to the SAMV71-XULT or other boards with an XPRO interface to prevent possible damage to the system.
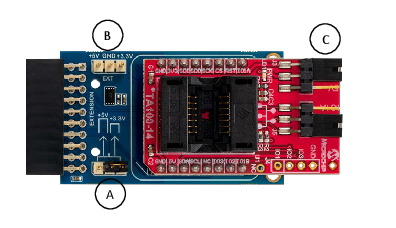
- 1.Option 1: Direct Power from
the XPRO Extension
- Determine if the XPRO Board outputs a 3.3V or 5.0V supply voltage.
- Connect the J3 shunt “C”of the AC164166 to the appropriate 3.3V or 5.0V supply.
- Connect the ATMBUSAdapter power shunt “A” to the same voltage as the XPRO supply.
- 2.Option 2: External Power
Connected to the ATMBUSAdapter.
- Remove the Power Shunt “A” from the ATMBUSAdapter. This disconnects power from the XPRO Header.
- Connect either 3.3V or 5.0V external power to the Ext Header “B” on the ATMBUSAdapter
- Make sure the J3 shunt on the AC164166 is placed across the correct connections for the External Power Supply chosen.
Additional Resources
- SAMV71 Kit Information
- SAMV71 Xplained Ultra User Guide
- SAMV71 Microcontroller
- Additional Tools available via myMicrochip