2.8 Using MPLAB® Code Configurator (MCC)
This section describes how to use MCC standalone with Microchip Studio. MPLAB® Code Configurator (MCC) is a free graphical programming environment that generates seamless, easy-to-understand C code to insert into your project.
Using MCC (Standalone) in Microchip Studio
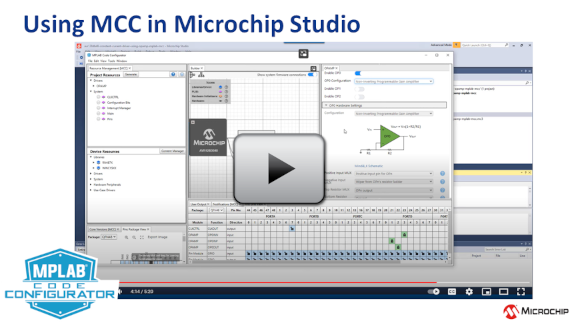
- Video link at 00:00: New MCC project, installing MCC Standalone, Generating Code
- Video link at 02:52: Using an MCC Melody Example project from MPLAB Discover, importing to Studio, modifying the configuration & generating code
MCC Melody:
MCC Standalone Download:
MCC can be downloaded and run as a separate application. You can find more information and download the standalone installer from the below WEB page: Download and get help on MCC Standalone.
Creating a New Project for MCC Development:
After installing MCC Standalone, you can use it for AVR development with Microchip Studio.
Here is how to do it:
1: Create a new 8-bit AVR Application Project using XC8 or GCC.
2: Open MCC by a) pressing the MCC button or b) opening the Tools menu and selecting MCC Standalone.
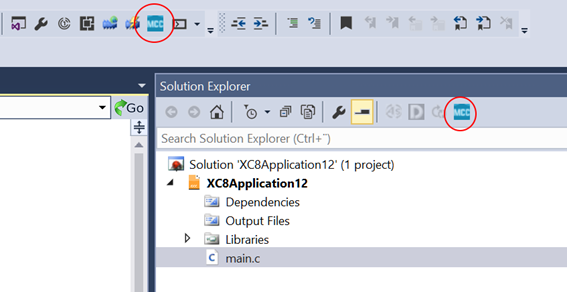
3: Note: If it is the first time you start MCC, you probably need to select content from the content manager to download. Select Melody as the framework.
4: Add the needed drivers and libraries from the device resources. Press the generate button to generate the configuration. The project view in Studio will then be updated automatically.
5: Build and start debugging in Studio.
6: If needed, reconfigure the project in MCC. Remember to press the generate button after your changes. Then the project will be generated and updated in Studio.
Note on main.h: The file main.c is created by Studio when creating a new project. MCC also generates main.c, which overwrites the one from Studio. A copy is made of the original and named main.c_bck to prevent losing those modifications. This file is saved alongside main.c in the project folder but not visible by default in the project tree in Studio.
-
MPLAB Discover is a tool to help find relevant projects quickly. Various filters help you efficiently find a Microchip tested example, as close as possible to your application requirements, to use as a starting point for your development.
- MPLAB Xpress is an online IDE with many of the basic features of MPLAB X IDE.
It is also possible to import MCC Melody projects from MPLAB Xpress into Microchip Studio, as demonstrated in this video:
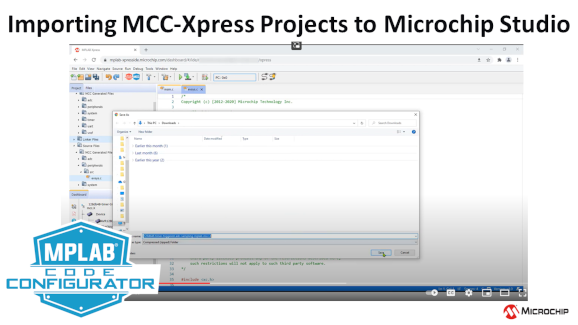
Video: Importing MCC projects from MPLAB Xpress
Do the desired configuration, then generate files and export the project, which is saved as a zip file that can be imported into Microchip Studio.
Start Microchip Studio and select Import MPLAB Xpress Project:
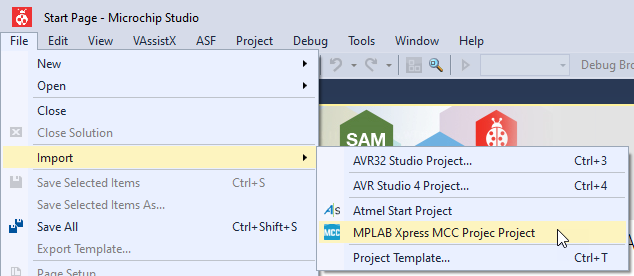
Import Dialog:
Use the dialog to import a project exported from MCC online. Remember to press Generate in MCC to create the files before selecting Export.
Use Browse to locate the exported file of type zip:
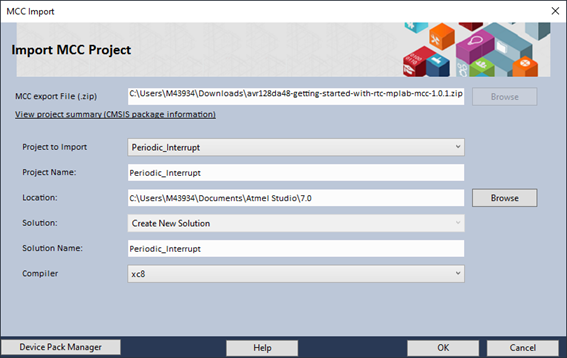
- Project to Import is the project name from the zip file. If more than one project is present, a drop-down menu lets you select the one to import. If this field is gray, in most cases, there is only one project.
- The project name will be set by the project name from MCC but can be changed
- The location is Microchip Studio default but can be changed
- The solution name is auto-filled from the imported project but can be changed
- The compiler is defined by the MCC project and cannot be changed
Press OK to import the project.
Reconfigure the Project in MCC
Do the reconfiguring in MCC in a browser. Generate and export the project.
Select Update from MCC export File either from the icon on the toolbar or from the right click menu.
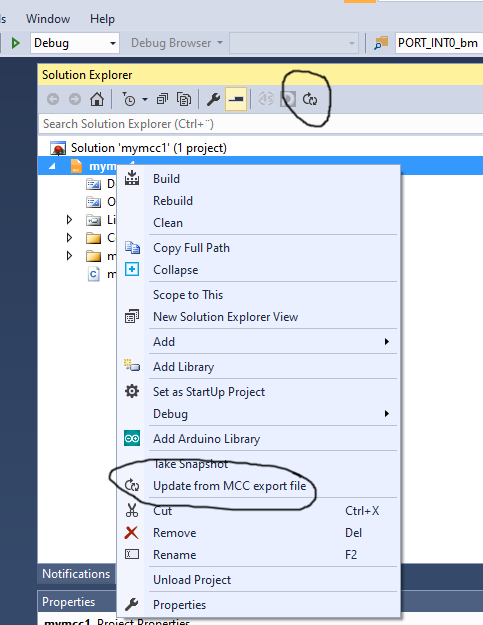
Select the updated export file. A summary is displayed:
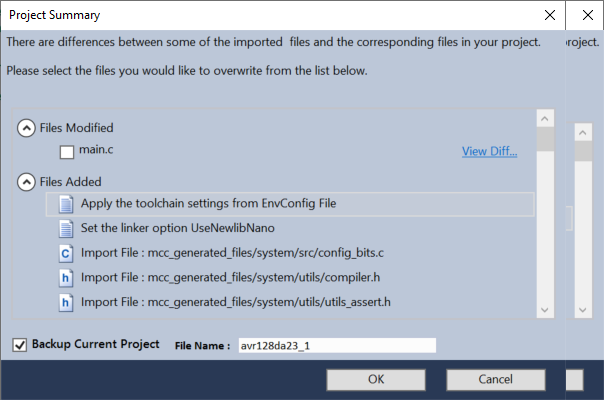
Modified files in the project are listed and will not be overwritten unless selected. Use View Difference to display changes made.
By default, a zip file placed in the folder ".project-backup" is the backup of the current project.
This file works as safety if it is necessary to undo the changes. However, it is better to use a version control system like git.
