
1.2 Secure MCC Melody MDFU Client Library – Provisioning the Secure Element
This document explains the process of provisioning the secure element with the public key. The secure element for this example is the ATECC608B chip which is provisioned using Microchip’s Trust Platform Development Suite (TPDS).
Important: This document explains the prototyping use case for
provisioning. For production, follow the production steps. The support document is linked
here.
The hardware secure element used for the development and testing of the 8-bit Secure MDFU Client is the ATECC608 Trust development board, but any other click or development board with an ATECC608 chip can also be used for provisioning.
This example expects that the user has the secure hardware element and TPDS downloaded.
- Open TPDS by clicking the Start icon on
your PC and searching for “Trust Platform Development Suite”.
Figure 1-1. Open Trust Platform Development Suite 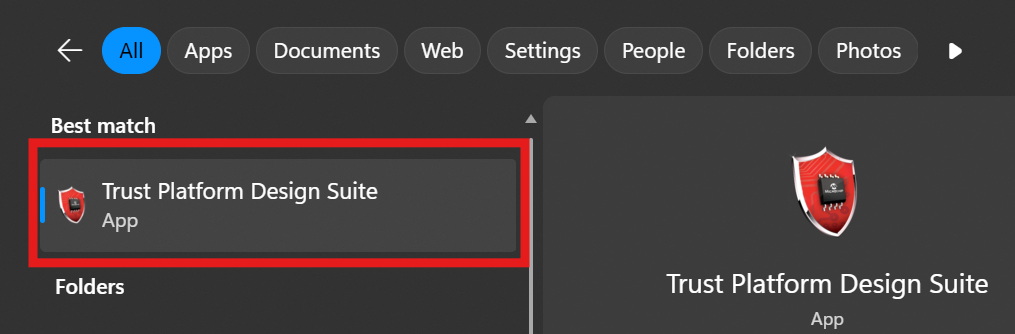
- A command prompt will pop up and load the
TPDS application. The homepage will appear on the screen once the loaded. Click the
Configurators tab on the top gray bar.
Figure 1-2. Configurators Tab 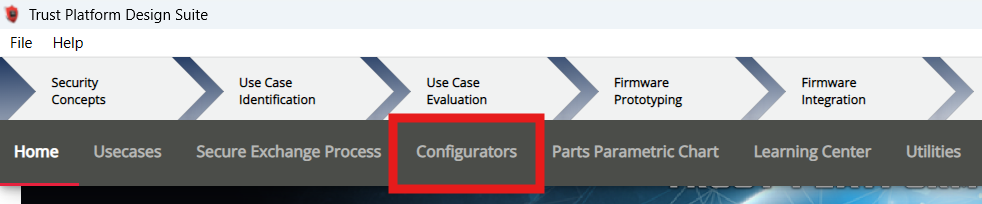
- Click the ATECC608-TFLXTLS
Configurator under ATECC608-TFLXTLS.
Figure 1-3. Open the ATECC608-TFLXTLS Configurator 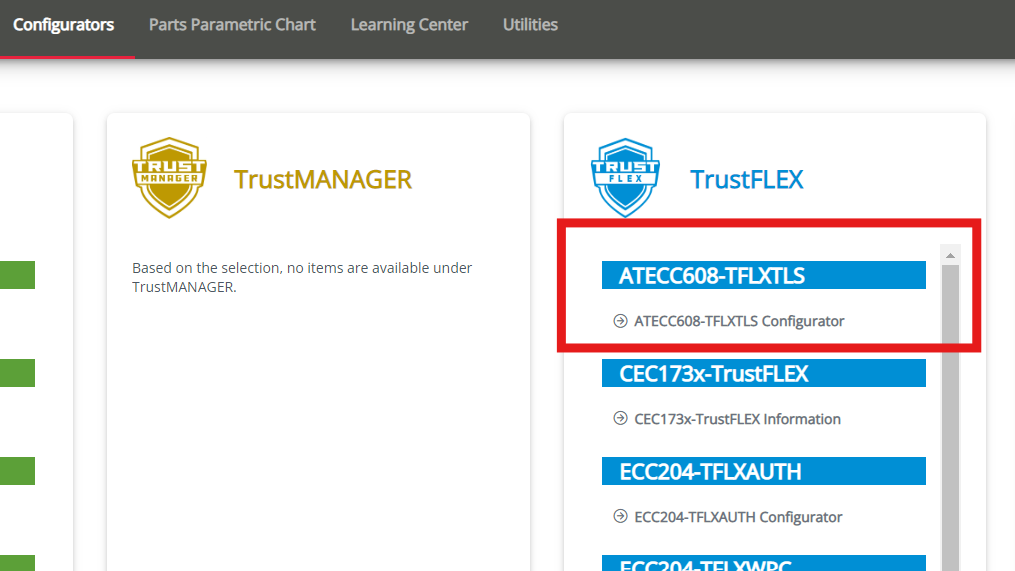
- The screen displays different use cases that can be used for the selected secure element. Clicking each use case highlights the recommended key slots for the respective use case.
- For this example, key slot 13 is used for
storing a parent public key. Click Slot 13 under the Slot Number column.
Figure 1-4. Slot 13 Description 
- Upload the public key either by entering
the raw hex data or directly uploading the
.pemfile.Figure 1-5. Upload Public Key in TPDS 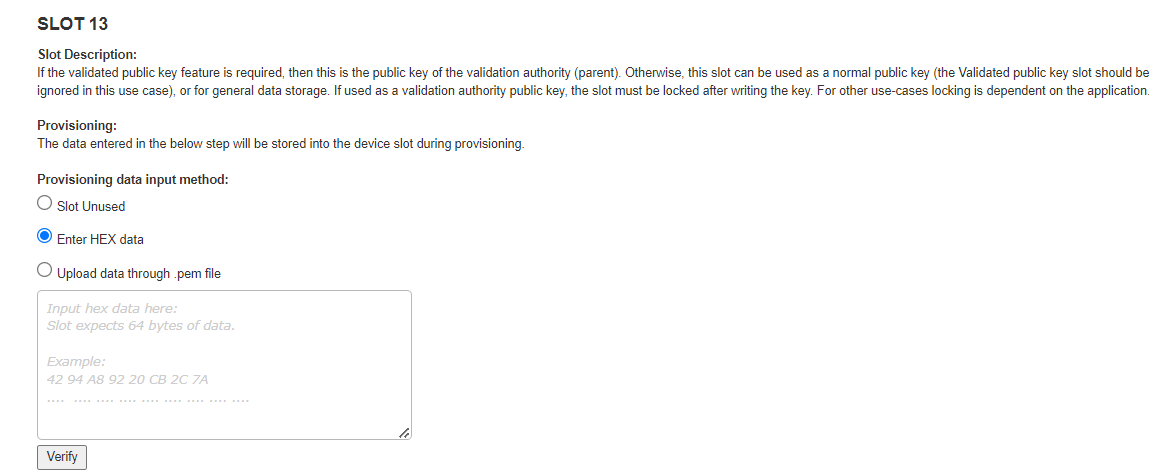
- After uploading the
.pemfile or entering the hex data, click the Verify button.Figure 1-6. Verify Public Key Data 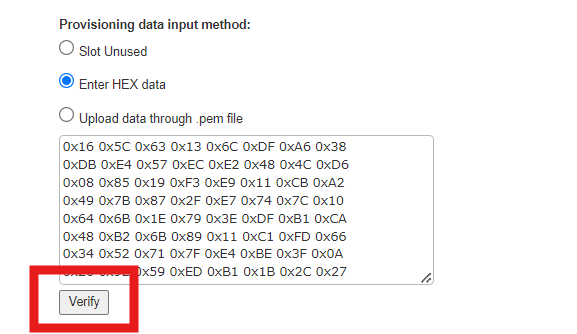
- After clicking the Verify button, a
pop up will display the entered data, verify the data again and click the OK
button.
Figure 1-7. Verify Public Key Data in Pop-Up 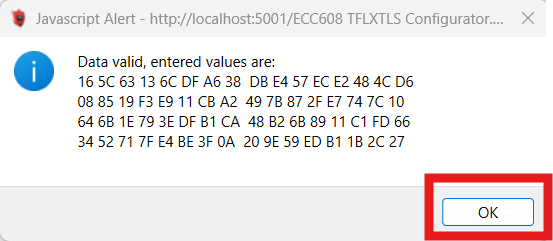
- For prototyping, it is recommended to keep the “Disable Slot Write” check box unchecked.
Figure 1-8. Keep Disable Write Slot Unchecked 
- Scroll down until the Prototyping and Production steps are visible.
- Click the Generate Provisioning
Package button.
Figure 1-9. Click on Generate Provisioning Package 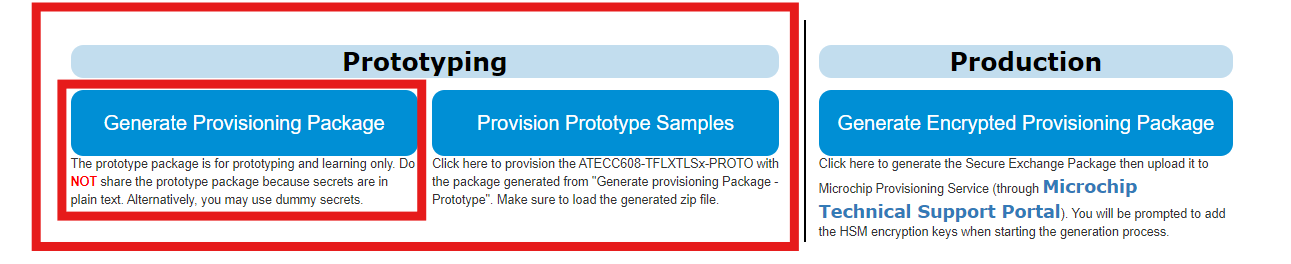
- Verify where the path is saved and click
the OK button.
Figure 1-10. Verify Path for Package Download 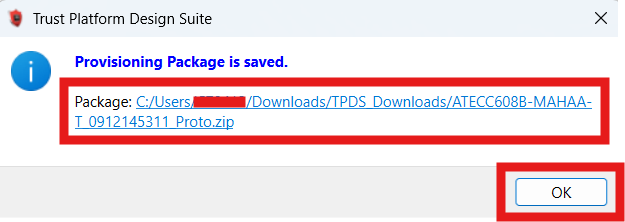
- Click the Provision Prototype Sample
button.
Figure 1-11. Provision Prototype Samples 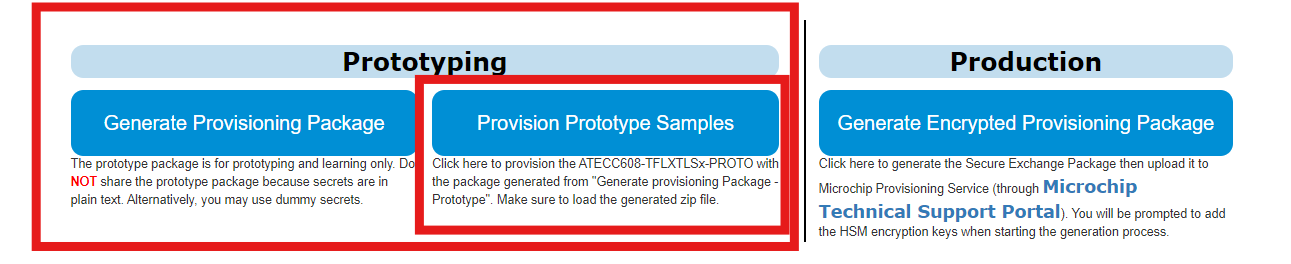
- Upload the generated package from
Downloads.
Figure 1-12. Upload Generated Package 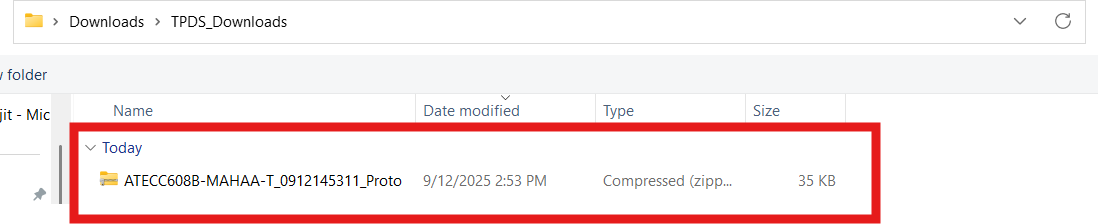
- The DIP switches (if any) on the secure
element need to be switched on for the provisioning to be successful.Tip: The element may need to be disconnected and reconnected several times if failures are observed.
- A pop-up will display if the provisioning
is successful.
Figure 1-13. Provisioning Complete 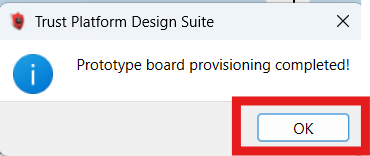
- The secure element is now ready to be used for the ECDSA verification.