1.12 TCP/IP TCP Client Server Using AT24MAC
This demonstration is a combination of the TCP Client and TCP Server application using AT24MAC Serial EEPROM.
It shows the usage of MPLAB Harmony TCP API to implement:
-
A TCP echo server on port 9760.
-
A TCP client that establishes TCP/IP connection to a TCP server.
The Microchip’s AT24MAC402 provides 2048 bits of Serial Electrically-Erasable Programmable Read-Only Memory (EEPROM) organized as 256 words of eight bits each and is accessed via an I2C-compatible (2-wire) serial interface.
Description
The TCP/IP TCP Client Server Using AT24MAC application is based on MPLAB® Harmony 3 TCP/IP Stack.
The Harmony TCP/IP stack is a collection of different network protocols.
The source files of Harmony 3 TCP/IP stack is available here.
The demo is created with MPLAB X IDE and MCC plugin.
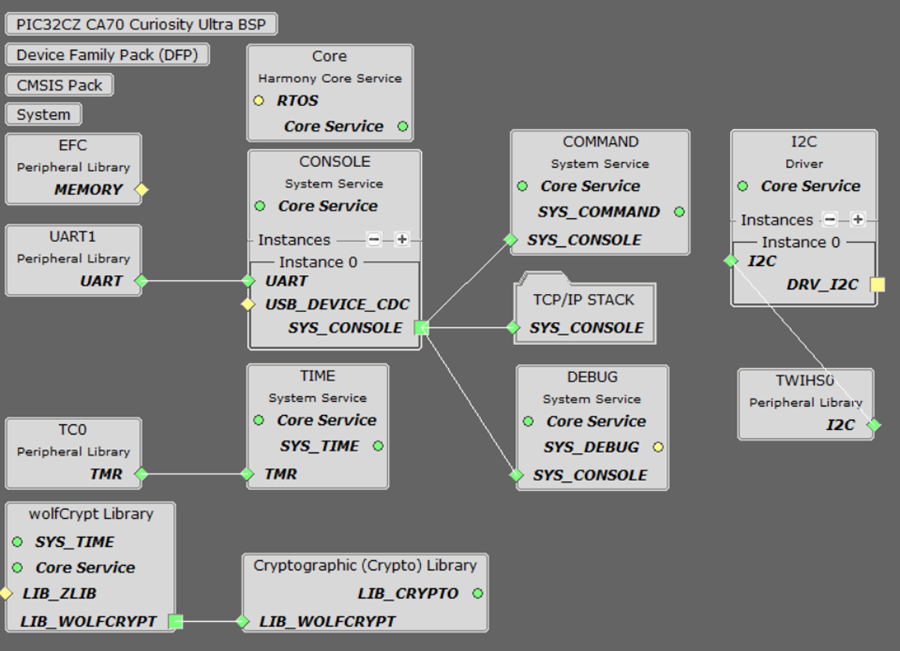
MCC Project Graph - TCP/IP TCP Client Server Using AT24MAC
The following Project Graph shows the Harmony components included in the TCP/IP TCP Client Server Using AT24MAC demo application.
TCP/IP Configuration - TCP/IP TCP Client Server Using AT24MAC
The TCP/IP modules enabled for the demo is shown in the TCP/IP Configuration Overview
More details of TCP/IP Configuration plugin is available here
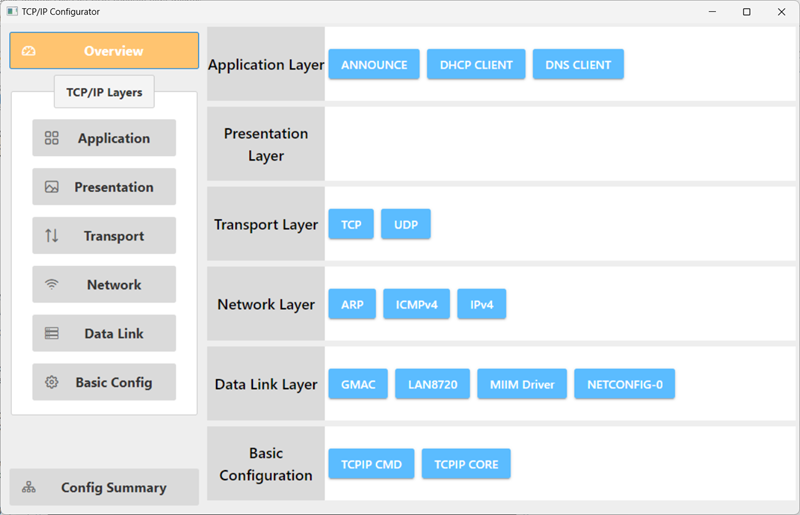
The Application Layer modules enabled in the demo are as follows:
- Application Layer Modules
- ANNOUNCE to discover the Microchip devices within a local network.
- DHCP Client to discover the IPv4 address from the nearest DHCP Server.
- DNS Client provides DNS resolution capabilities to the stack.
Downloading and Building the application
To clone or download this application from Github, go to the main page of this repository and then click Clone button to clone this repository or download as zip file.
This content can also be downloaded using content manager by following these instructions.
Path of the application within the repository is apps\tcpip_tcp_demo_at24mac\firmware
To build the application, refer to the following list of demo configurations and open the project using MPLAB X IDE.
| Project Name | Target Device | Development Board | Description |
|---|---|---|---|
| pic32cz_ca70_curiosity_ultra.X | PIC32CZ2051CA70144 | PIC32CZ CA70 Curiosity Ultra + LAN8720 PHY Daughter Board | TCP/IP TCP Client Server Using AT24MAC Application - Bare Metal |
Hardware Setup - PIC32CZ CA70 Curiosity Ultra
The target board for running the application is PIC32CZ CA70 Curiosity Ultra.
This section provides essential hardware configuration of this target board to run TCP/IP applications.
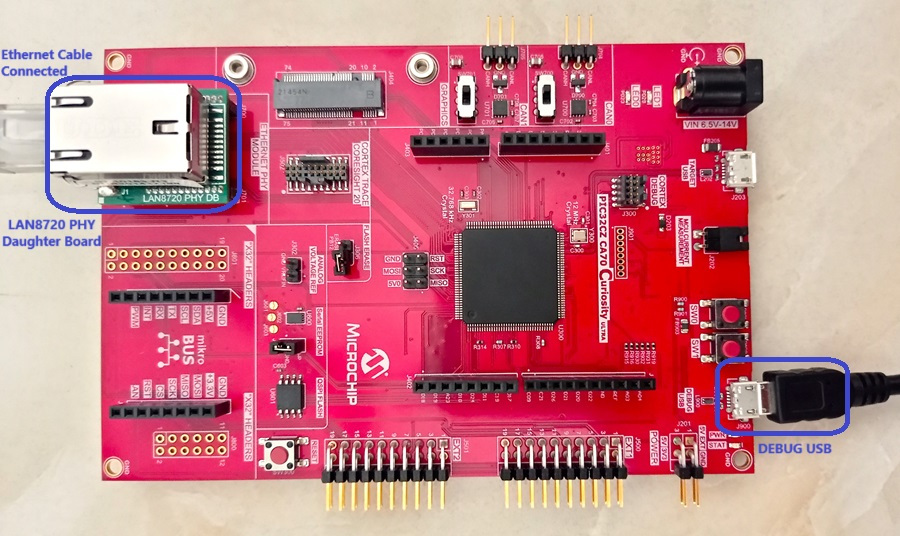
Board Setup
To set up the hardware, refer to the PIC32CZ CA70 Curiosity Ultra User's Guide.
- Default jumper setting of the board is shown above.
- Connect the micro USB cable between DEBUG USB port on the board and host PC.
- Establish a connection between the router/switch with the PIC32CZ CA70 Curiosity Ultra board through the RJ45 connector, using the Ethernet cable.
Running the Application
- Open a terminal application on the host computer (like Hyper-terminal or Tera Term).
- Configure the terminal application for serial virtual COM port.
- Set baud rate as 115200 in the terminal application.
- Build and download the application project on the target board.
- Verify the TCP/IP Stack initialization console messages.
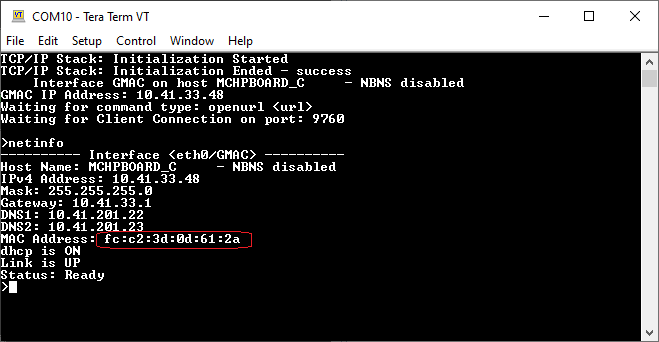
If DHCP client is enabled in the demonstration, wait for the DHCP server to assign an IP address for the development board.
This will be printed on the console. Otherwise, the default static IP address will be assigned to the board.
By entering the command netinfo, the response is obtained as shown above.
As highlighted in the above screenshot, the MAC address is a factory programmed EUI-48™ MAC Address. This indicates that the AT24MAC Serial EEPROM is used in this application.
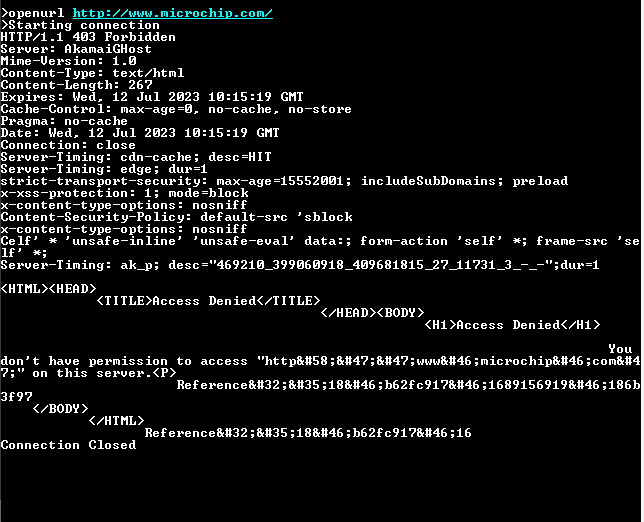
TCP Client Test
Enter following command in console: openurl <url>. For example, openurl http://www.microchip.com/.
The response from the server will be printed on the console as shown below.
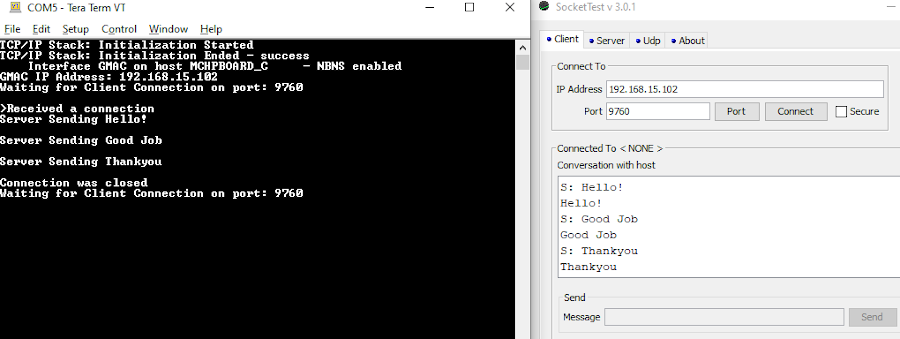
TCP Server Test
For TCP Server test, a TCP Client application is required to run on the host computer (SocketTest, PacketSender etc).
In this demonstration, we use SocketTest utility.
- Send a TCP packet to the IP address of the hardware board, port 9760, from TCP Client application (SocketTest) running on the computer. See the following screenshot of test .
- The TCP Server running on the hardware board will echo back the message it receives. See the console screenshot of test below.