On the MPLAB X toolbar, look for and
click the MPLAB®\ Code Configurator (MCC) Icon
() or click Tools > Embedded > MPLAB X Code Configurator v3
Open/Close. For assistance with installation, refer to MPLAB ® Code Configurator Page (www.microchip.com/mplab/mplab-code-configurator)
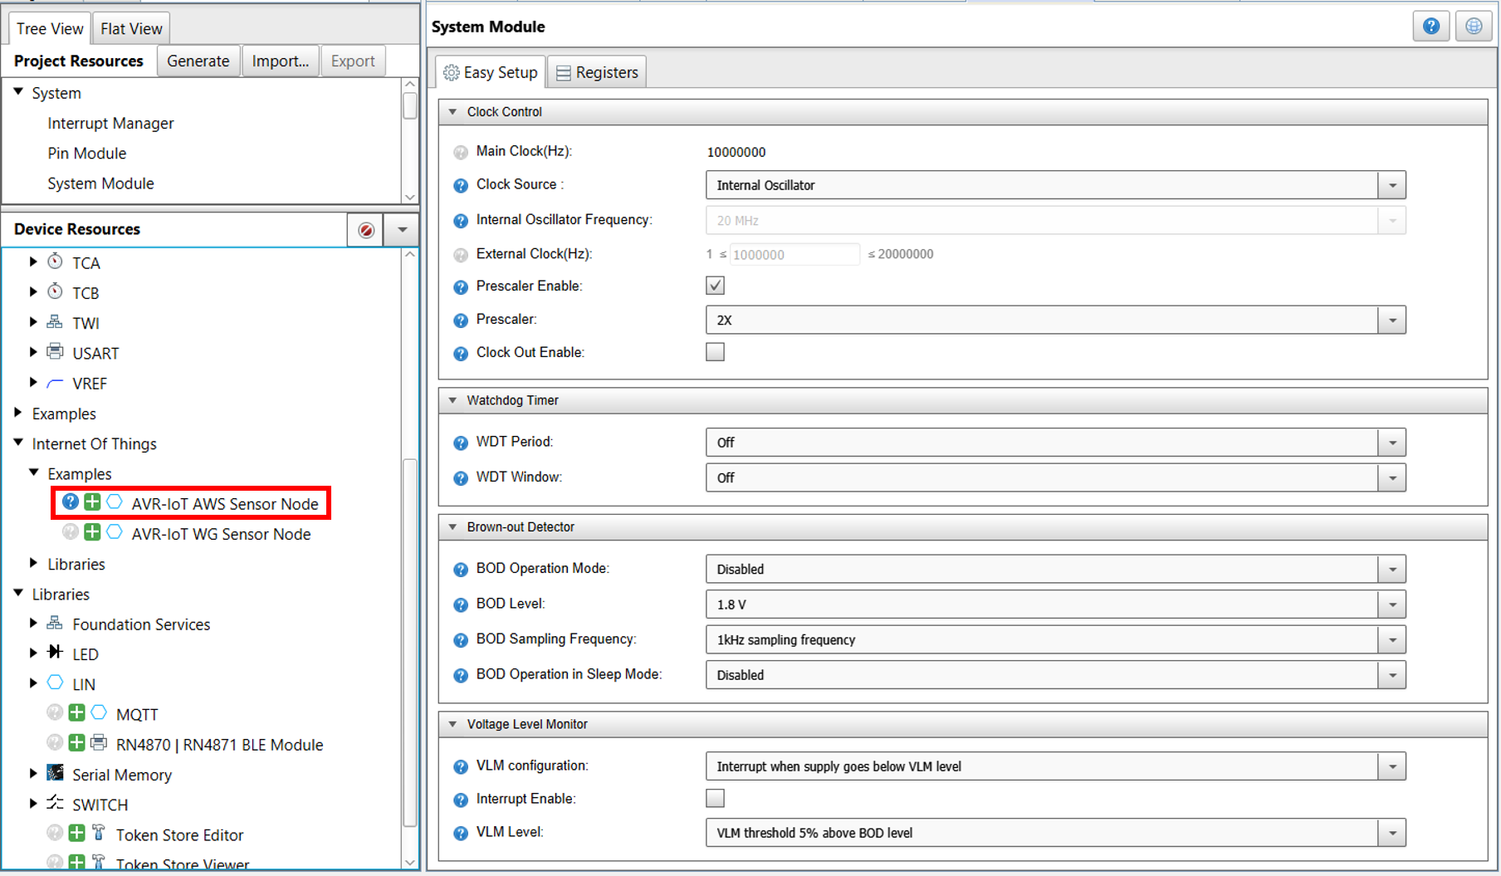
Under Device Resources, scroll down
to the Internet of Things header. Under Examples, double click on AVR-IoT AWS Sensor Node
(see MCC Start Page).
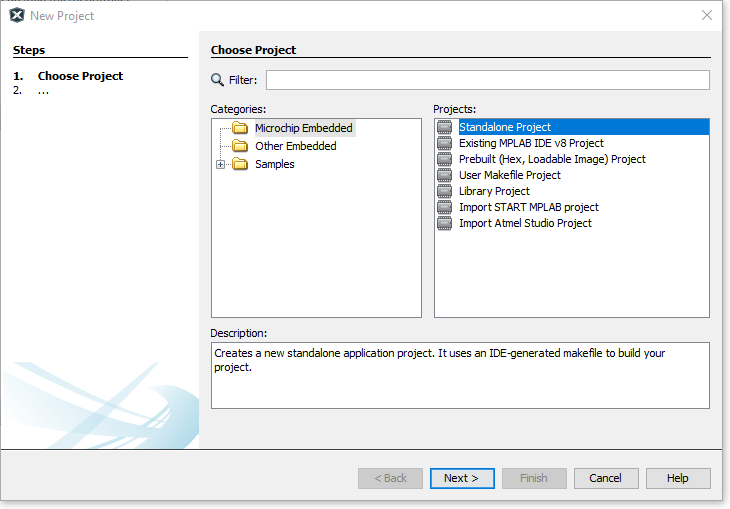
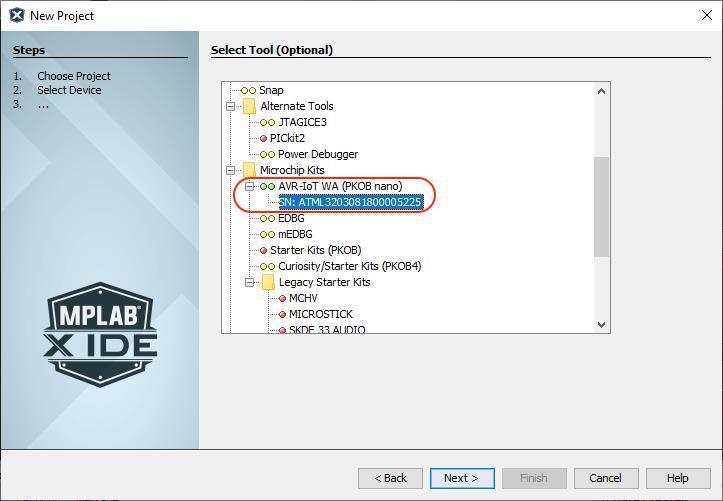
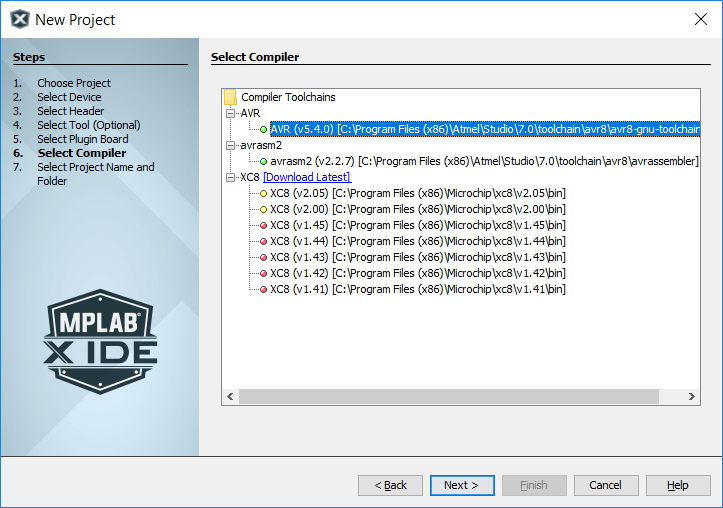
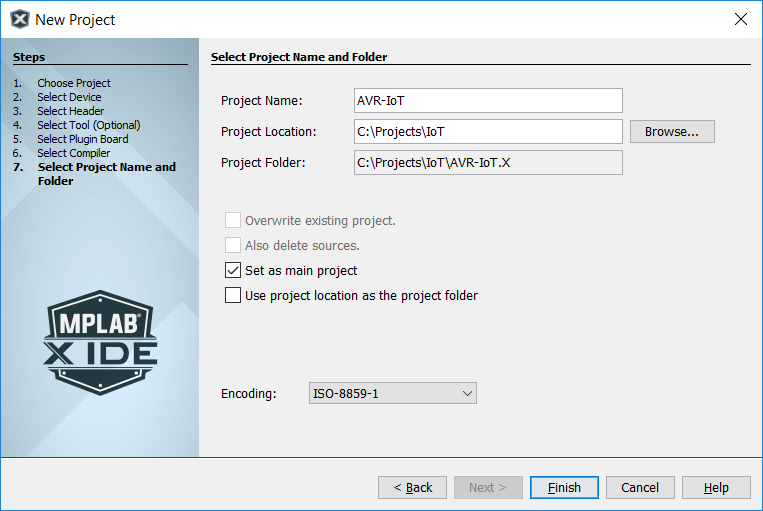
Figure 3-1. Create New ProjectFigure 3-2. Selecting a DeviceFigure 3-3. Selecting a ProgrammerFigure 3-4. Selecting a CompilerFigure 3-5. Naming a New ProjectFigure 3-6. MCC Start Page
The online versions of the documents are provided as a courtesy. Verify all content and data in the device’s PDF documentation found on the device product page.

 ) or click Tools > Embedded > MPLAB X Code Configurator v3
Open/Close. For assistance with installation, refer to MPLAB ® Code Configurator Page (www.microchip.com/mplab/mplab-code-configurator)
) or click Tools > Embedded > MPLAB X Code Configurator v3
Open/Close. For assistance with installation, refer to MPLAB ® Code Configurator Page (www.microchip.com/mplab/mplab-code-configurator)