1.2 PIC32CZ_CA90 Key Provisioning in Trust Platform Design Suite
Install TPDS:
- Download TPDS application and install.
- See Installation Instruction
Install TPDS extension (pic32cz_ca90 key provisioning) using python wheel:
Download this python wheel file (xt_provisioning_pic32czca90-1.0.0-py3-none-any.whl) and make a zip folder of this. Then follow the below steps to install provisioning extension in TPDS,
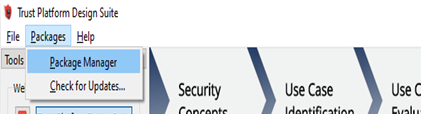
- Launch TPDS application.
- Navigate to Packages ->
Package Manager.
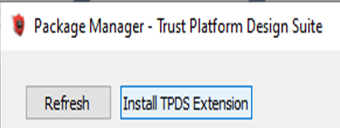
- Click on "Install TPDS
Extension".
- Navigate to python wheel zip
folder location, select file to install and click on Open.

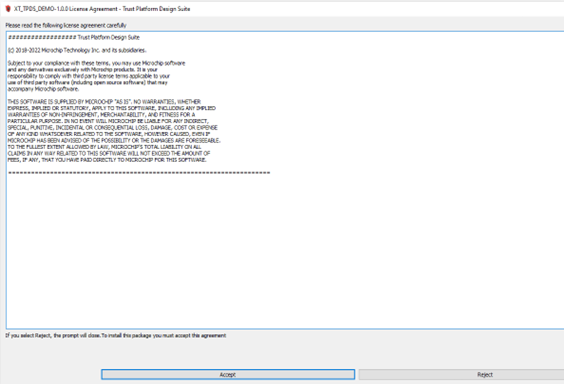
- Accept License Agreement to
continue with installation.
- Wait for installation to complete (wait for Close button to get highlighted).
- Click on Close. Close Package
Manager and Restart TPDS Application.

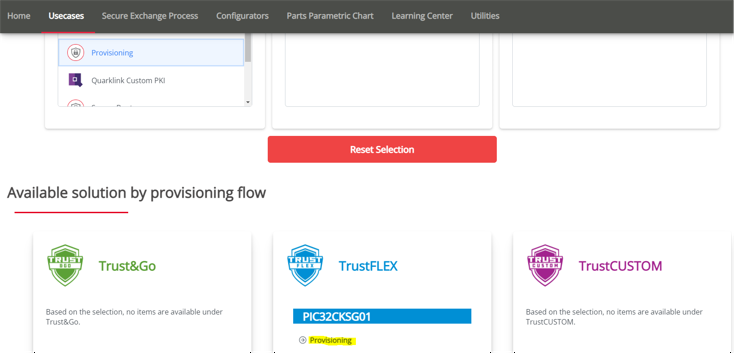
- This use case should be presented
and can be run in the TPDS environment. Click on Provisioning under Use Cases
and then from TrustFlex to start the key provisioning use case.
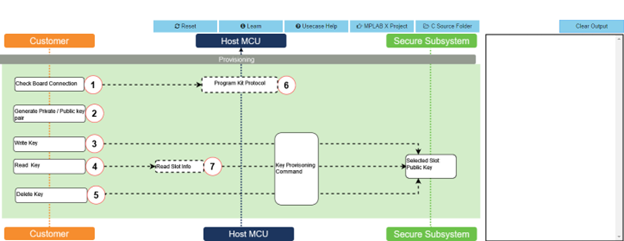
- Below are the use case steps for
pic32cz_ca90 key provisioning. Click steps 1 through 5 to run the use case. If
the board is not programmed with Kit Protocol, click Step 6, to program the kit
protocol and then run the use case from step 1 through 5.
- Use Case transaction
diagram:
- Use case Implementation
steps:
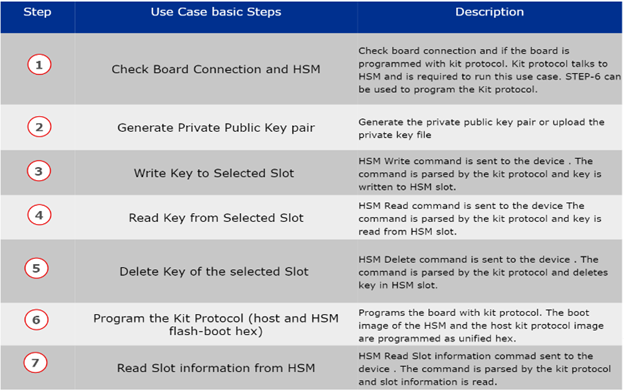
- Use Case transaction
diagram:
Setup requirements
- PIC32CZ CA90 Curiosity Ultra (EV16W43A)
- MPLAB X IDE and v6.05 or above
Pre Usecase transaction Steps
- Connect PIC32CZ CA90 Curiosity board to PC running Trust Platform Design Suite. Power the board through barrel jack (Vin). It is required to connect both TARGET USB and DEBUG USB to PC.
- Ensure MPLAB X Path is set in
File -> Preference under System Settings. This helps
- To program the Usecase prototyping kit by TPDS
- To open the embedded project of the Usecase
- Note that ~/.trustplatform/ pic32cz_ca90_provisioning’ is the Usecase working directory. It contains the resources generated during transaction diagram execution.
Post Usecase transaction Steps
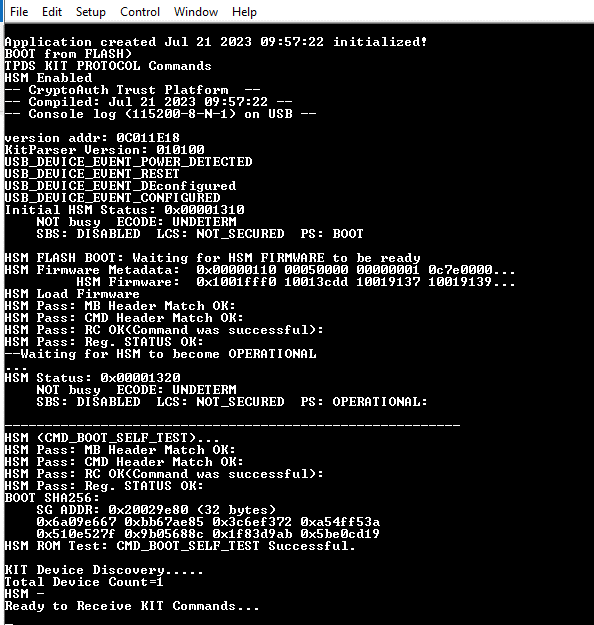
- Log from the HSM provisioning can be viewed using applications like TeraTerm. Select the COM port and set baud rate as 115200-8-N-1.
Troubleshooting
Programming Kit Protocol:
The board must be programmed with Kit Protocol to run this use case. The Kit Protocol is the combined image of "host_kit_protocol.hex" and "hsm_flash_ boot.hex" images. The hex images are under '.trustplatform-> pic32cz_ca90_provisioning'. Make sure the DEBUG USB must be connected to PC for programming.
Programming might be inconsistent in TPDS platform. Please find below for different options to program the kit protocol.
- Using use case step 6 to
program the kit protocol:
- Click step 6 to program the Kit Protocol before running the use case steps from step 1. You may need to disconnect the USB DEVICE that can conflict with DEBUG USB for programming.
- Using IPE to program the kit
protocol:
- If the TPDS fails programming/gives error in step 6, the 'combined_image' (Kit Protocol) under ".trustplatform-> pic32cz_ca90_provisioning" can be programmed using MPLAB X IPE.
- Using MPLAB X IDE to program the kit protocol:
- The 'host kit protocol' and 'hsm flash boot' images can be
programmed individually.
- The hsm_flash_boot.hex must be programmed first using IPE or by creating new 'prebuilt hex MPLAB X project'and adding hsm_flash_boot.hex to the project.
- The host kit protocol firmware is in '.trustplatform-> pic32cz_ca90_provisioning->firmware'. The project can be opened and programmed from MPLAB X IDE.
- The 'host kit protocol' and 'hsm flash boot' images can be
programmed individually.
Serial Output after programming Kit Protocol:
- Select the COM port and set baud rate as 115200-8-N-1