2.3.1 Migrating CLB Projects to Latest Version
To enable CLB setup in MPLAB X projects created with previous CLB versions, follow these steps:
- Open MPLAB X IDE and get the project ready to work with.
- Import the existing MPLAB X project to load the current setup.
- Open MPLAB Code Configurator (MCC) Melody to access the project configuration.
- If a pop-up window “MCC Core Update Required” as shown below
appears, an update to the MCC Core is required. Confirm the
update by pressing the Yes button.
Figure 2-1. MCC core update required 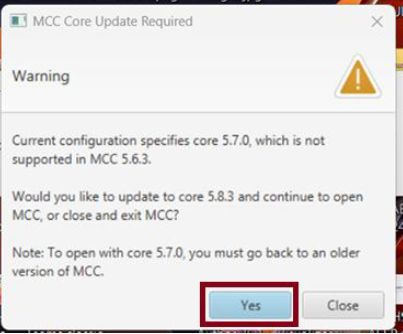
- In the Resource Management
[MCC] tab, under the Project Resources
tab, click on the CLB1 peripheral, as shown below.
Figure 2-2. CLB under Project Resource 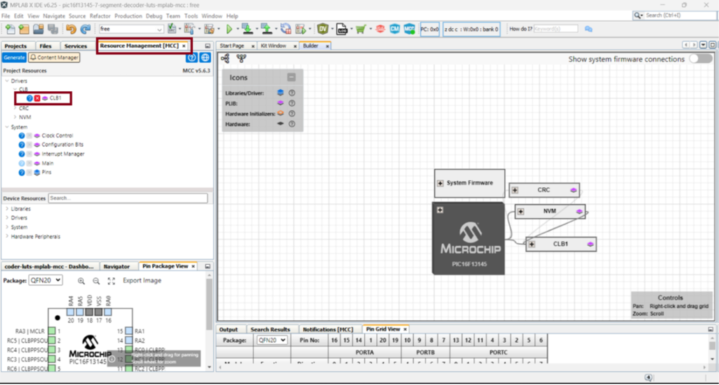
- In the CLB
Synthesizer tab, click the Setup button, then
select Save design… option to store the current design locally
Figure 2-3. Save the CLB design 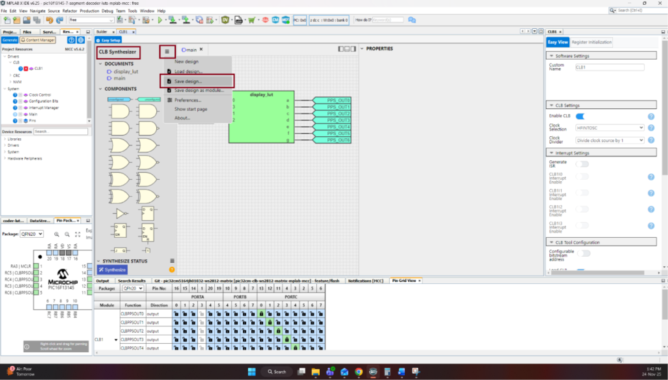
- A new pop-up window will
appear to enter the design name. After typing the desired
name, click OK.
Figure 2-4. Save design 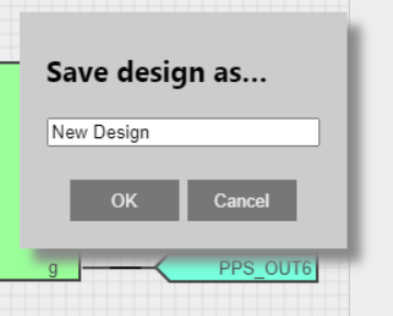
- Select the desired path
in the file dialog that appears, then click Save.
Figure 2-5. Save design in desired path 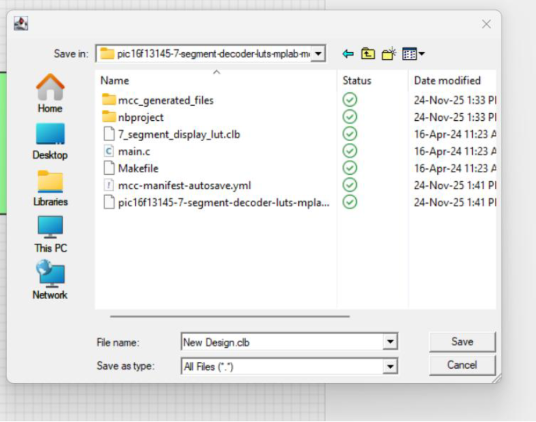
- Verify all the used peripherals and their configuration in the
Resource Management [MCC] tab. After completing the check,
click on the Content Manager button.
Figure 2-6. Verify CLB configuration 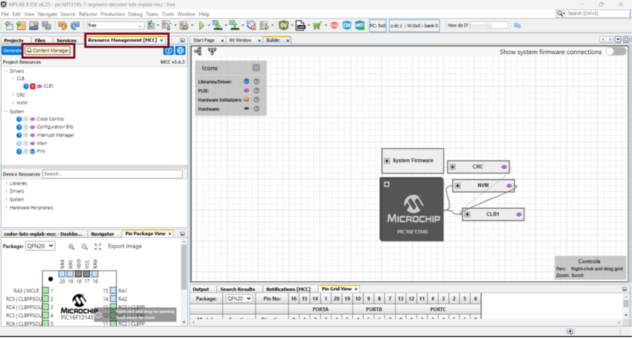
- Update all content libraries, cores and frontends versions to
the latest – making sure the CLB driver in the PLIB tab and
CLB Library in the Libraries tab are included – by clicking
Select Latest Version(s) button.
Figure 2-7. Update latest version of CLB PLIB and Libraries 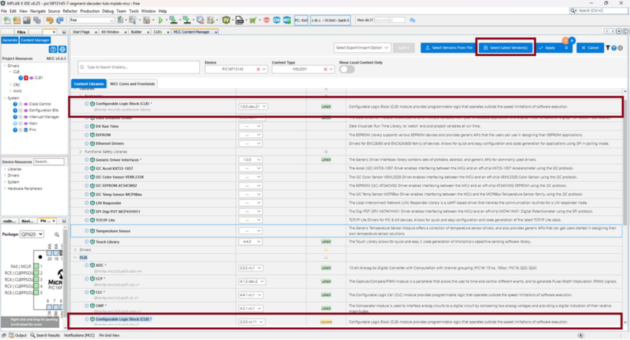
- Click the Apply button, then select Apply again from the
drop-down menu.
Figure 2-8. Apply and Save 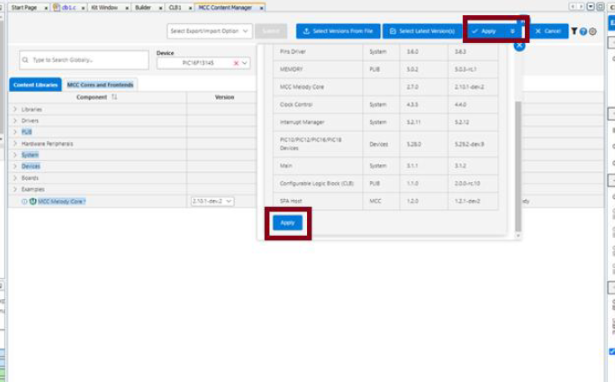
- Wait for the latest version(s) to finish updating. In the Content Manager, verify that the CLB components – both the Library and PLIB – are now at their latest versions.
- Ensure that all peripheral configurations remain unchanged, except for the CLB and any peripherals configured within the CLB.
- In the MCC plugin window, open the Device Resources tab,
click on the Libraries section, then add the CLB
Synthesize Library by pressing the Plus
button.
Figure 2-9. Load CLB Synthesizer Library 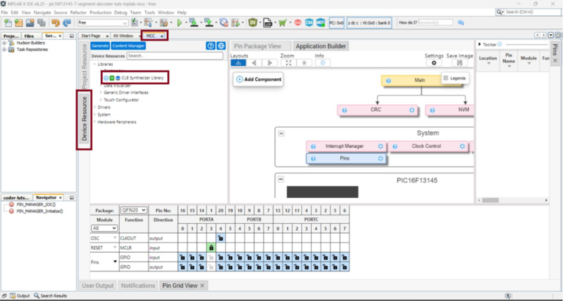
- In the CLB Synthesize Library tab, click the Load… button to
import the previous saved design.
Figure 2-10. Import Previous saved CLB design 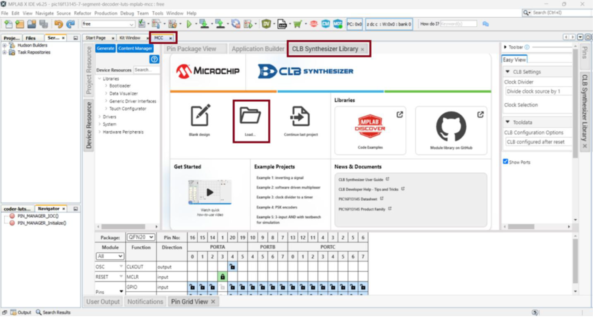
- In the dialog box that appears, select the CLB design to be
imported, then click Open.
Figure 2-11. Open CLB design 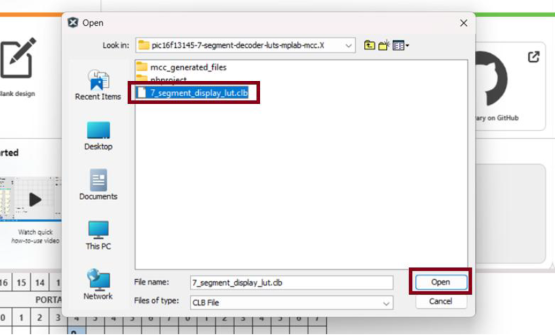
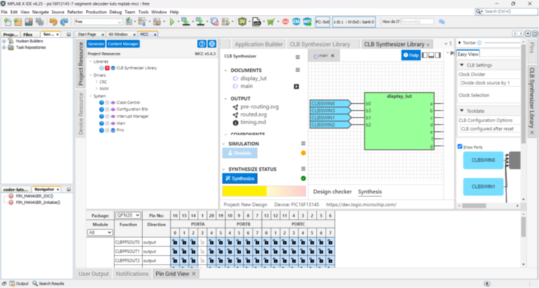
- Once the design is loaded, click Synthesize, and the CLB
configuration is ready to be generated.
Figure 2-12. CLB Synthesizer loaded sucessfully 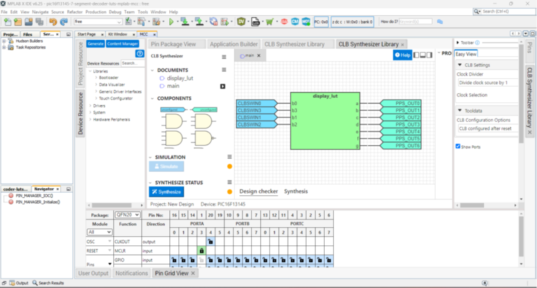
- If additional peripherals were used, verify all their
configurations within the Project Resource tab, then
press the Generate button to finalize the
setup.
Figure 2-13. CLB configuration project generation