Follow the below step to add the Zigbee OTAU Server capability in any of the zigbee application. Mostly Combined interface which is zigbee co-ordinator is considered for OTAU server.
Pre-requisite
Open any zigbee type application based on MCC (Example project/ Custom created project)
Launch MPLABx Code Configurator (MCC).
The below steps explains only the components/configurations needed for OTAU Server functionality. Figure 10-70. .
Pull-in MCC Components
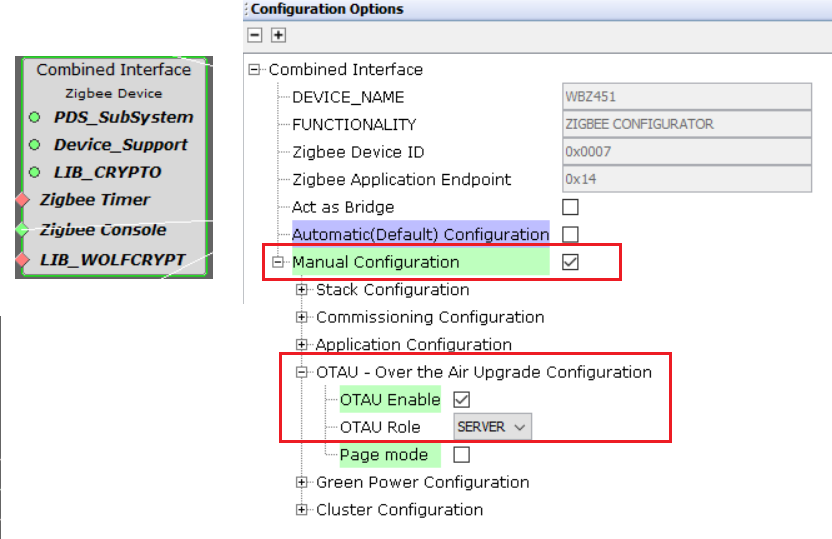
Configure "Zigbee Device Type" component as below to enable "OTA Server" capability. Figure 10-71. .
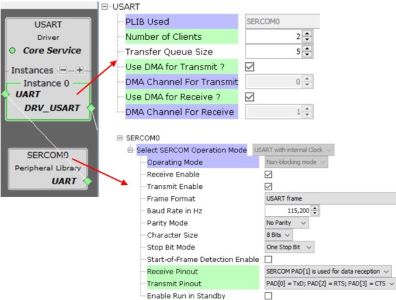
As the OTAU server is connected to PC to get the upgradable image, the UART interface has to be configured. Connect "Zigbee console" in the Zigbee device component to USART Driver Component and to SERCM0 component (for WBZ Curiosity Board) as shown below. Figure 10-72. .
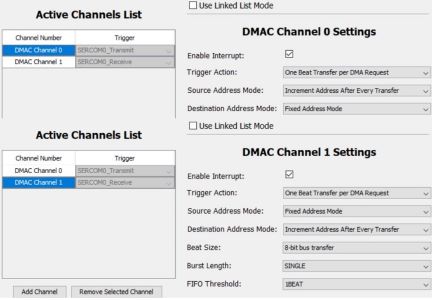
Configure the SERCOM0 component to set the uart baud rate, parity, data bits and Sercom Tx and Rx pins, DMA. DMA is needed for stable UART communication without impacting the CPU time for other operations. Figure 10-73. .
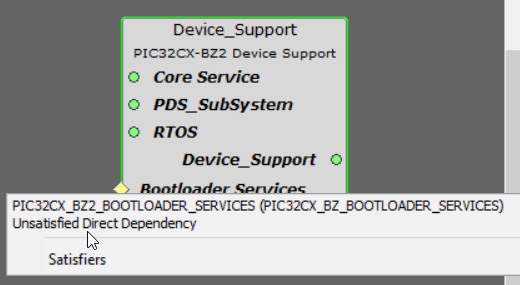
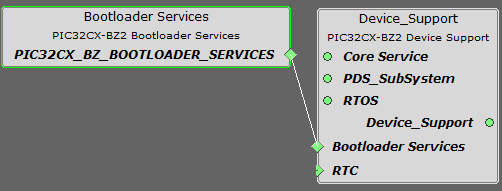
Add the "Bootloader Services" dependent component for "Device Support" component in project graph. This component generates the supporting linker file and MPLABX script needed for OTAU Server device upgrade over UART. This step is needed only when require to upgrade the OTAU server device locally through UART interface. Figure 10-74. .