7.1.1 FFD Project Creation with MAC Component
Developing the Application from Scratch using MCC
-
Create a new MCC Harmony Project. For more details, refer to Creating a New MCC Harmony Project
- From the “Device Resources”
field, go to Harmony>Wireless>Drivers>IEEE 802.15.4>IEEE 802.15.4
MAC
Figure 7-1. IEEE 802.15.4 MAC Component 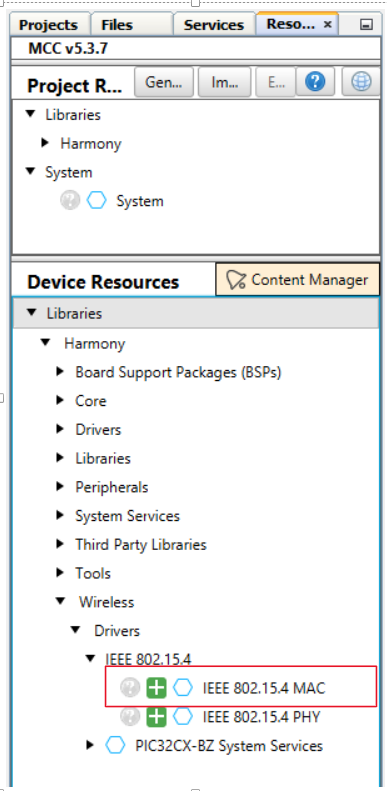 Note: IEEE 802.15.4 PHY and MAC components will appear in Device Resources only if, “wireless_15_4_phy” and “wireless_15_4_mac” repository is cloned in MCC framework path.
 - Click on the plus symbol on the IEEE 802.15.4 MAC component, as illustrated in the above image.
-
Upon selection, user will receive a prompt for auto-activation and auto-connect request of different component dependencies. Select Yes to add all the dependent components and also for all attachment auto-connect requests.
-
Right click the TIME module for selecting the timer source, and select any one of the timer.
Figure 7-2. Timer Component 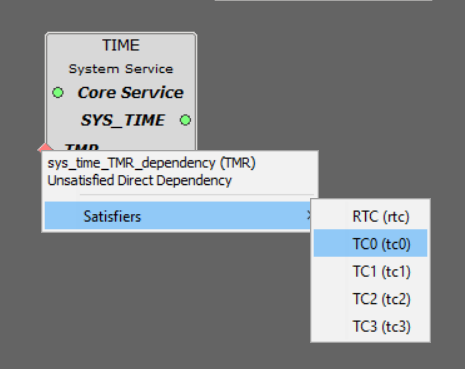
- Click the TIME Component, open Configuration Options and,
- Change the Number of
Clients 5 to 10 based on software timers.
Figure 7-3. TIME Configuration 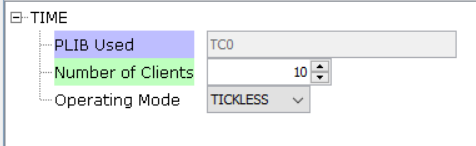
- Change the Number of
Clients 5 to 10 based on software timers.
- Click the IEEE 802.15.4 MAC component, and open Configuration Options
and
- In “Device Type Configuration” field, select FFD from the drop
down for FFD project generationNote: If security required, select MAC Security config as Enabled.
Figure 7-4. IEEE 802.15.4 MAC Configuration 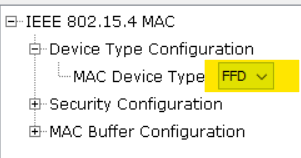
- In “Device Type Configuration” field, select FFD from the drop
down for FFD project generation
-
If console prints is required, user can add a “CONSOLE” component to facilitate application console prints.
- Go to “Device
Resources” field, and navigate to
Libraries>Harmony>System Services and
select CONSOLE
Figure 7-5. CONSOLE Component 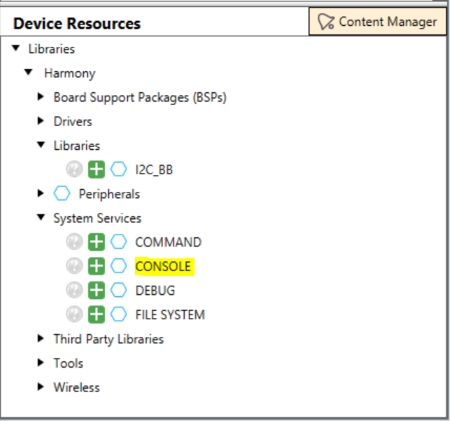
- In the project graph,
right click on ◇ UART>Satisfiers>SERCOM0
to add and connect the SERCOM0 component.
Figure 7-6. Console Component 
- Click on the
SERCOM0, open Configuration Options and, to change
“Receive Pinout”, “Transmit Pinout” and “TX and RX Ring buffer” size
as illustrated in the following figure.
Figure 7-7. SERCOM0 Configurations 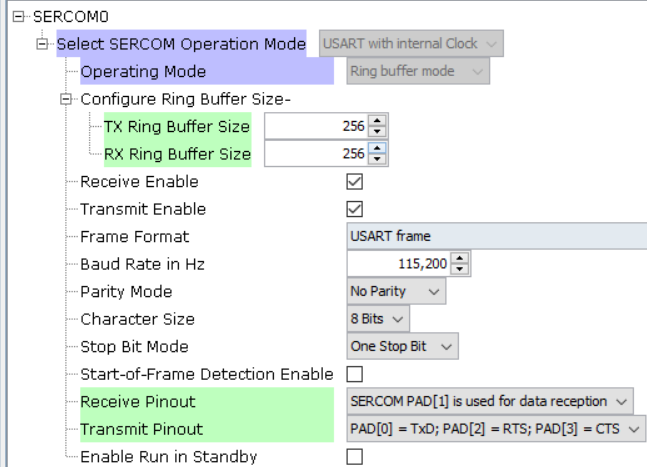
- Perform the following
to configure the “SERCOM0” to enable the Direct High Speed.
- In Project Graph, click the System component to open Configuration Options.
- To locate “SERCOM0 Direct (High Speed) Pin Enable (SCOM0_HSEN)”, navigate to System>Device & Project Configuration>WBZ451 Device Configuration>Generate Fuse Settings>DEVCFG1
- Select DIRECT from the drop-down list as illustrated in the following figure.
Figure 7-8. System Configuration - SERCOM0 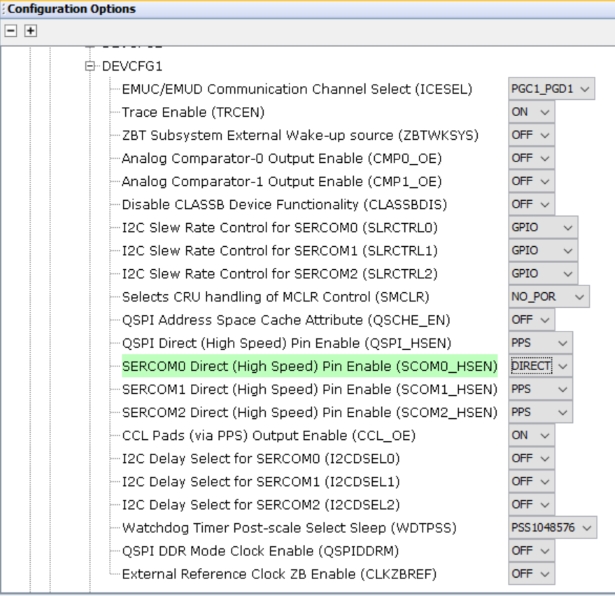
- Go to “Device
Resources” field, and navigate to
Libraries>Harmony>System Services and
select CONSOLE
-
Click PIC32CX BZ2 Curiosity BSP under Device Resources.
Figure 7-9. Device Resources 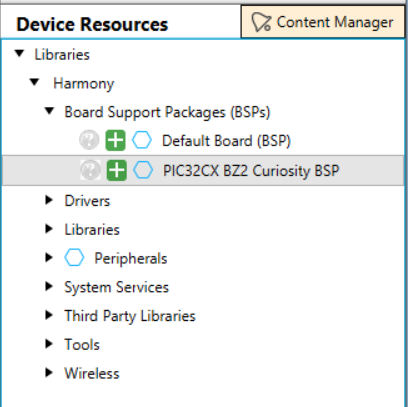
-
Click on Generate Tab for code generation. Upon code generation, MAC files will be added to the project. For more details on code generation, refer to Generate Code section.
Figure 7-10. Code Generation 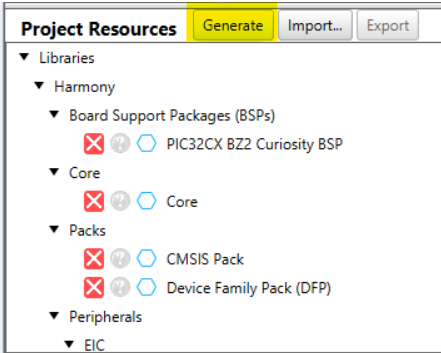
-
Once the generation is completed, the header, source, and library files of MAC will be added to the project under config/IEEE_802154_MAC directory.
Figure 7-11. Project Files 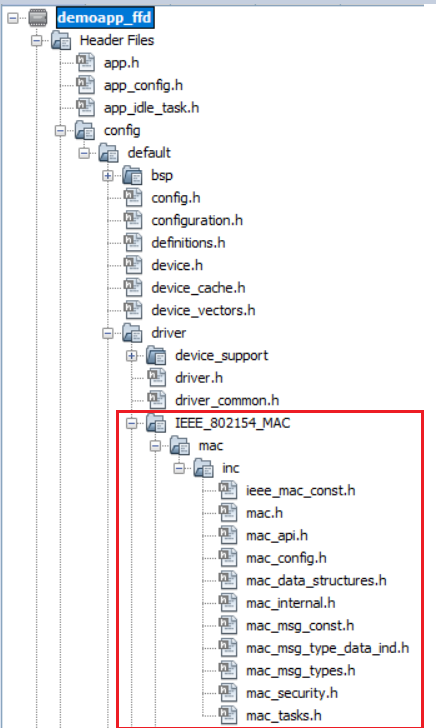
Figure 7-12. MAC Source Files 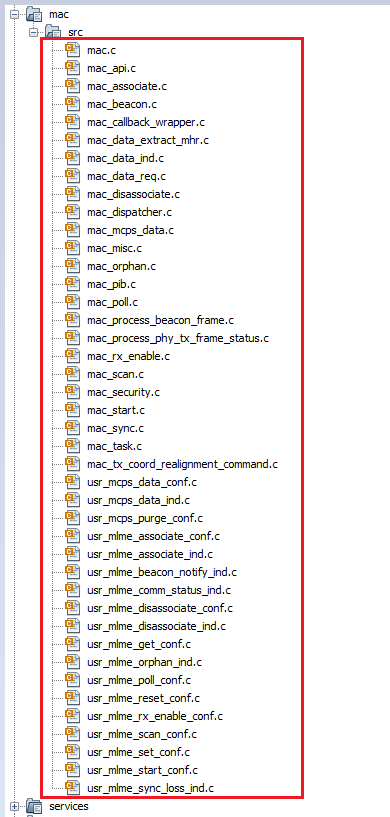
-
RTOS task for MAC Layer will be created.
-
tasks.cfile andWPAN_Init ()will be called fromSYS_Initialize()function. Change argument ofSYS_Load_Cal ()functionWSS_ENABLE_NONEtoWSS_ENABLE_ZBininitialization.cfile.Figure 7-13. initialization.c
Adding Files To The Project
-
Copy the
demo_app_ffdapplication folder from Project repository (wireless_apps_pic32cxbz2_wbz45/ apps/ieee_802_15_4 /MAC/ push_pull_mac_app/demoapp_ffd/firmware/src/) into created project folder (../firmware/src/)Figure 7-14. Project Repository 
- Include the demoapp_ffd folder
header files in project, as illustrated in the following figure.
Figure 7-15. Header file 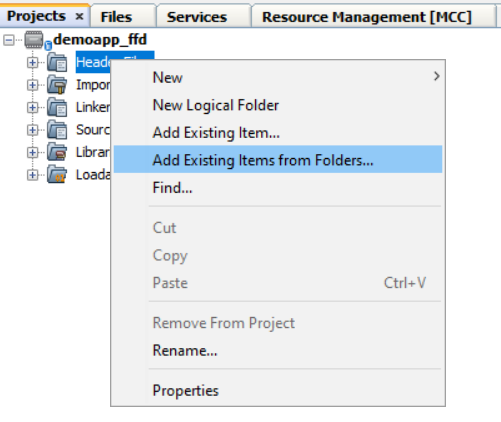
Figure 7-16. Including Header Files 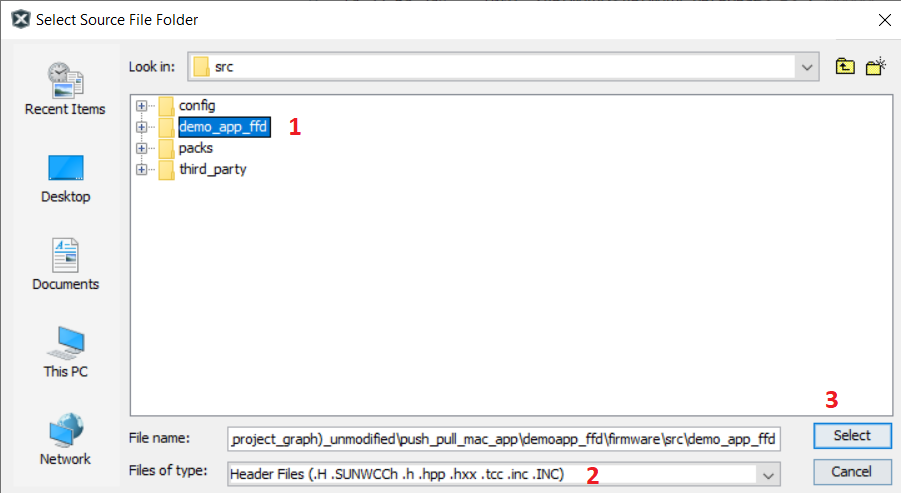
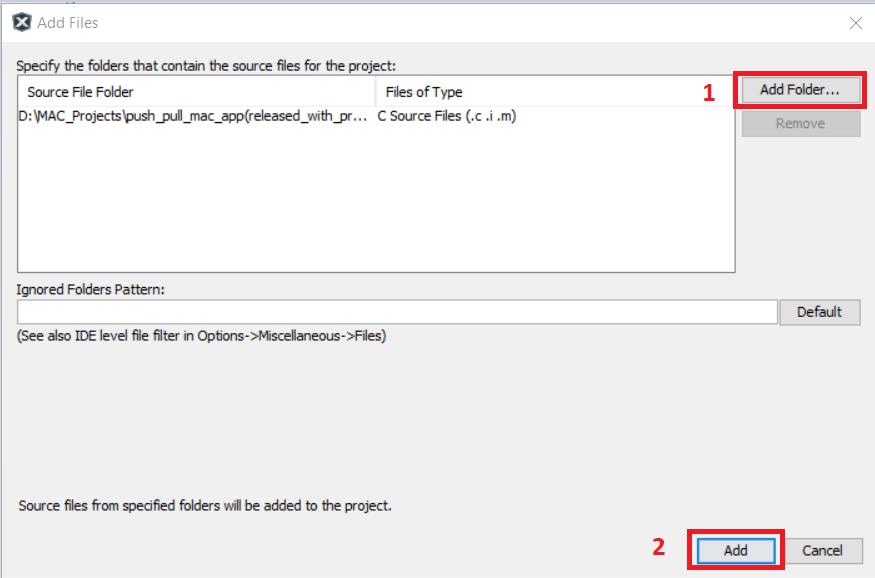
- After selecting the header files
from the demoapp ffd folder in current project folder, Click Add.
Figure 7-17. Add Files 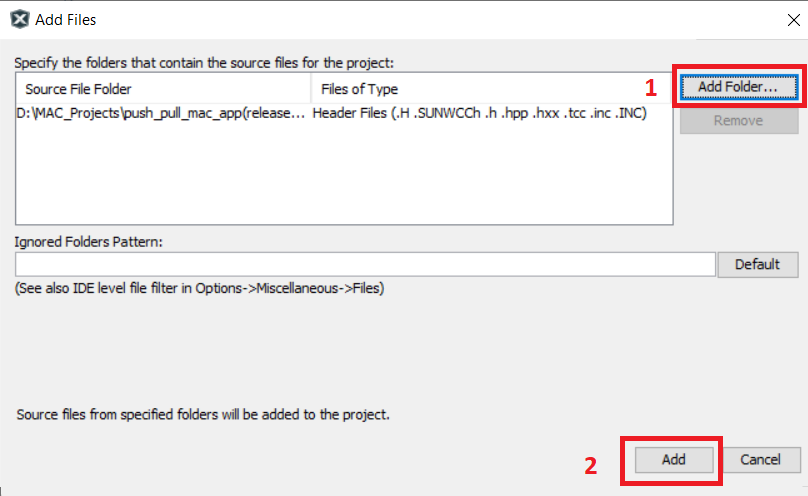
- Do the same steps to add the
source files to the project folder.
Figure 7-18. Source Files 
Figure 7-19. Including Source Files 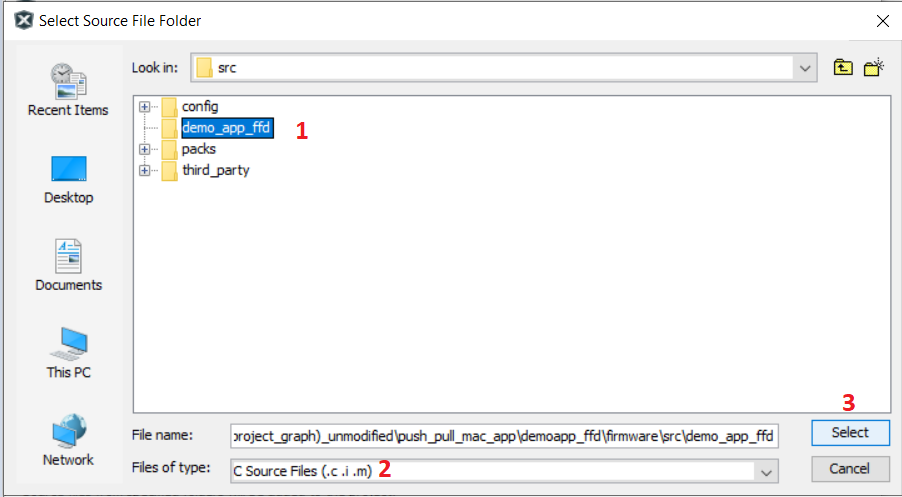
-
After selecting the source files from the demoapp ffd folder in current project folder, Click Add.
- Once the files are included the
project files will resemble as illustrated below
Figure 7-20. Project Files 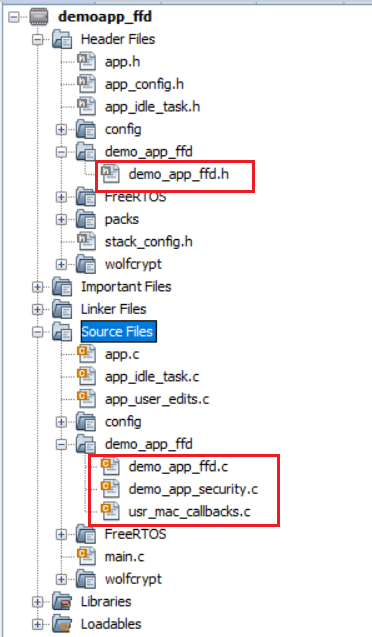
- Open Configuration for adding
include header files directories.
Figure 7-21. Set Configuration 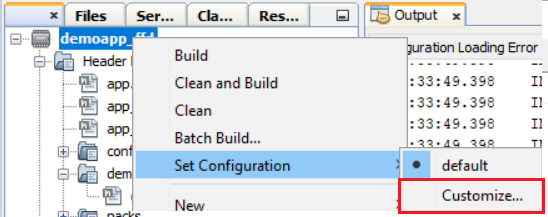
-
In Project Properties,
- select XC32-gcc
- Select Preprocessing and messages in Option categories from the drop down
- Click Include directories
Figure 7-22. Project Properties 
- Browse and include demoapp ffd
folder and click Apply and OK.
Figure 7-23. Include Directories 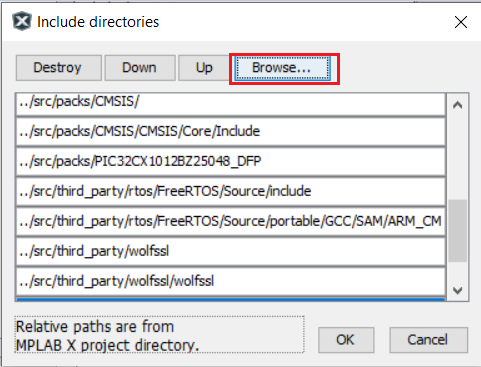
Figure 7-24. Including Files 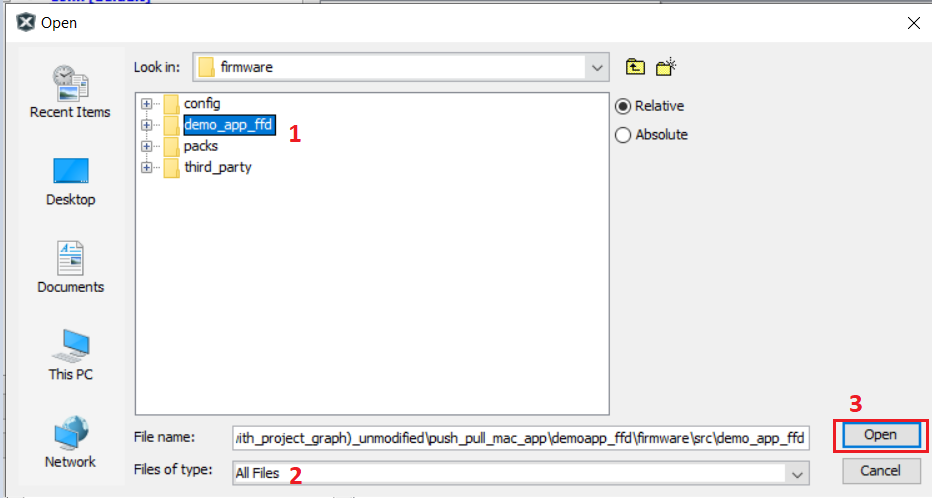
- app.h file changes: add FFD Demo
No beacon APP message ID’s.
Figure 7-25. app.h 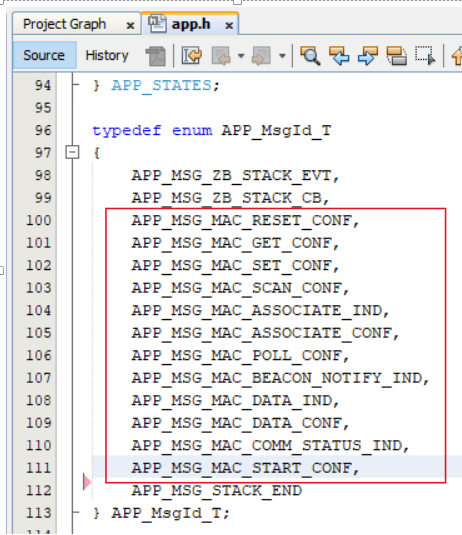
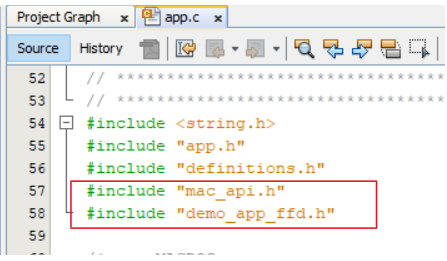
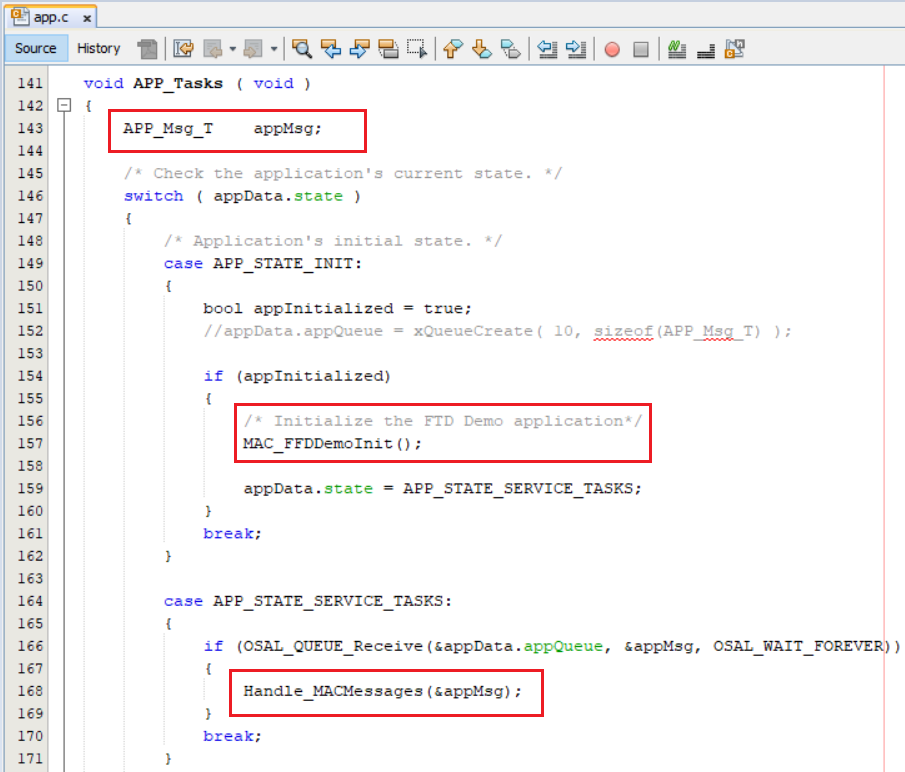
app.c file changes :
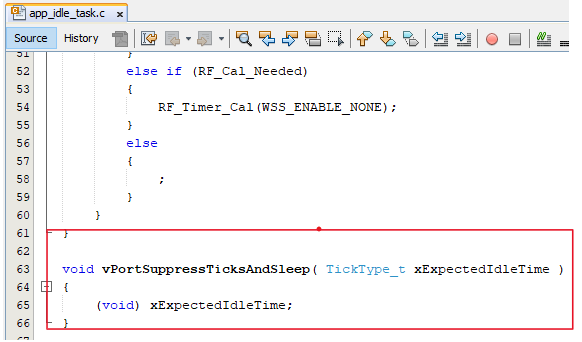
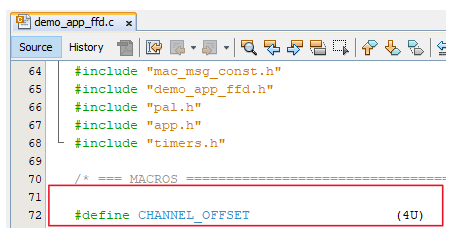
app_idle_task.c change:
For channel configuration (example:CHANNEL_OFFSET :3 , Channel => 11 + 3 = 14)
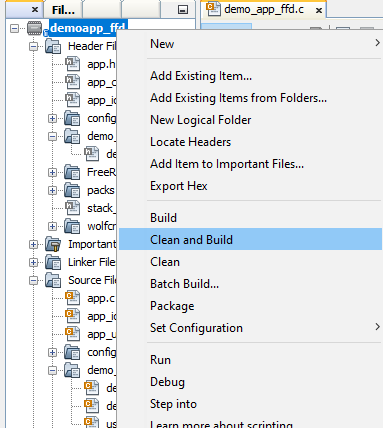
Right click on the project and Click on Clean and Build