3.3.2 Non Trust Zone Project Setup
- Create MPLAB Harmany Project with
below device and DFP version
- Device: ATSAML21J18B
- XC32 Compiler: v4.10
- DFP: SAML21_DFP (v3.6.105)
1.1 Create new 32-bit MCC Harmony Project as shown below
1.2 Select the Framework Path (Framework path must match SDK setup document)and select Next
1.3 Select Project Folder and select Next
1.4 Select the device "ATSAML21J18B" for standalone project using the SAML21 device family in the "Target Device" and click Finish
1.5 MPLABx Code Configurator will be launched automatically. Then Select "MPLAB Harmony" and Click Next for the Harmony Framework Path.
1.6 Select "Finish"
1.7 Project Graph window of the Configurator may have predefined components
Right click on the project properties and verify the selected configuration
- After creating the project as
shown in the above step go to device resource and verify RNBD was under Wireless component
Click on Plus icon under RNBD to add it under the Project Resource
- Project Graph and RNBD Module Configuration
User can Select RNBD under the Select Module Type Drop Down either of the one as shown below
- Selecting Example Application
- Expand the Drop down
under Select Example Application option and choose any one as
mentioned in the below
- Basic Data Exchange
- Transparent UART Application
4.1. Basic Data Exchange:
- Basic Data Exchange
uses only ONE SERCOM for the Data Transmission
4.2. Transparent UART:
- Transparent
UART Application uses TWO SERCOM as a Dependency for
the Data Transmission
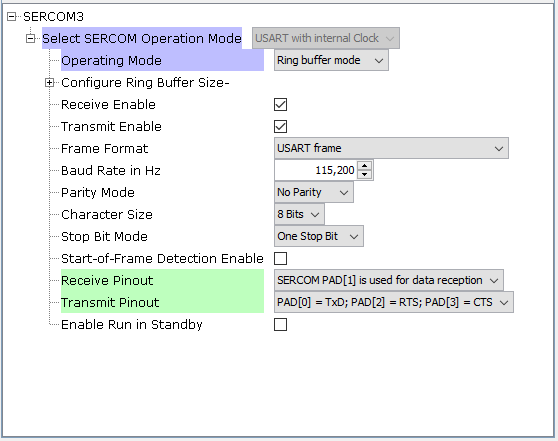
SERCOM0 Pin Setting is same as mentioned under Basic Data Exchange above.

- Transparent
UART Application uses TWO SERCOM as a Dependency for
the Data Transmission
- Expand the Drop down
under Select Example Application option and choose any one as
mentioned in the below
- PIN Settings for Example
Application:
- Basic Data Exchange Pin Settings
- Transparent UART Pin Settings
- Basic Data Exchange Pin Settings
- Code Generation and adding the example application to main.c
- After making the all the above settings click on Generate in which
code will be generated for RNBD or RN487x as per the selection
- Once after Generation
is complete include the headers for RNBD as shown below
- if Select
Module Type is selected for RNBD: #include "examples/rnbd_example.h"
Call the function RNBD_Example_Initialized(); in main() after SYS_Initialize ( NULL );
- if Select
Module Type is selected for RNBD: #include "examples/rnbd_example.h"
- After making the all the above settings click on Generate in which
code will be generated for RNBD or RN487x as per the selection
- Build the Generated Project:

- Program to the Development Board

This is the End of Non-Trust Zone project kindly refer RNBD Example1: Running Basic Data Exchange Example Application and RNBD Example 2: Running Transparent UART Example Applicaiton
