
1.29 SERCOM USART ISO7816 Smartcard
This example application demonstrates how to use the SERCOM peripheral in USART ISO7816 mode to communicate with smartcard.
Description
This example demonstrates data read and write to AT88SC1616C smartcard over USART using ISO7816 mode of communication. The example starts with reading the configuration zone data, writing 2 bytes of data and reading back. In the process, the example demonstrates various ISO7816 APIs.
Downloading and Building the Application
To clone or download this application from Github, go to the main page of this repository and then click Clone button to clone this repository or download as zip file. This content can also be downloaded using content manager by following these instructions.
Path of the application within the repository is apps/sercom/usart/usart_iso7816_smartcard/firmware.
To build the application, refer to the following table and open the project using its IDE.
| Project Name | Description |
|---|---|
| sam_l22_xpro.X | MPLABX project for SAM L22 Xplained Pro Evaluation Kit |
Setting Up the Hardware
The following table shows the target hardware for the application projects.
| Project Name | Description |
|---|---|
| sam_l22_xpro.X | SAM L22 Xplained Pro Evaluation Kit |
Setting Up SAM L22 Xplained Pro Evaluation Kit
- Connect SmartCard Xplained Pro to EXT3 header
- Insert AT88SC1616C SmartCard into SmartCard Xplained Pro socket.
- Connect the Debug USB port on the board to the computer using a micro USB cable
Running the Application
- Open the Terminal application (Ex.:Tera term) on the computer
- Connect to the EDBG Virtual COM port and configure the serial settings as
follows:
- Baud : 115200
- Data : 8 Bits
- Parity : None
- Stop : 1 Bit
- Flow Control : None
- Build and Program the application using its IDE
- The console displays the
following message
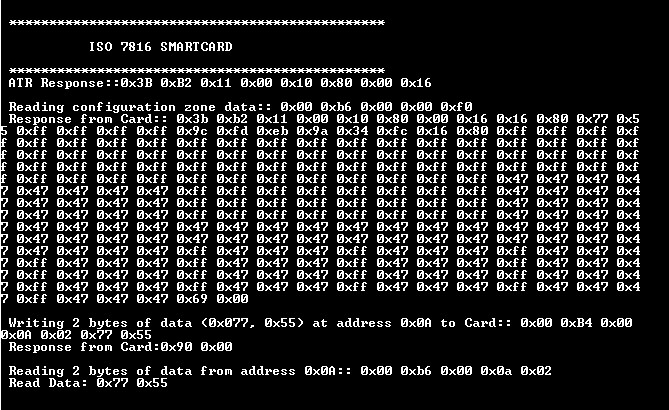
- LED is set when the read operation is completed and read data matches with written data.
| Board | LED Name |
| SAM L22 Xplained Pro Evaluation Kit | LED0 |