4 Changing Device in Atmel Studio 7.0
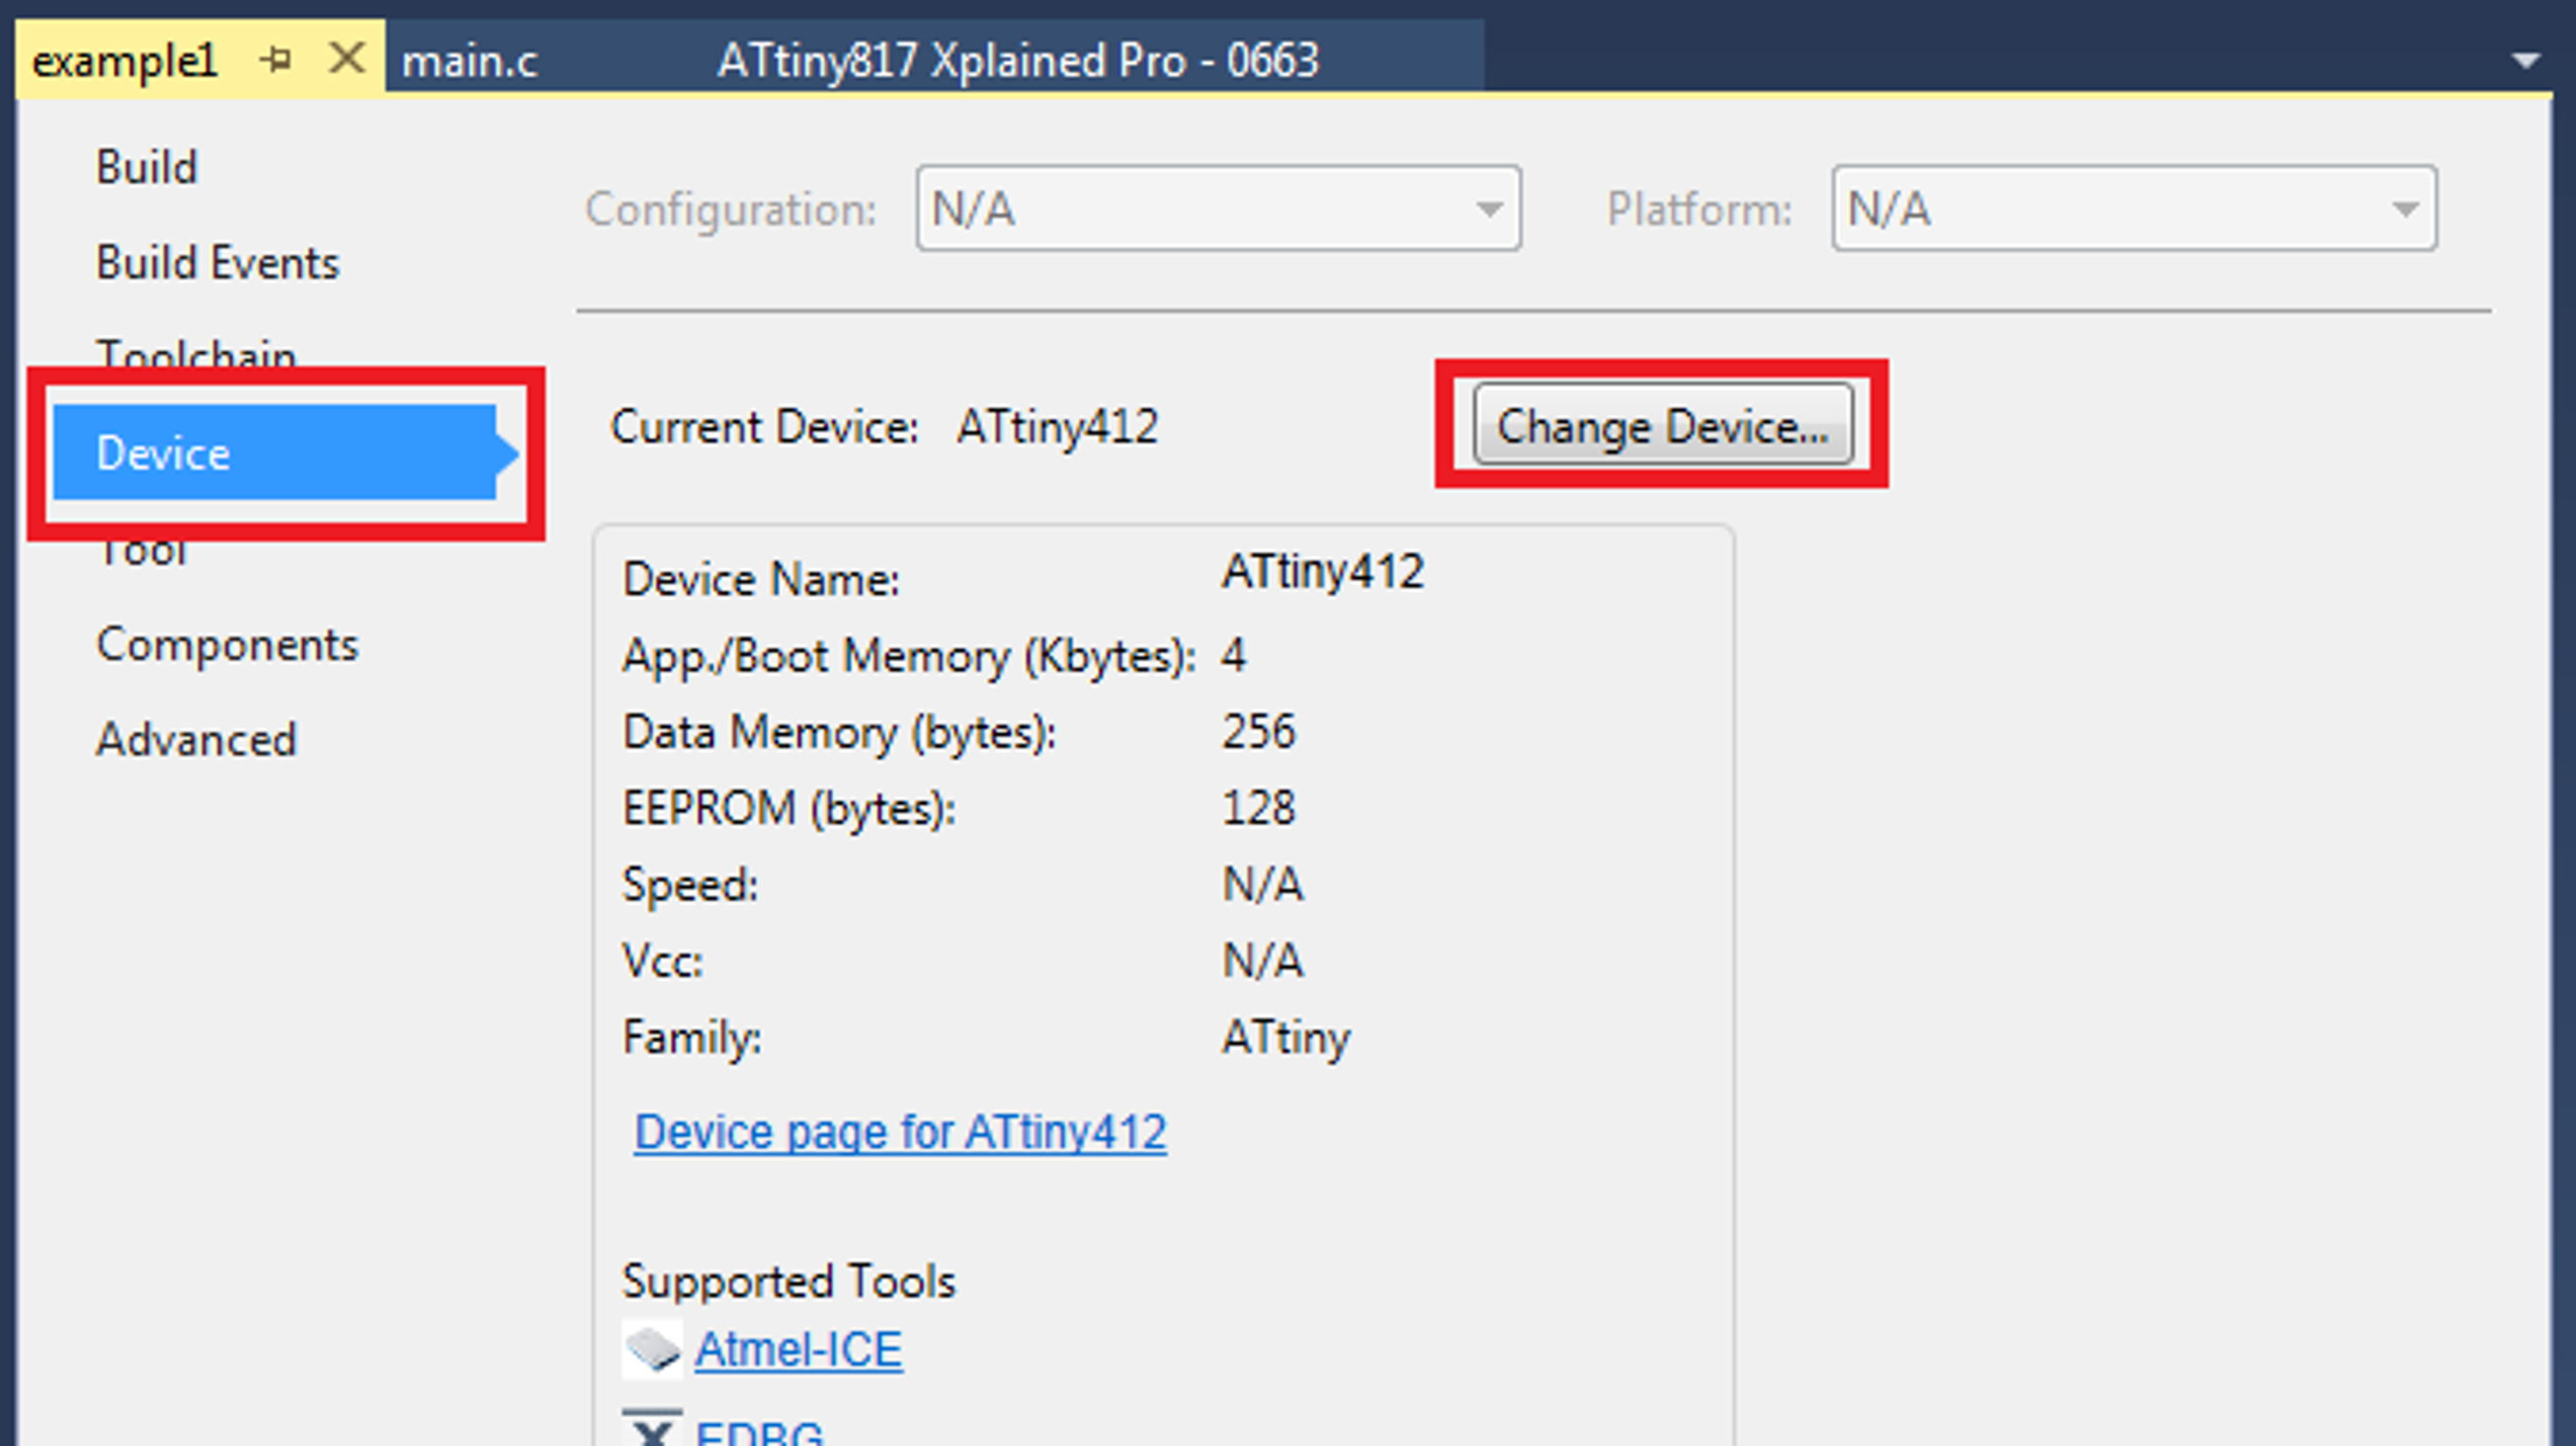
Changing device between a tinyAVR 1- and 0-series variant in an Atmel Studio 7.0 project is easy. The first step is to open the project properties as shown below.


In the following example, the device is changed from ATtiny412 to ATtiny402. First, the search field is used to search for the ATtiny402 device. The device is selected by clicking on it, and the OK button can be pressed. Note that a new device has to be selected in the menu by clicking on it. If it is not selected, clicking OK will not change device.

When the above steps are completed, multiple files and compile options are changed in the project. Amongst others, the device header file is changed. If the project uses any registers or bit names not present in the new device header file, an error will be raised when compiling the project.
