5 Observe the Output on the Serial Console
- Connect the UART Lines (TX and RX) and ground (GND) between the Host and Client
using the jumper wires as per the following table.
Table 5-1. Hardware Connection Between Host and Client PIC32CM LS60 Curiosity Pro UART UART GND Host PA12 (EXT 3, PIN14, TX)
PA13 (EXT 3, PIN 13, RX)
GND (EXT 3, PIN 2, GND)
Client (Bootloader)
PA13 (EXT 3, PIN13, RX)
PA12 (EXT 3, PIN14, TX)
GND (EXT 3, PIN 2, GND)
Figure 5-1. Hardware Connection Between Host and Client - Open two Serial console applications for the Host and Client, such as Tera Term on
the Host PC and perform the serial port setup as follows.
Figure 5-2. Host and Client Serial Port Configuration - Press the Reset push button on
both PIC32CM LS60 Curiosity Pro Evaluation Kits to reset the Host and Client
devices.
Figure 5-3. Resetting the Host and Client Boards - Observe the console message on the
Host and Client serial consoles.
Figure 5-4. Host Console Message 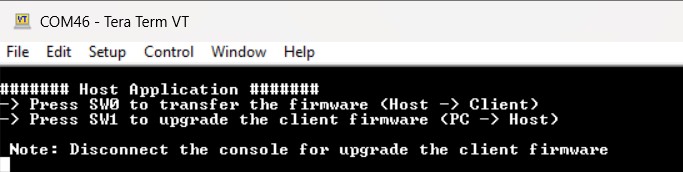
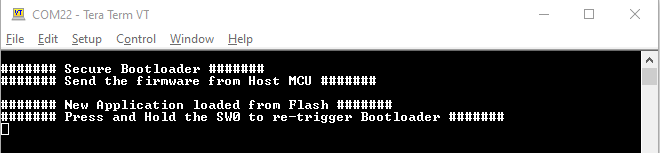
Figure 5-5. Client Console Message 
- Disconnect or close the Host MCU's serial console to give the Host PC access to transfer the client firmware.
- Press the SW1 button on the
Host evaluation board to receive the Client firmware from the PC.
Figure 5-6. Transfer of the Client Firmware onto the Host Board 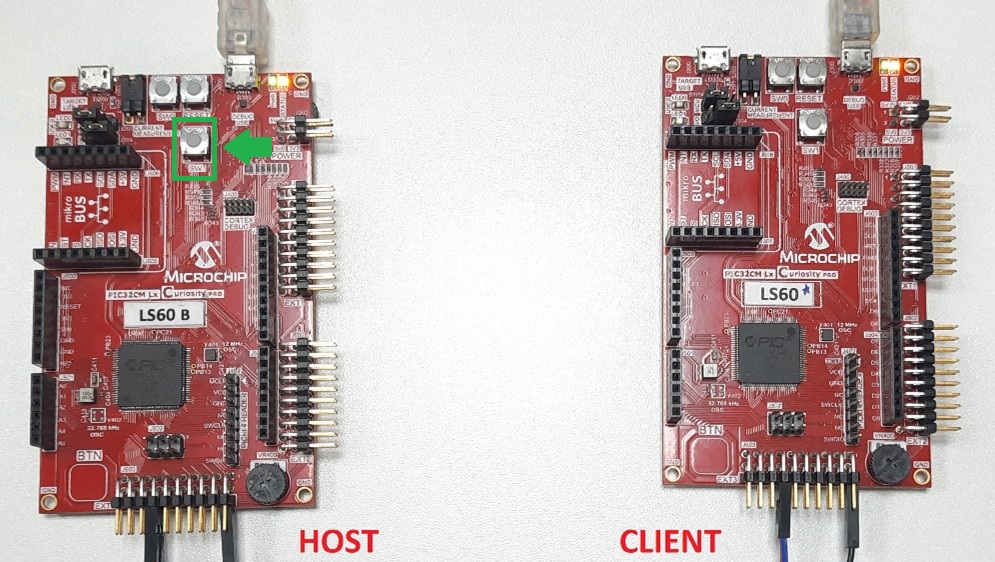 Note: The LED1 on the Host evaluation board will illuminate to indicate that the Host MCU is prepared for the client firmware reception.
Figure 5-7. Indication of the Client Firmware Reception Process - Open the command prompt and run the
python script
(btl_host.py) as used to transfer the target application binary file with the configuration bits to the Host MCU board.python <harmony3_path>/bootloader/tools/btl_host.py -v -i <COM PORT> -d PIC32CM -a 0x9000 -f <downloaded path>/pic32cm_ls60_secure_firmware_upgrade/hex/test_app/test_app_secure.X.production.bin -c <downloaded path>/pic32cm_ls60_secure_firmware_upgrade/scripts/application_user_configurations_out.txtNote: Users need to install the pyserial package before running the python script.Figure 5-8. Running the Python Script Figure 5-9. Completing of the Firmware Transfer - Reopen the serial console as mentioned in Step 2.
- Press the SW0 button on the Host
evaluation board to upgrade the Client firmware. The progress of the firmware
upgrade will be displayed in the terminal console.
Figure 5-10. Starting the Firmware Upgrade Process on the Client 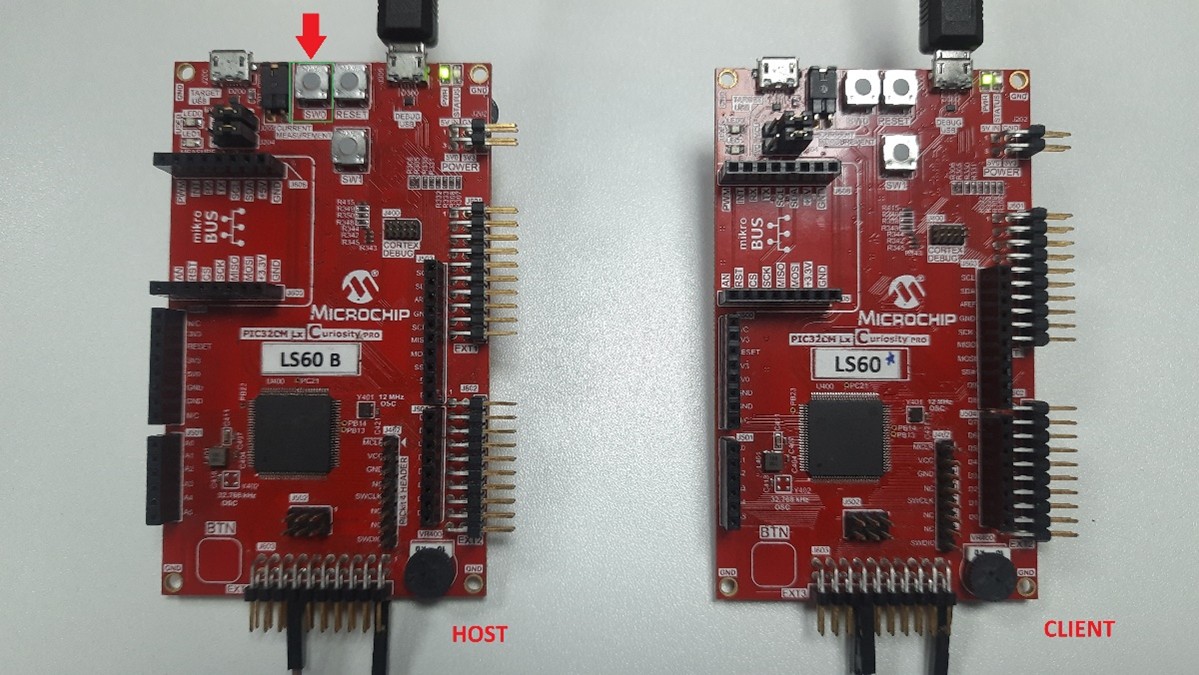 Note: The LED0 on the Host evaluation board will illuminate to indicate that the Host MCU has initiated the secure firmware upgrade on the client.
Figure 5-11. Indication of the Secure Firmware Upgrade Process on the Client Figure 5-12. Host Firmware Upgrade Progress 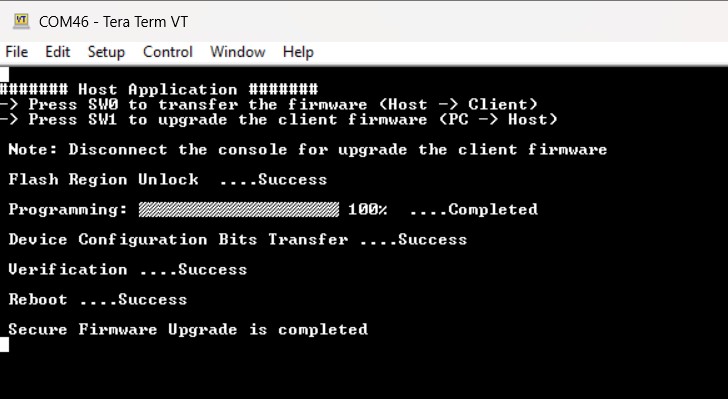
- Once the firmware update is
completed, the LED0 on the Host evaluation board will be turned off.
Figure 5-13. Host Firmware Upgrade Completion - On the Client evaluation board, the
LED0 will start blinking and display the startup message on the terminal
console.
Figure 5-14. Client Firmware Upgrade Completion