
5.1 Creating the Project
Two projects are required for implementing the functionalities: one for host/transmitter and the other for client/receiver.
To create an MPLAB Harmony v3-based project, follow these steps:
- From the Start menu, launch MPLAB® X IDE.
- On the File menu, select
New Project or click on the New Project icon.
Figure 5-1. New Project in MPLAB X IDE v6.20 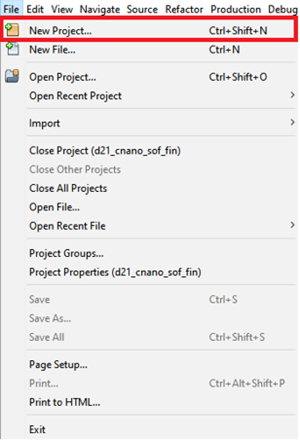
- In the New Project window, in the left Navigation bar, under Steps click Choose Project.
- In the Choose Project
property page:
- For categories, select Microchip Embedded.
- For projects, select
Application Project(s).
Figure 5-2. Choose Project 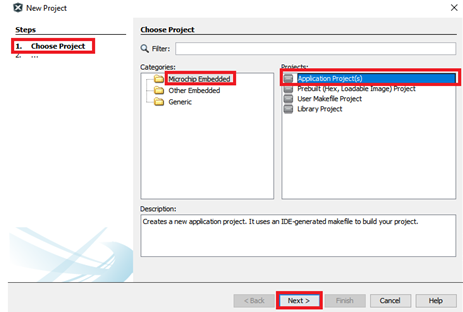
- Click Next.
- In the left Navigation bar, click Select Device.
- In the Select Device
property page, in the Device box, type or select the device
ATSAMD21G17D for the SAM D21 Curiosity Nano Evaluation Kit. Note: For the SAM E70 Xplained Ultra Evaluation Kit, select the device ATSAME70Q21B.
Figure 5-3. Device Selection 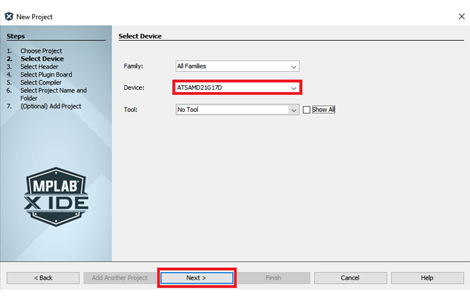
- Click Next.
- In the left Navigation bar, click Select Compiler.
- In the Select Compiler
property page, under Compiler Toolchains, click and expand XC32 list of options,
and then select XC32 (v4.45).
Figure 5-4. XC32 Compiler Selection 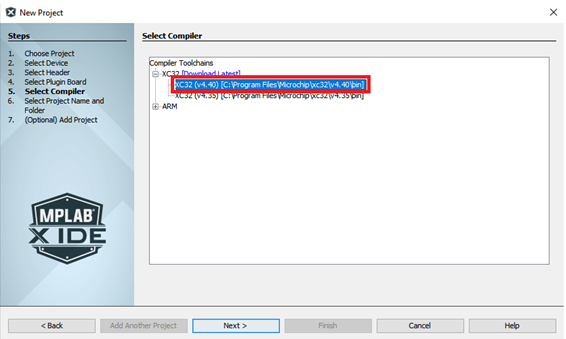
- Click Next.
- In the left Navigation bar, click Select Project Name and Folder.
- In the Select Project Name and
Folder property page, enter the Project Name and Project Location.
Figure 5-5. Project Name and Folder Settings 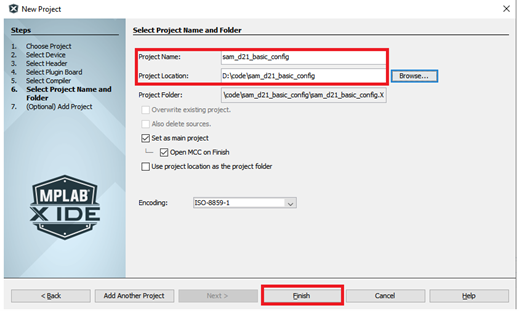
- Click Finish. Then, MPLAB Code Configurator Window will be displayed. It comprises of Project Resources, Device Resources, Project Graph, and Configuration options.

Note: The procedural steps mentioned in the section Creating the Project can be used to
create a project on the SAM E70 Xplained Ultra Evaluation Kit with the changes mentioned
in Step 6.