5.8 Supporting Interrupts for AVR® Devices
This section demonstrates how to enable interrupts in the bootloader and application code for AVR® devices.
Description: It is always recommended to avoid using interrupts in the bootloader code, when possible, to avoid errors due to complexity, but user applications can freely support interrupts. Enabling interrupts for AVR devices in the application space is as simple as setting up the interrupt sources and creating the desired functionality. There are no additional steps required within the bootloader project in order to achieve basic interrupt support in the application space. The following section will walk through the setup of an application that is blinking the LED using a timer interrupt instead of using the delay driver.
- Set the bootloader project as the main
project. From the Projects tab, right click on the project folder and select Set
as Main Project.
Figure 5-178 5-181. Set the Bootloader to the Main Project 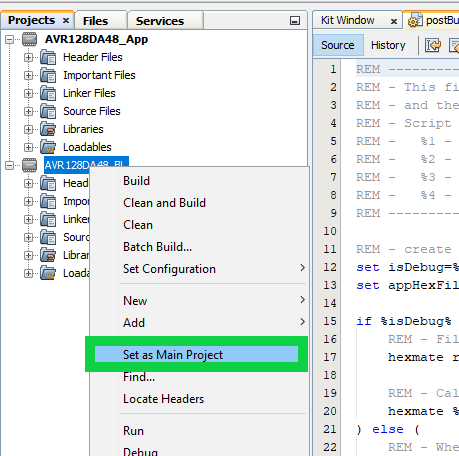
- Open MCC by clicking the icon in
the toolbar.
Figure 5-179 5-182. Open MCC 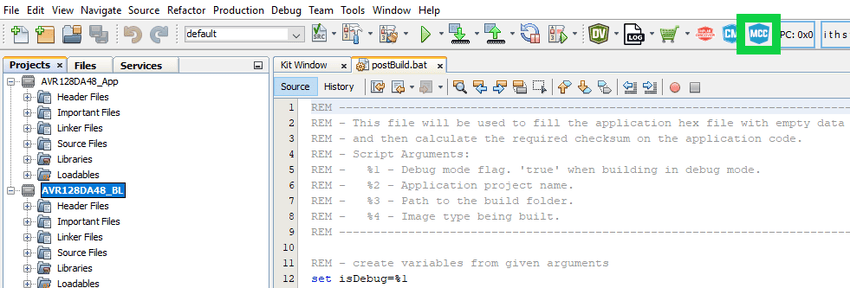
- Open the Interrupt Manager tab and
enable the sliders for Global Interrupt Enable and Interrupt Vector Select
Enable.
Figure 5-180. Set the Bootloader Interrupt Manager 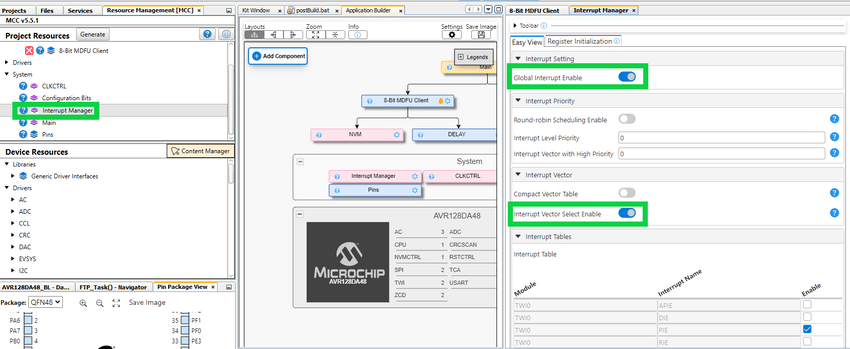
- Set the application project as the main
project. From the Projects tab, right click on the project folder and select Set
as Main Project.
Figure 5-178 5-181. Set the Application as the Main Project 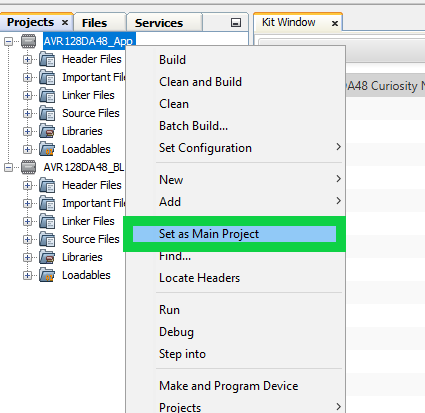
- Open MCC by clicking the icon in
the toolbar.
Figure 5-179 5-182. Open MCC 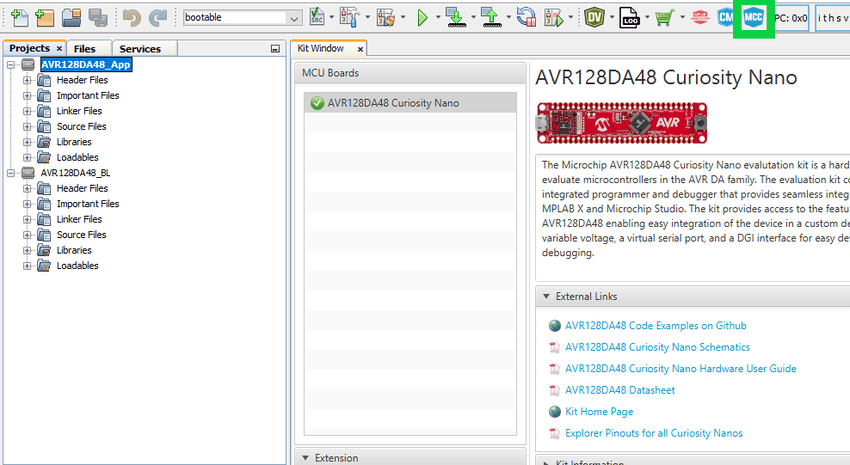
- Navigate to the Project Resources
tab, and click the red x-box next to the Delay module.
Figure 5-183. Remove the Delay driver 
- Navigate to the Device Resources
tab and add the TCA0 driver.
Figure 5-184. Add TCA0 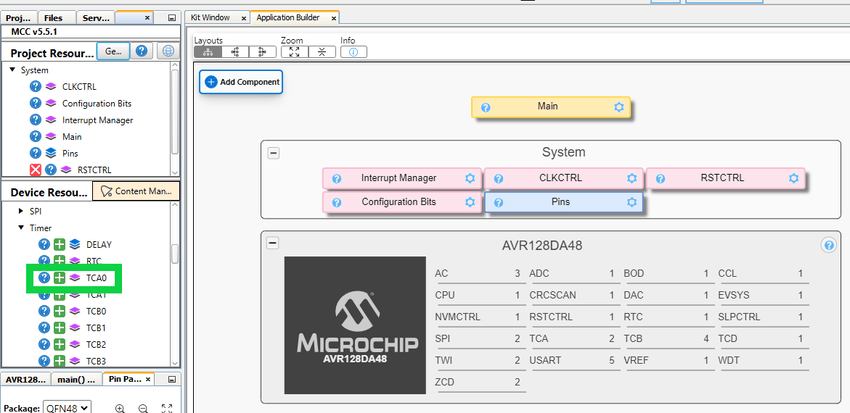
- Setup the TCA0 driver to use a
time-out of 150 ms or more and then enable the Overflow Interrupt.
Figure 5-185. Configure the TCA0 Module 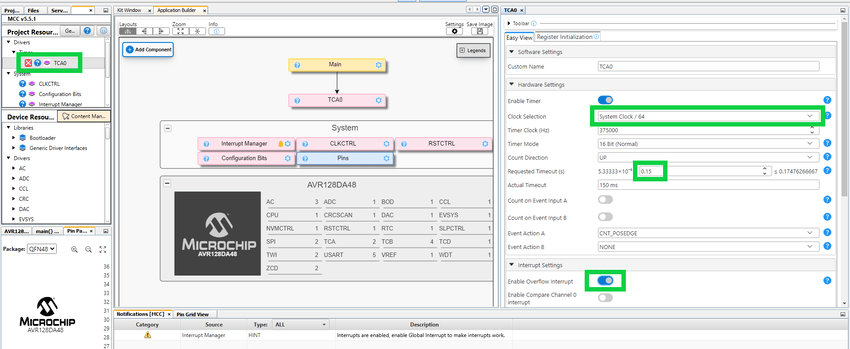
- Setup the TCA0 driver to use a
time-out of 150 ms or more and then enable the Overflow Interrupt.
- Notice that once the Overflow Interrupt
is enabled, there is a notification for enabling global interrupts. Navigate to the
Interrupt Manager tab and flip the switch for Global Interrupt Enable.
Figure 5-186. Enable Global Interrupts 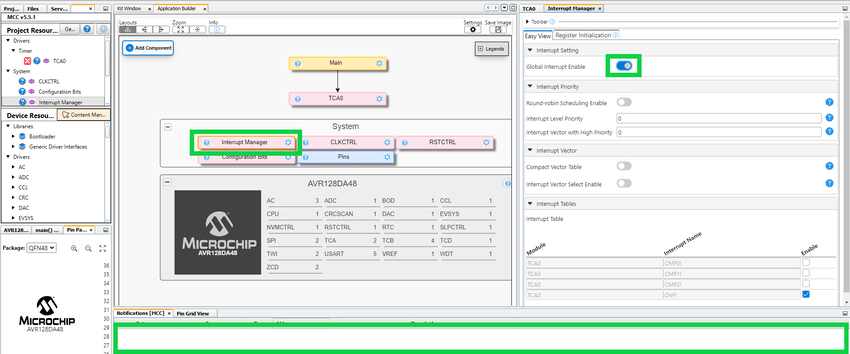
- Generate the new timer code and observe
the new files being generated in the Output window.
Figure 5-187. Regenerate the MCC Code 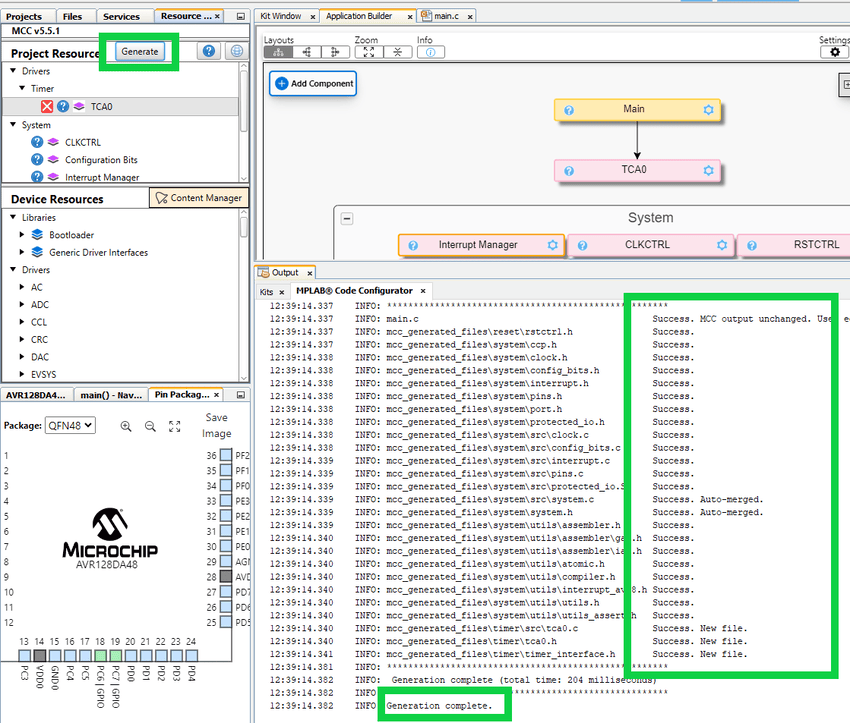
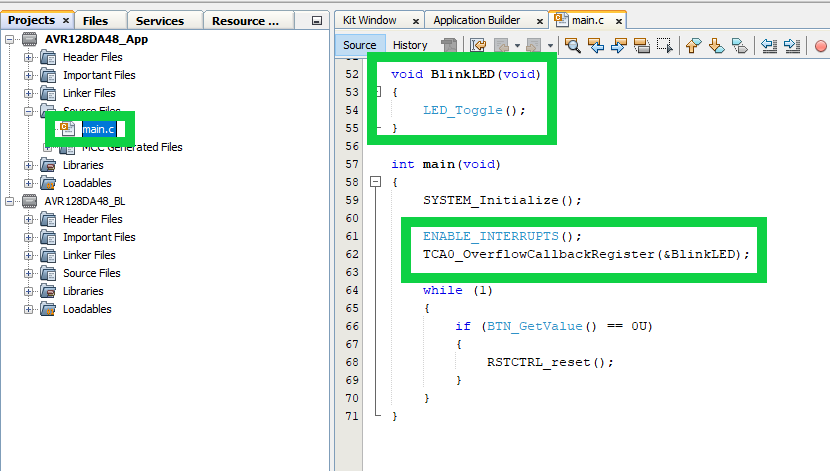
- Lastly, update the
main.cto blink the LED using the overflow interrupt callback. Remove the calls to the Delay driver and update themain.csimilar to the example below.Figure 5-188. Update the Blinking LED Code to Use Interrupts 