1.2 SAMD21 Fan State Condition Monitoring Demo
Overview
In this tutorial, the Microchip MPLAB® Machine Learning Development Suite is used to build a predictive maintenance application for a fan that can run entirely on the SAMD21 microcontroller (MCU). Specifically, the SAMD21 Machine Learning Evaluation Kit with Bosch IMU, which incorporates a 3-axis accelerometer and 3-axis gyro sensor, detecting the fan states of interest.
This tutorial focuses on predictive maintenance, but these technologies are applicable to a to various domains where classifying time series sensor data is critical, such as gesture recognition, activity recognition, sound classification and keyword spotting.
Objective
Highlight a typical industrial use case example for the Microchip MPLAB® Machine Learning Development Suite
Build a data pipeline to extract features in real time on the SAMD21 ML Evaluation Kit
Train a classification model using the Microchip MPLAB® Machine Learning Development Suite’s AutoML feature
Evaluate model performance within the MPLAB® Machine Learning Development Suite environment
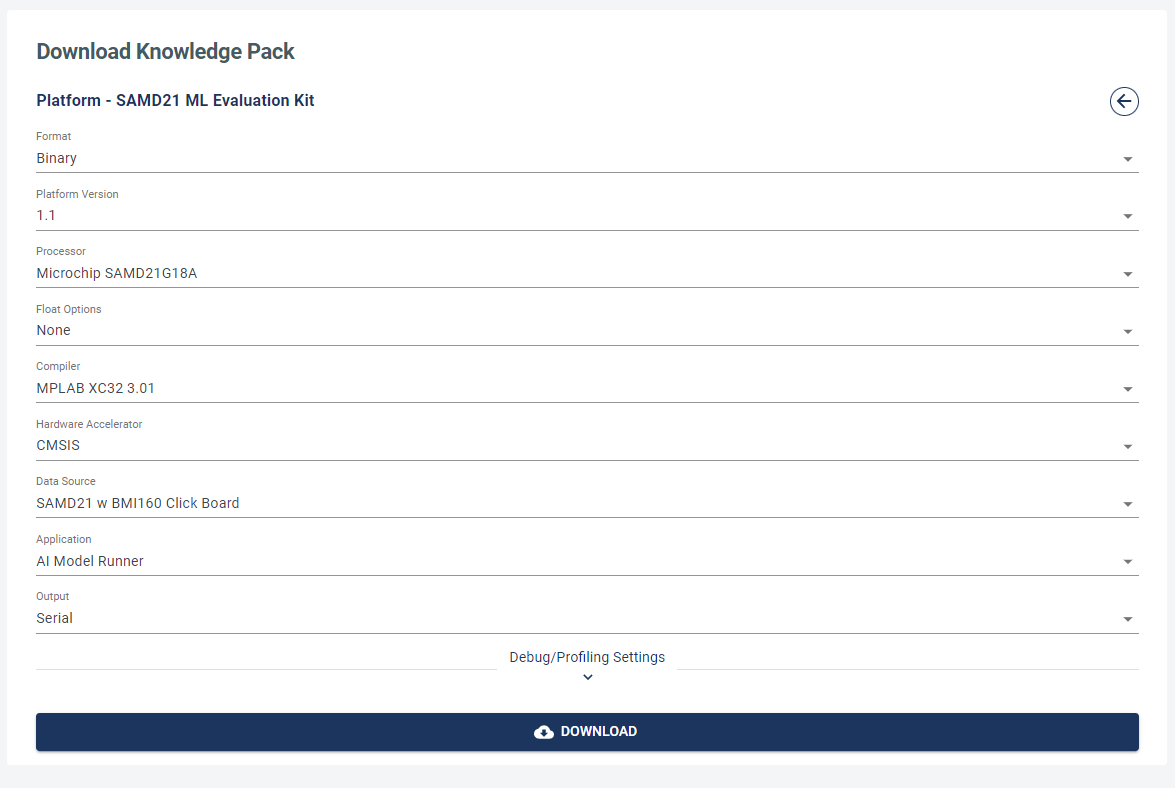
Convert the model into a Knowledge Pack that can be tested on the SAMD21 ML Evaluation Kit
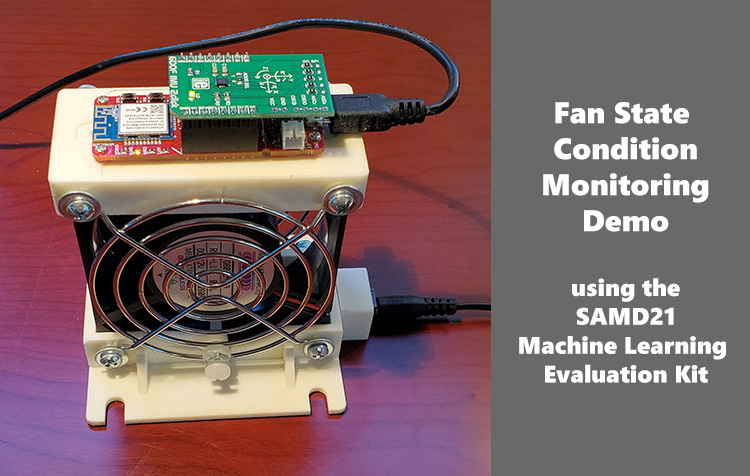
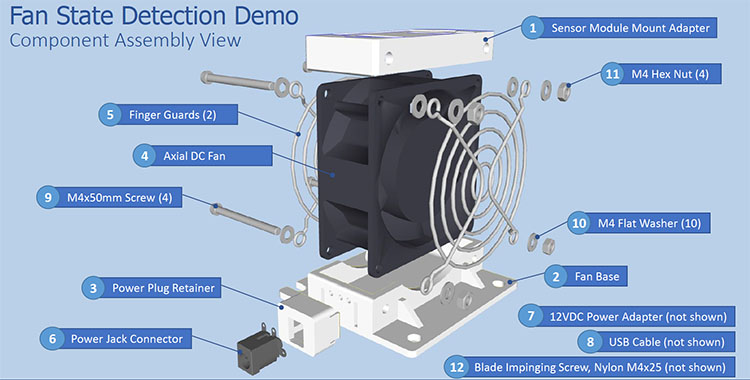
The Demo Setup
To illustrate how the SAMD21 MCU utilizes motion/vibration sensors along with the MPLAB Machine Learning Development Suite to create accurate Internet of Things (IoT) edge inference models, a simple fan apparatus was constructed that can represent a wide range of rotating equipment use case examples. The demo fan apparatus uses a basic axial cooling fan, some 3D printed assembly parts, a 12 VDC power supply and some off-the-shelf hardware that allows the creation of a number of fan state conditions for measurement and model prediction.
This fan setup collects state information for fan ON versus OFF states, as well as blocked airflow, mount shocks and fan blade interference events.
The Sensor Dataset
As it is difficult for users to replicate the same physical device themselves, the dataset that was already collected is provided with the device as described above.
Download the dataset here: Fan Demo Dataset.
Unzip the folder on your computer.
Uploading the Dataset with the ML SDK
To upload the example dataset, you will need the MPLAB ML SDK. The installation guide can be found in the Installation Instructions Documentation.
In the unzipped folder, locate the .PROJ file and upload
the dataset by running the following command in the ML SDK:
from mplabml import Client
client = Client()
client.upload_project('<Project-Name>', r'<Project-File-Path.proj>')

# Replace <Project-Name> with the name you want to save your project
# Replace <Project-File-Path.proj> with the .PROJ file path location on your computer
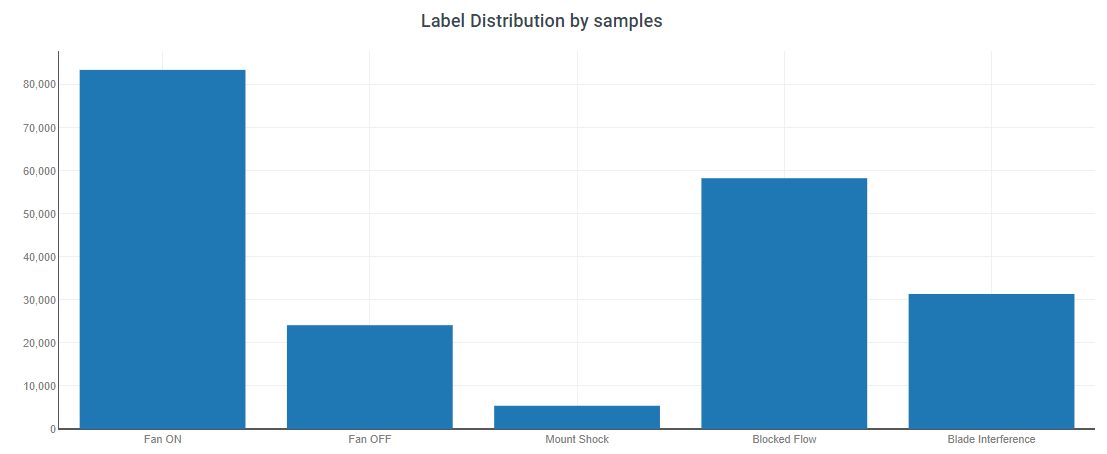
Labels
There are five different labels in the fan demo dataset:
Label | Example |
|---|---|
Fan OFF |  |
Fan ON |  |
Flow Blocked (Fan ON) |  |
Blade Inference (Fan ON) |  |
Mount Shock (Fan OFF) |  |
Metadata
In the Project Properties, you can also define custom metadata to describe your files. As the vibration characteristics varies considerably depending on the type of surface the fan is resting on, elect to create a metadata field to record what mounting surface type was used for each training file. The options provided include: Concrete, Solid Wood Tabletop, Fabric Covered Surface (like a trade show booth table with a skirt), Padded Surface or Unsturdy Tabletop.
Recording this information for each data file captured provides the flexibility to filter data later on or create submodels for each type of surface used.
In addition to this, choose to capture who collected the data. That way, if it is discovered later that a test technician misunderstood the data collection methodology or introduced some adverse bias into the dataset, the means to filter that technician’s data from the model without reconstructing the entire dataset is available.
Adding a Query
With training data and useful metadata defined, the first step in generating a model within the MPLAB® Machine Learning Development Suite application is to create a query to filter the data to construct our model.
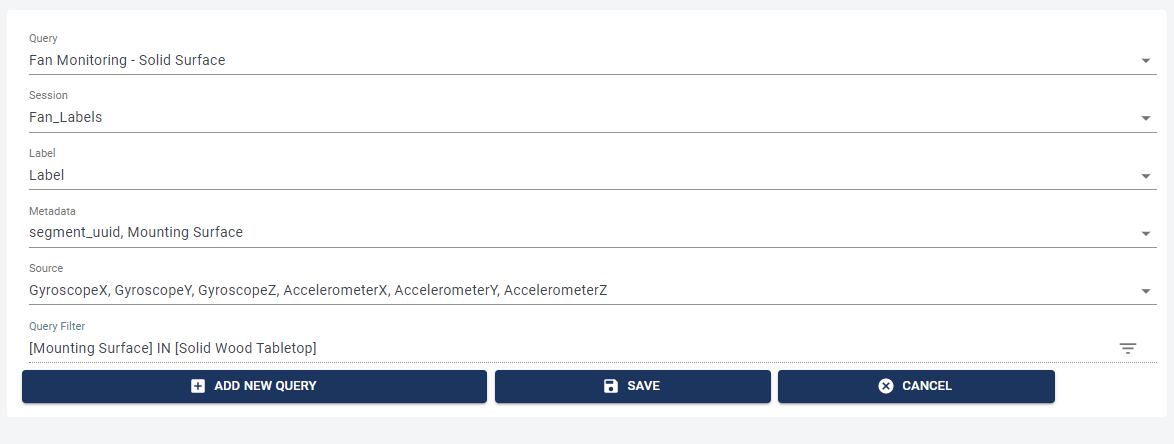
Give the query a suitable name, “Fan Monitoring - Solid Surface”, that describes the intent to focus only on the solid wood surface data for model creation. For metadata, ensure that “Mounting Surface” is among the selected criteria. Finally, use the Query Filter line item to define a constraint that only uses data where the metadata field “Mounting Surface” = “Solid Wood Tabletop”. With this subset, a tailored inference model for hard surface fan use is produced.
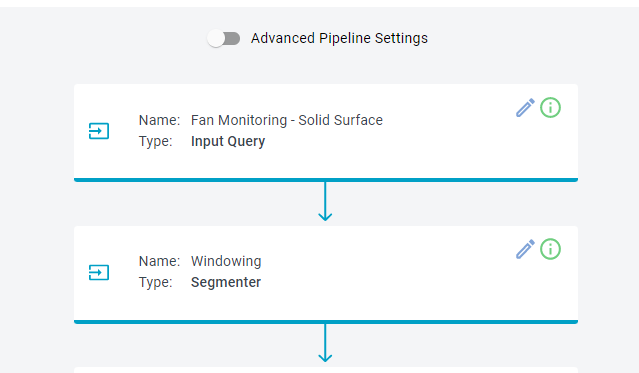
Building a Pipeline
To build a model, first you need to generate a pipeline that extracts the desired data segments by running the corresponding query. Each pipeline also contains an instruction set on how to convert each segment to a set of features that are used in multiple machine learning algorithms.
The MPLAB® Machine Learning Development Suite AutoML engine explores multiple combinations of ML algorithms with different features. Then, the five best models are returned based on the adopted evaluation metrics.
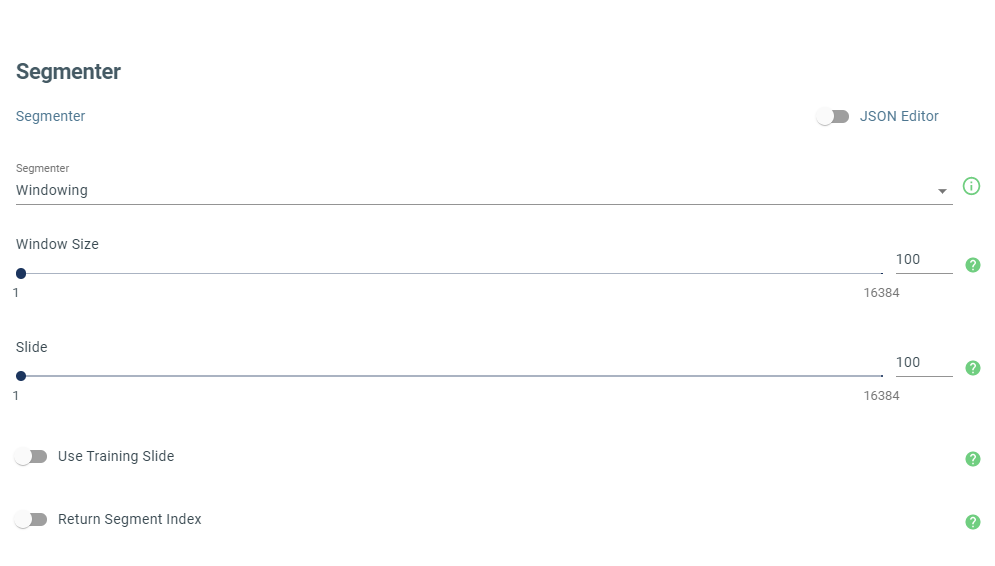
To begin building a pipeline, go to the Build Model in the left menu. Name your pipeline, then choose the query you prepared previously from the drop-down menu. A critical parameter to define up front is the segment length for classification.
While using a sliding window of fixed size, it is important to understand that the labeled segments consist of mostly continuous data for all but the Mount Shock event. Mount Shocks are taps of the finger on the fan assembly; therefore, those events are represented with discrete segments of a uniform length. When the dataset was created, the finger tapping Shock event fit consistently within a window of 250 ms and a sensor sample rate defined at 400 Hz; this equates to a 100-sample window. The sliding window for the segment length cannot exceed this event duration (in order to detect it); therefore, also elect to use a window segment size of 100 samples.
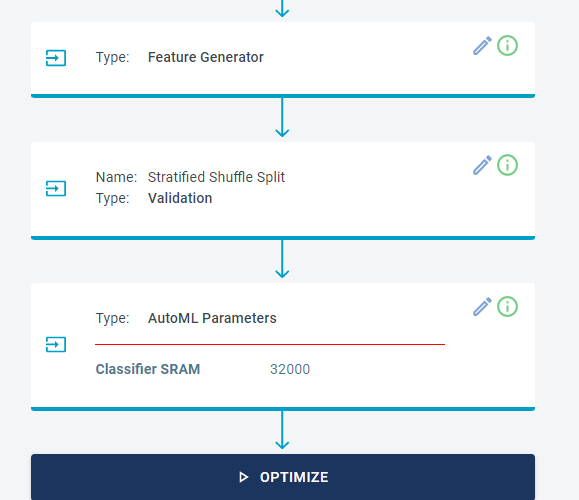
Leave the other parameters with their default values, then click OPTIMIZE to generate candidate models.
After several minutes of computation, the MPLAB Machine Learning Development Suite AutoML will provide a number of candidate models to evaluate:
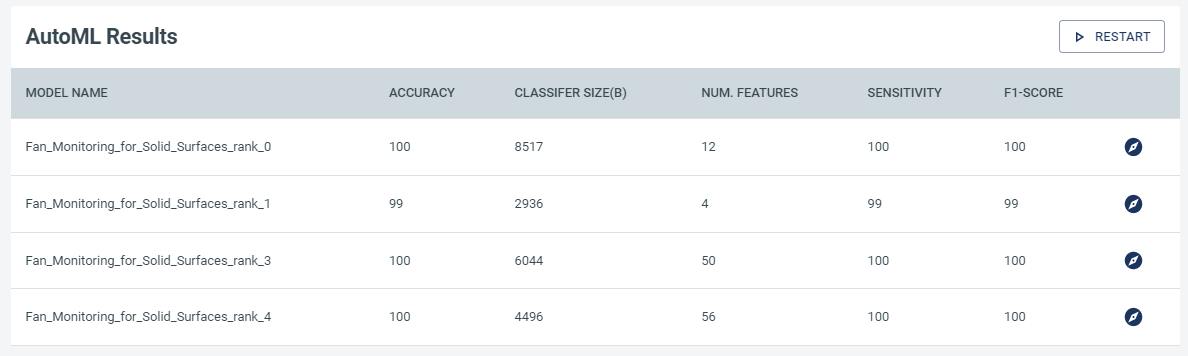
With the Explore Model tab, examine each of these candidate models in detail. More information on the data provided in explore model can be found in the Exploring Model Details Documentation. Looking across the presented options, the rank_2 model appears to be a good choice. Its confusion matrix is as follows:

Testing and Deploying
After selecting a satisfactory model, test it against model data that was NOT used as part of the training process. Do that in the Test Model tab. Provided the results still look satisfactory, then proceed to the Download Model tab to create the embedded code optimized and suited for the SAMD21 device.