3.2.6 Project Setup
- Create a New Project in MPLAB® X IDE.

- The Validation Hardware used with Microchip Bluetooth Data Mobile App is shown in the process below. AVR128DA48 8-bit devices are used for reference.
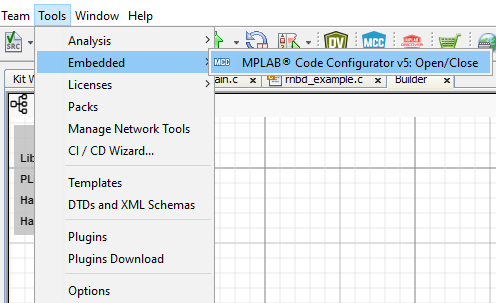
- Open MCC by clicking Tools →
Embedded → MPLAB® Code Configurator OR click the MCC icon.
 or
or 
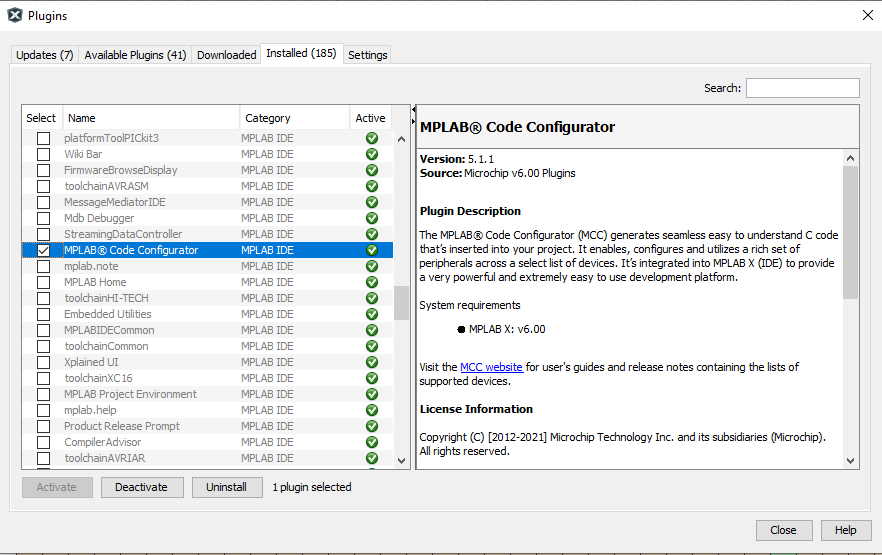
- If MCC is not available; it is
required to be installed. Navigate to Tools→ Plugins. Under Available Plugins
select MPLAB® Code Configurator, ensure the checkbox is selected and press
Install. Once this installation is completed, MCC will be
available.

- On launching MCC click on
Content Manager button.
WARNING Kindly use mentioned Driver Version's only as shown in the below image - Expand Libraries section
and load the available version of rnbd-rn487x-host-driver BLE Library
- Common for PIC
& AVR
- Common for PIC
& AVR
- Expand Drivers section
and load the below version of UART Drivers
- Click on Apply
Button to finish the Library and Driver Configurations:
- Expand Libraries section
and load the available version of rnbd-rn487x-host-driver BLE Library
- From the Device Resources panel
under Libraries dropdown select: rnbd-rn487x BLE Module.
Add the RNBD-RN487x from Device Resource to Project Resource as below
Once RNBD-RN487x driver was loaded to the project resource choose USART0 as UART Hardware Dependency Selector in which GUI will be expanded for other configuration setting tab
After the initial setup, Default RNBD-RN487x Configuration populate as below
- The Notifications [MCC]
tab will appear after the library addition to describe required actions. The
library requires the Reset Pin to be connected to the Module, which needs to be
assigned to a pin. Select and configure the dependent UART instance under
Dependency Selector.

-
Generating Example Applications:
- Enable Sample Examples toggle button ---> Under Reference Example
drop Down choose any of the example application as listed below,
- Basic Data Exchange
- Transparent
UART Application
Note:Any one of the Examples can only be selected with is common for both RNBD and RN487x
- Enable Sample Examples toggle button ---> Under Reference Example
drop Down choose any of the example application as listed below,
- Clock Settings:
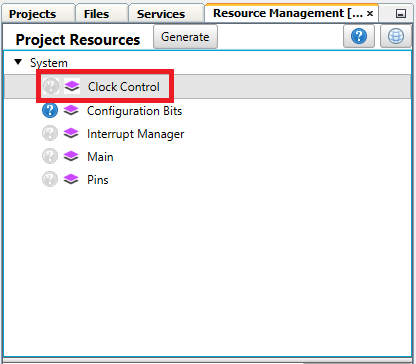
- From the Project Resource
panel under System select Clock Control

-
Set Internal Oscillator Frequency to 20 MHz system clock, Prescaler Enable option should be Enabled and Prescaler Divison should be set to 2x.
- From the Project Resource
panel under System select Clock Control
- UART Settings:
- AVR
- NOTE: The
below UART selections are applicable for both Transparent UART
Application and Basic Data Exchange (USART0 and USART1)
- NOTE: The
below UART selections are applicable for both Transparent UART
Application and Basic Data Exchange (USART0 and USART1)
- AVR
- Global Interrupt Settings:
- Click on Interrupt Manager under System settings
- Click on Interrupt Manager under System settings
