6 Updating Binary and System Image into the Target Board
This section describes how to update or flash the system image. The pre-build images include pre-build driver and firmware binaries, which are available at GitHub.
The SAM-BA® tool is used to flash the binaries
into the target board.
Note: Ensure that
the SAM-BA tool is installed in the host machine before updating the system image.
The scripts in the demo package use 3.2.x when user selects in step 5 of the following procedure.
For additional information, refer to the following:
To start flashing, perform the following steps:
- Download the pre-built images from github.com/linux4wilc/wilc_demo.
- Unzip the downloaded file.
- Once the new image is built as
described in Chapter 2, Building Linux for SAMA5D4 Xplained Ultra
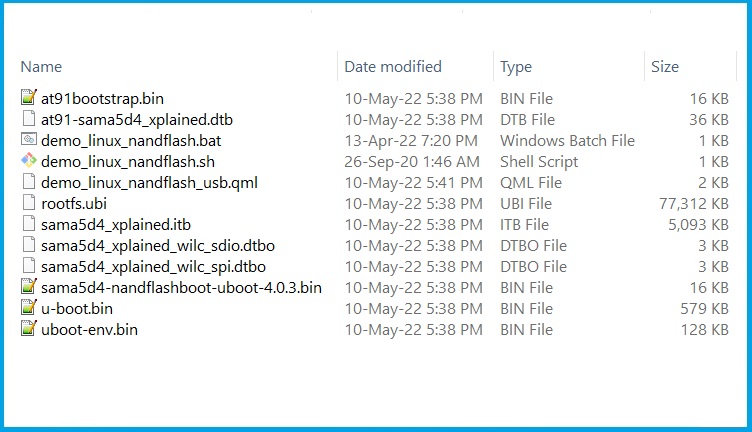
Board, these files must be copied from the
buildroot-at91\output\imagesdirectory to the directory where thedemo_linux_nandflash_usb.qmlfile is available.Figure 6-1. List of Files in buildroot\output\images Location 
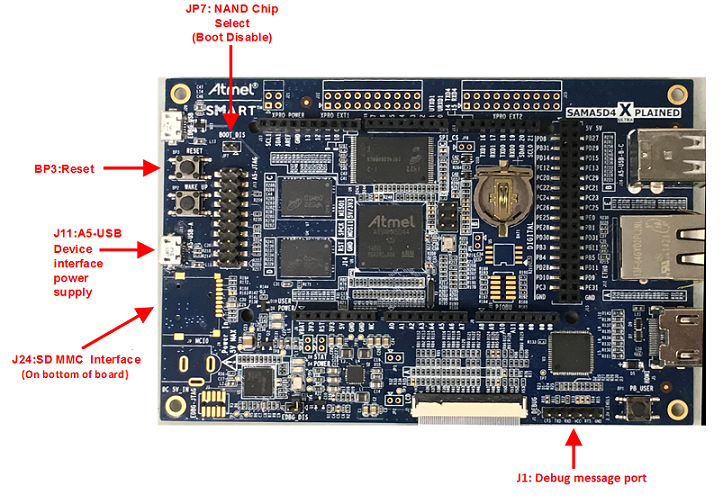
- Add the jumper at JP7 and connect
to the host PC via the USB port at J11. Ensure that the host machine completes
the USB serial port connection and then remove the jumper at JP7. The following
figure shows the SAMA5D4 adapter connections.
Figure 6-2. SAMA5D4 Adapter Connections 
- Execute the
demo_linux_nandflash.bat(for Windows®) file or thedemo_linux_nandflash.sh(for Linux) file.Note:The output log can be viewed via J1 serial port.- By default, the
demo_linux_nandflash.shfile hassam-babinary for 32-bit operating system. For 64-bit operating system, change thesam-batosam-ba_64in the same file. - Execute the script in
the super user mode. If sam-ba 3.2 is installed, use
demo_linux_nandflash_3_2.batordemo_linux_nandflash_3_2.shinstead.
Open the serial terminal on PC via the COM port, with the following configurations:- 115200 baud rate
- 8-bit data
- No parity
- One stop bit
- No flow control
- By default, the
- Successful download of the system image into the board is indicated by a log file, which opens automatically. This log file contains all the download process history.
