
5.1 Board Validation Check
The EV42J24A evaluation kit has a CEC1736 device with predefined OTP settings and a Soteria-G3 firmware SPI image. With this device, a simple validation check can be performed to verify that the board is working properly.
The following procedure can be used to verify that the board is working correctly:
- Verify that all jumpers are in their default positions as described in the relevant section.
- Make sure terminal window software is installed on the PC and can run multiple windows. Tera Term was used for this test.
- Connect micro-USB cables to connectors P2 and P3 and to a PC. These provide power to the board and allow monitoring of the output from the CEC173x and the MEC1723.
- Open the first “Tera Term” window,
then set and select “Serial” new COM port (e.g., COM10).
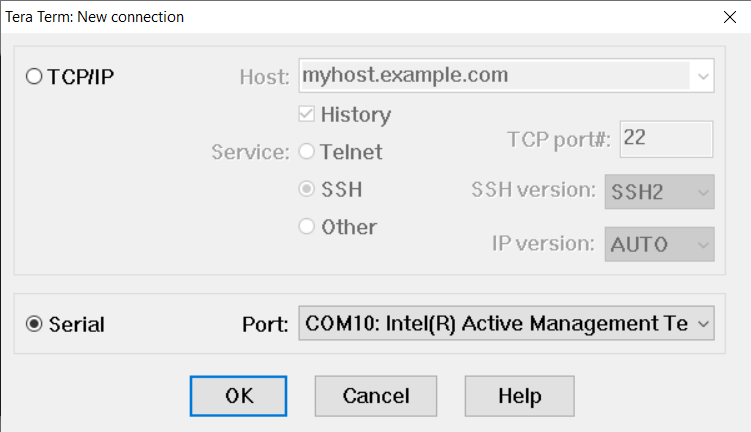
- Go to “Setup” ➜ “Serial port”, then
select “115200-8-n-1-n”.
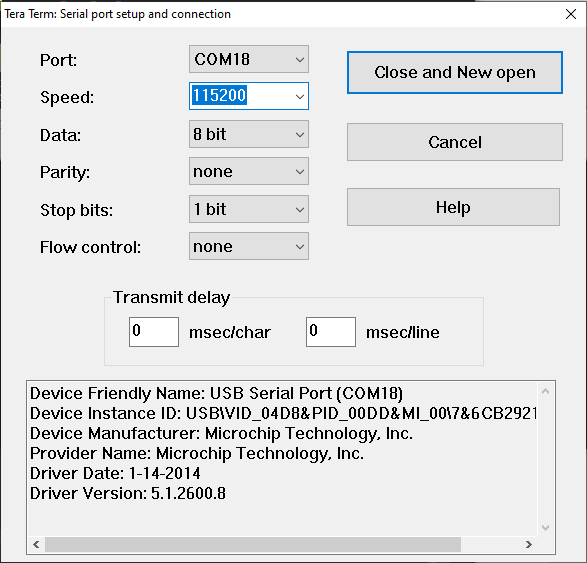
- Repeat Steps 4 and 5 to set up the other Tera Term window. Both must have their serial port baud rate set to 115200.
- Press the Reset button S1 on the EV42J24A development board. The board will follow an
internally programmed routine and produce the following Tera Term output logs.
Table 5-1. Board Validation Output Logs CEC1736 Serial Log Output MEC1723 Serial Log Output 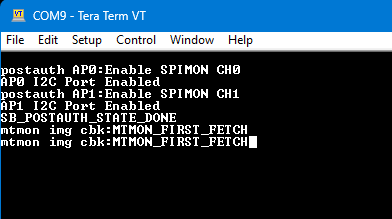
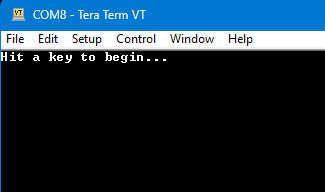
- Move the cursor to the MEC1723 Output
Log and press any key. The following output will appear if everything is operating
correctly.
Figure 5-1. Final MEC1723 Output Log 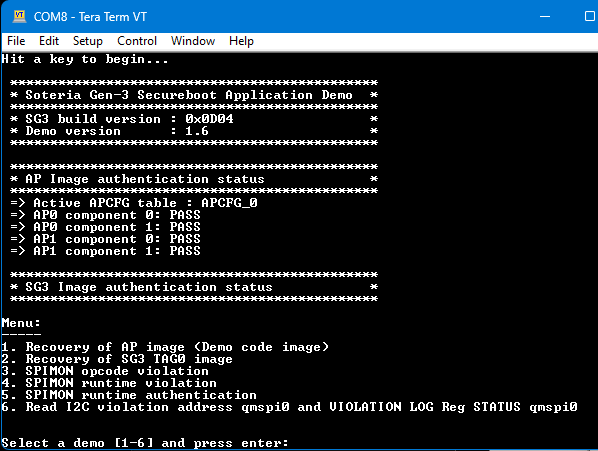
: The logs shown are examples only. The actual
results may vary depending on the test environment and the Soteria-G3 firmware release
version being used. The above is expected as of the time of release of this development
kit, using Tera Term software and the CEC1736 device used for testing. Devices
programmed with TPDS will overwrite the default test image, and the log will not be the
same.
Performing the validation check ensures board operation and confirms that the devices and board will operate with the Trust Platform Design Suite (TPDS) tools.