4.1 MCC Demo FFD Project creation with MAC component
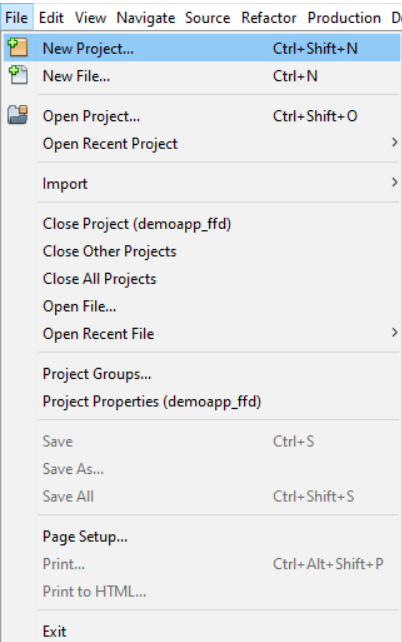
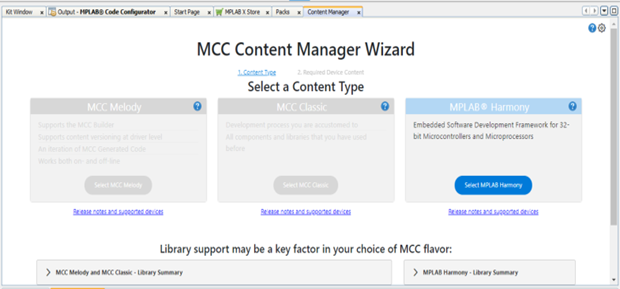
Select “32-bit MCC Harmony Project” 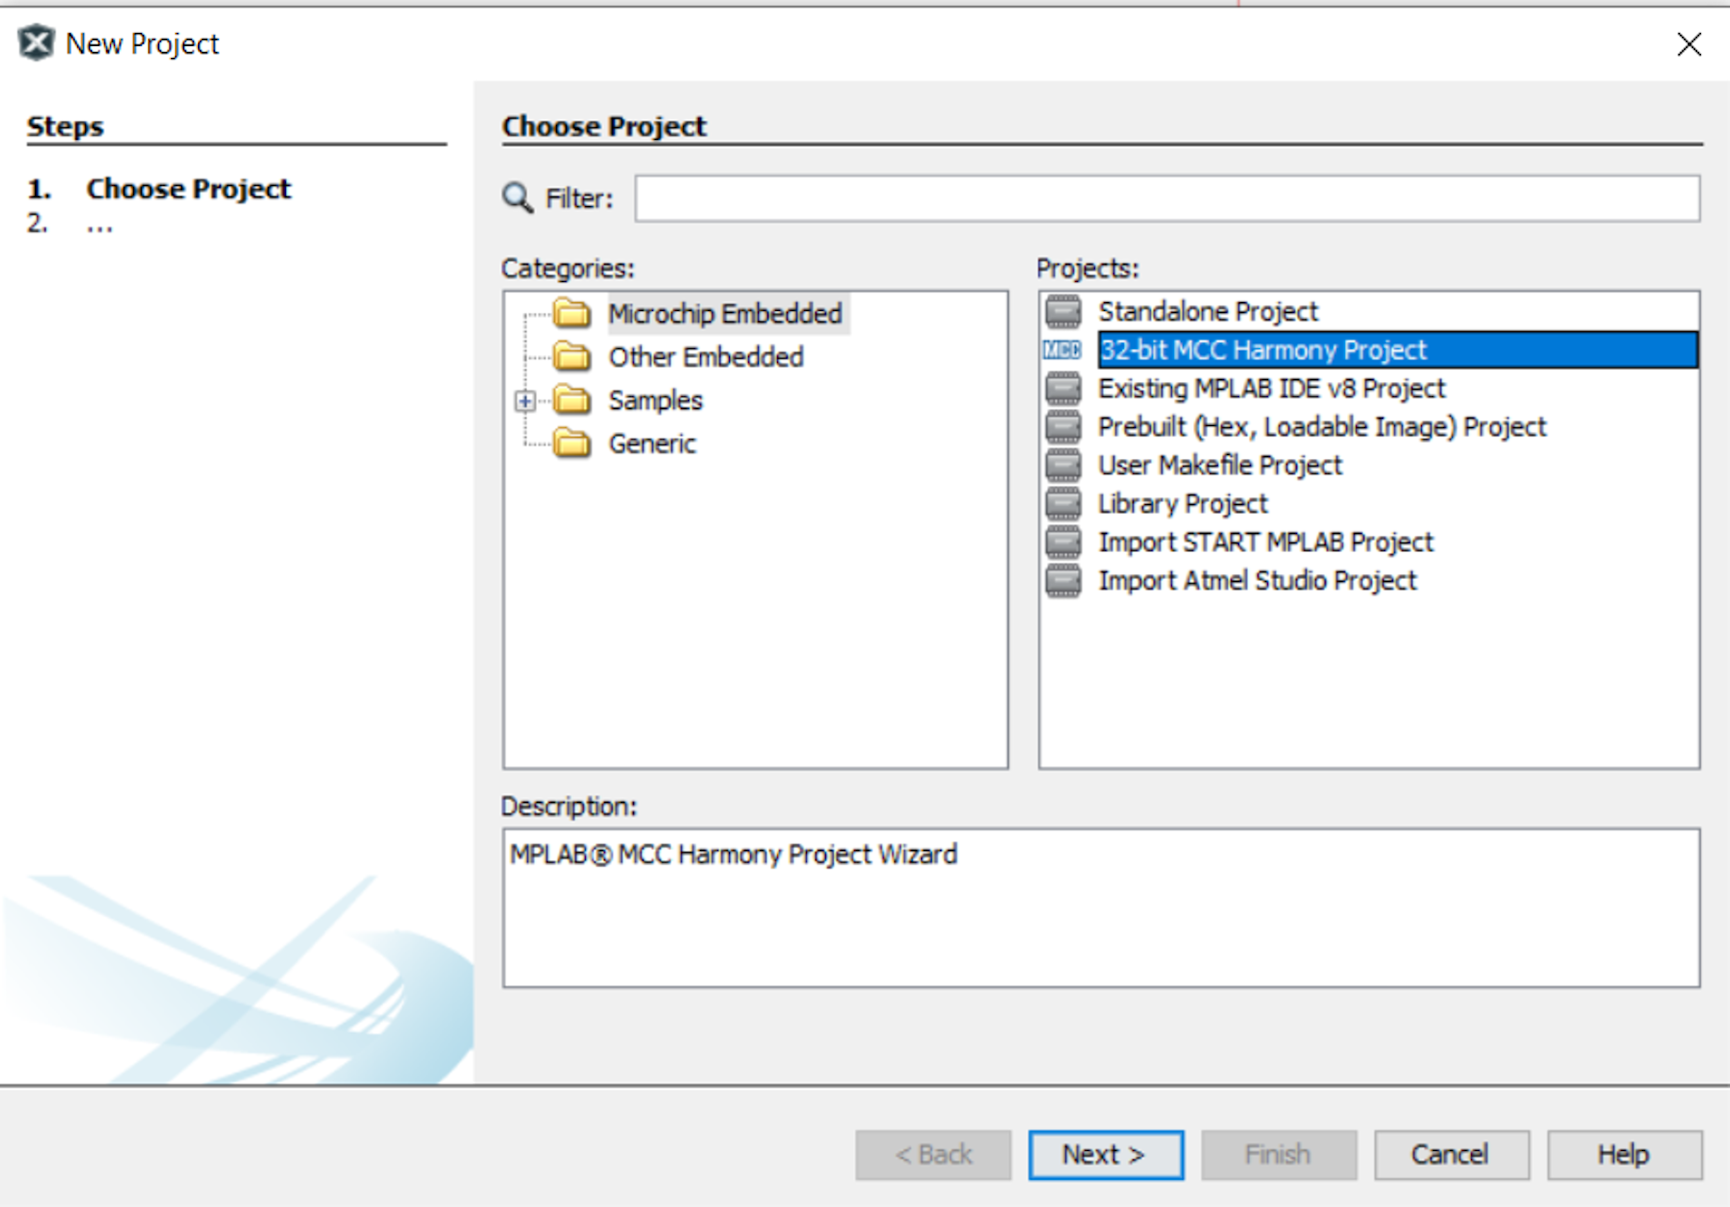
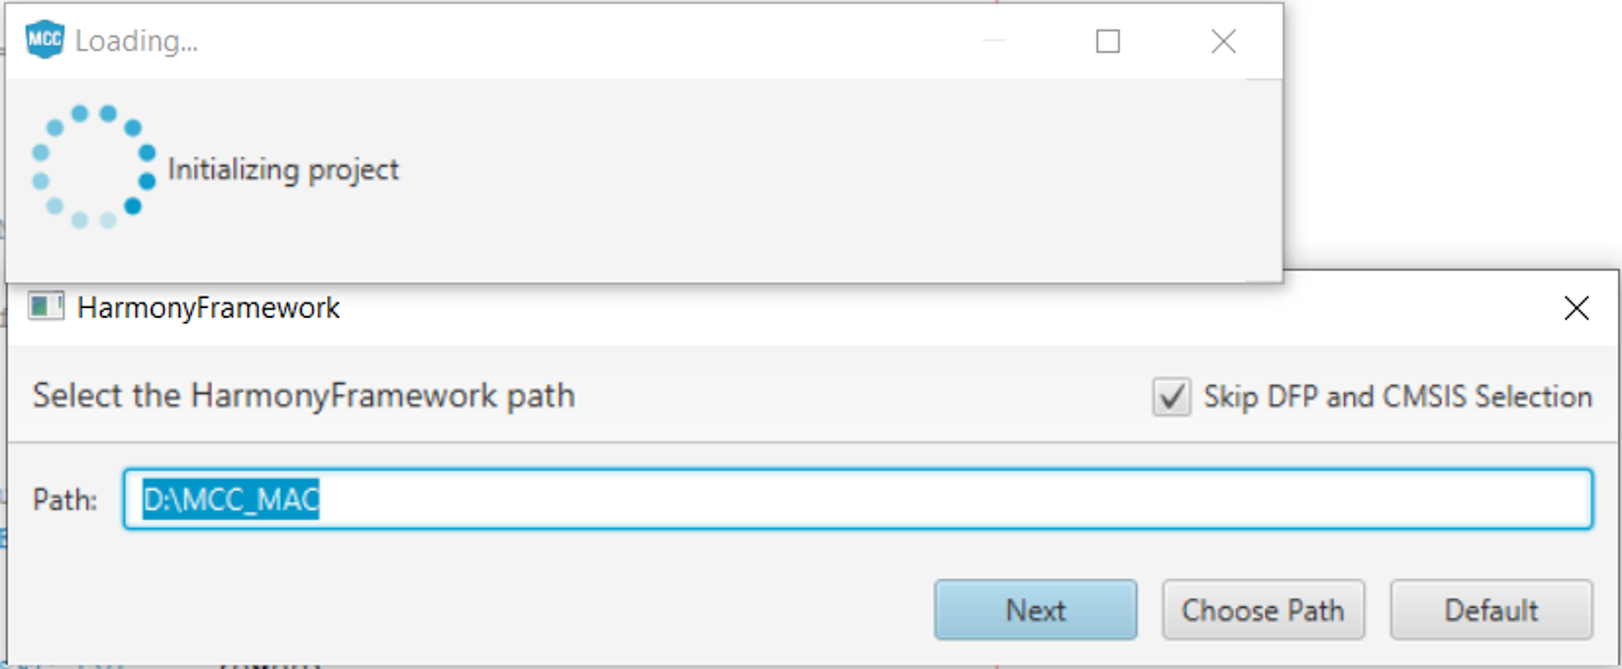
Framework Selection 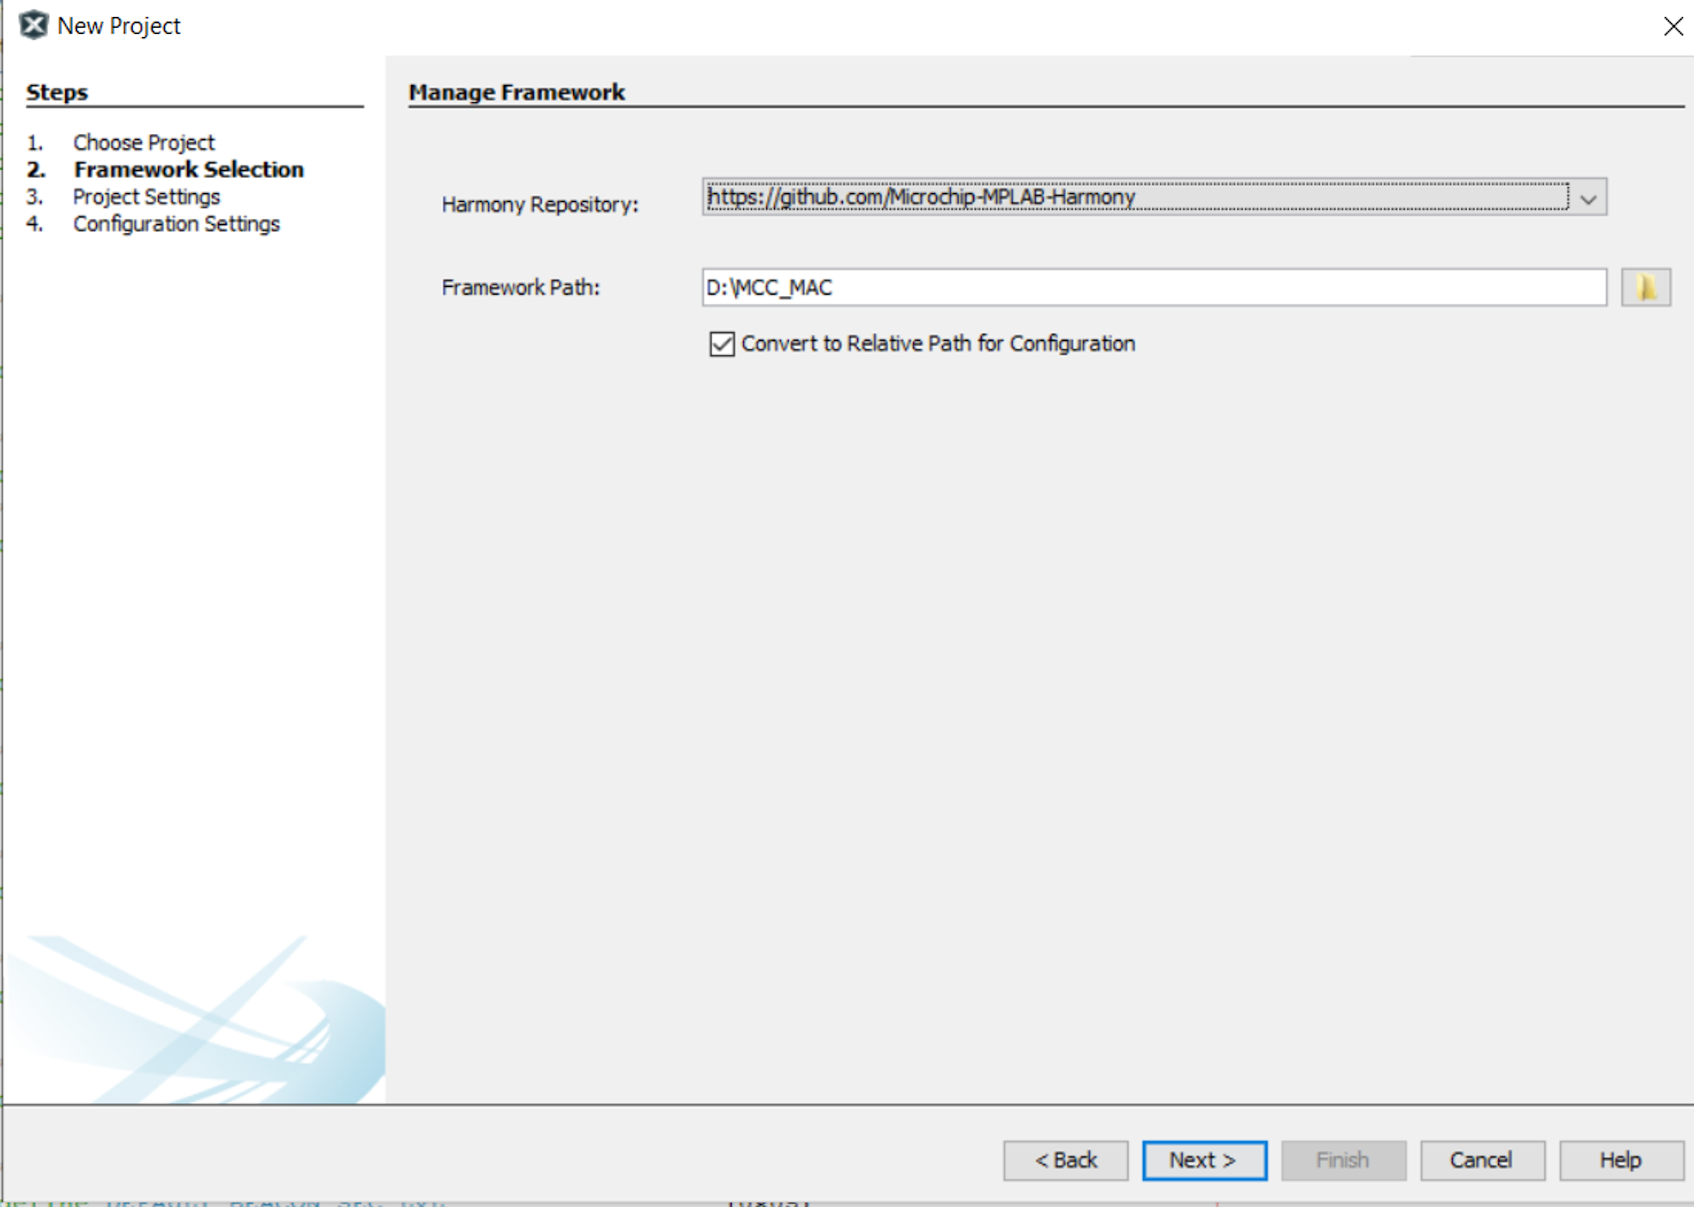
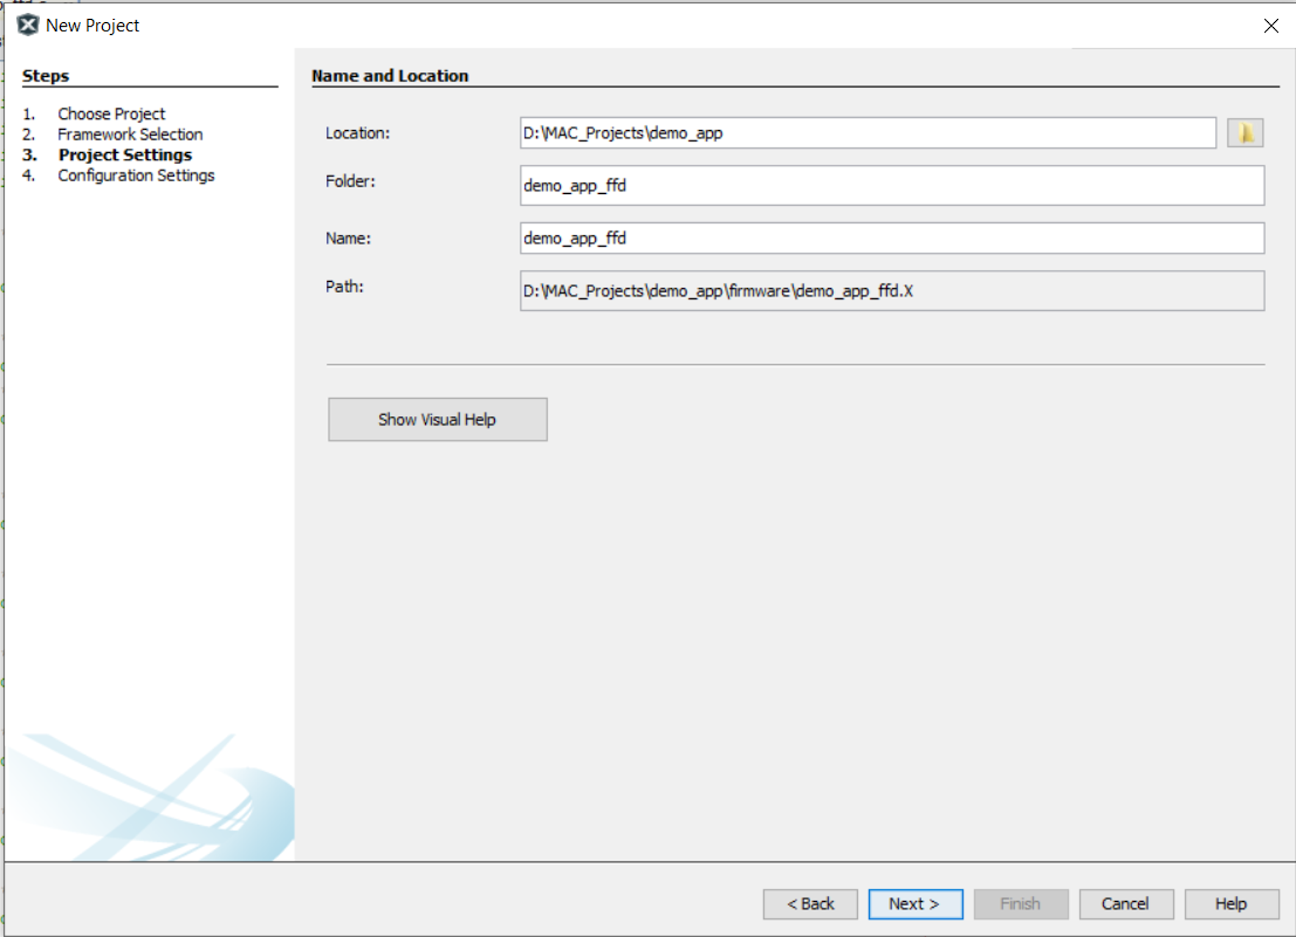
Project Settings
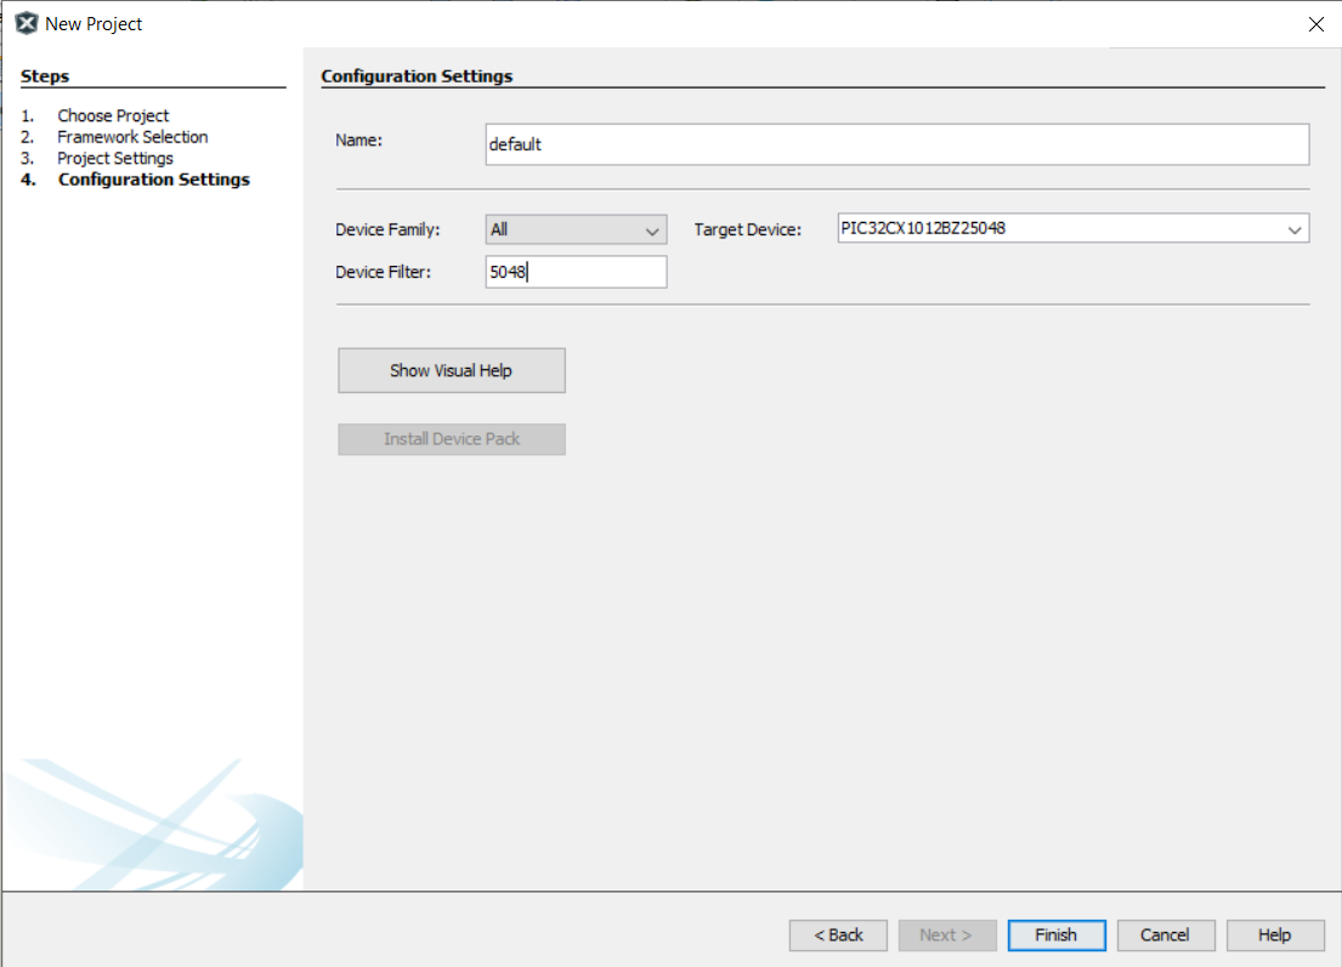
Configuration Settings

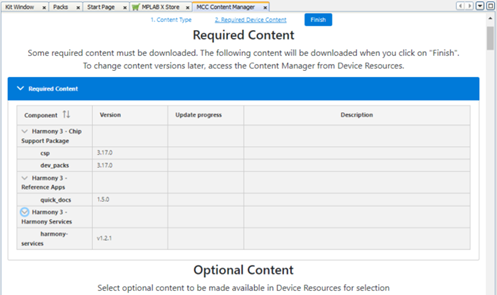

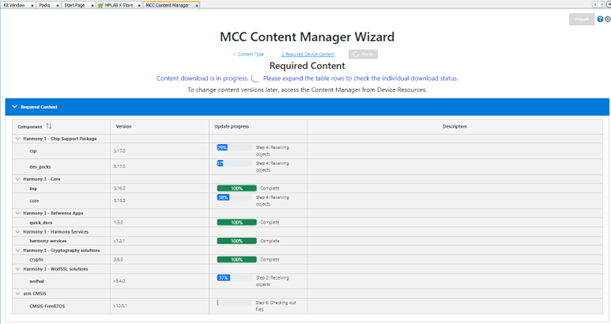
While the process is going on if downloading a particular component appears to failed, try re downloading again the component .
For example, if user received a prompt from MCC saying “dev_packs” was not downloaded, close the MCC and reopen it again and start from step 3, with the “dev_packs” as the only missing component for downloading and select “Finish”.
Create MCC Project for any one of PIC32CXBZ2 devices (WBZ450/WBZ451 /PIC32CX1012BZ25048 /
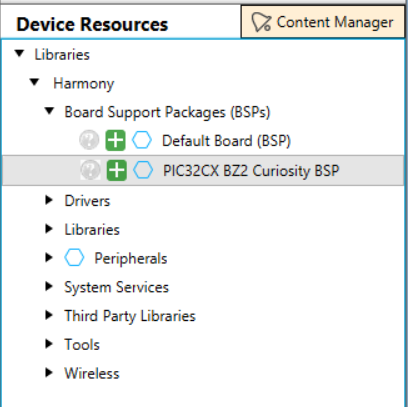
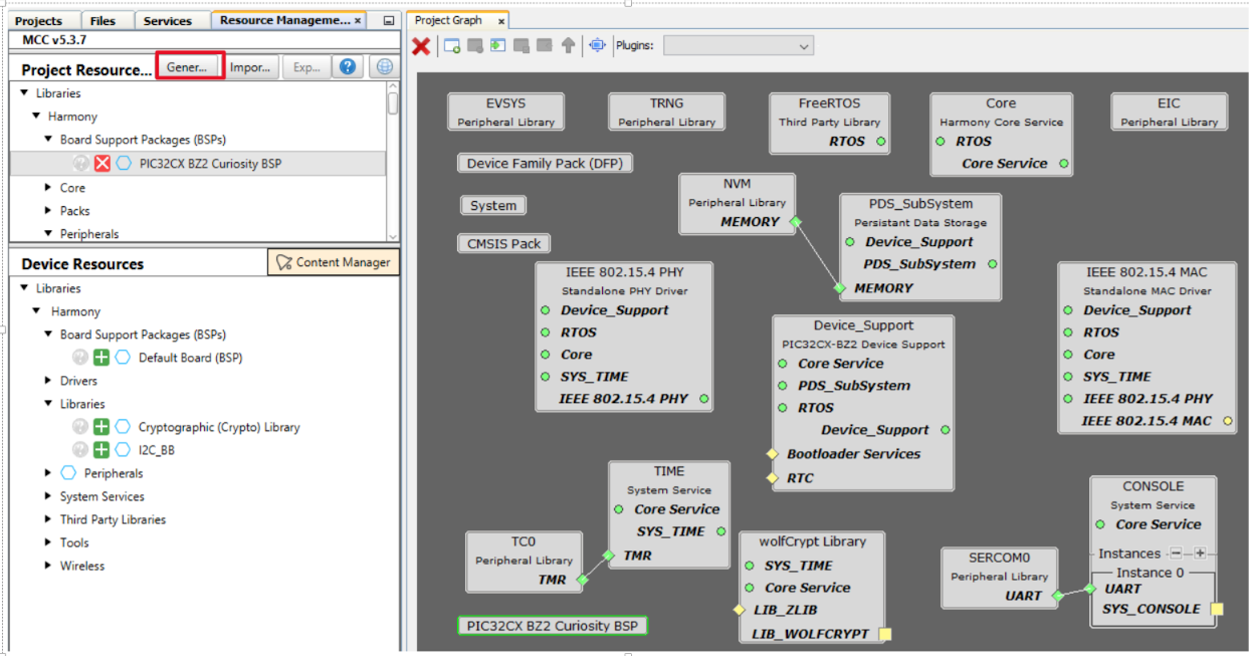
PIC32CX1012BZ24032). Open MCC Window. By default, the MCC window will appear as follows.
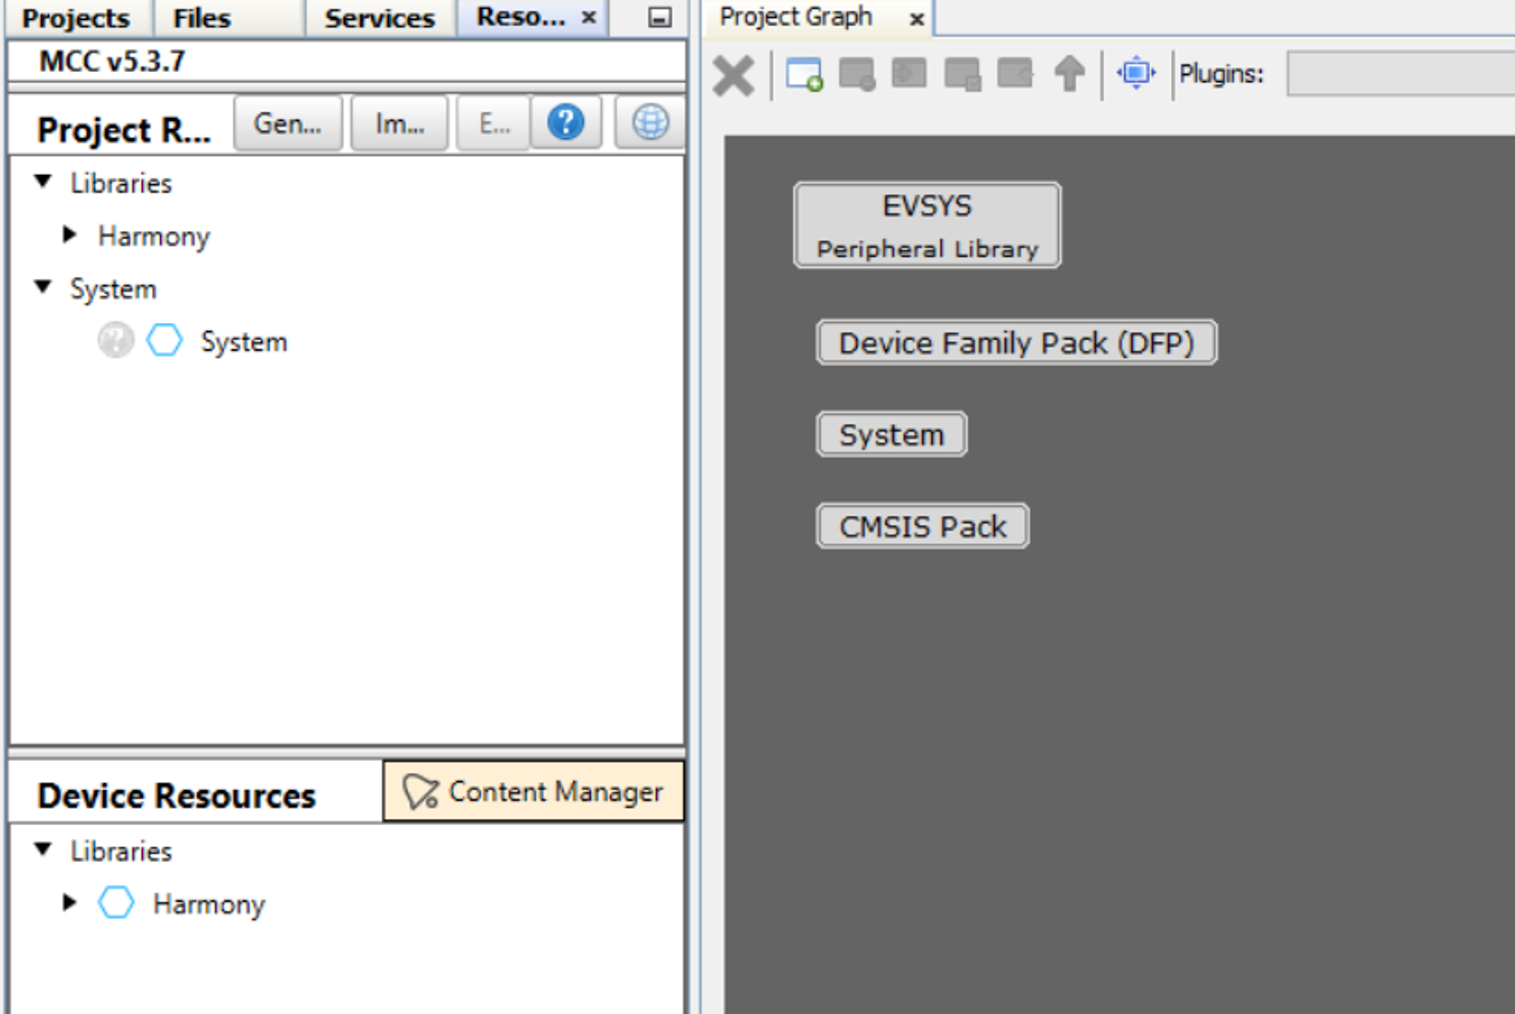
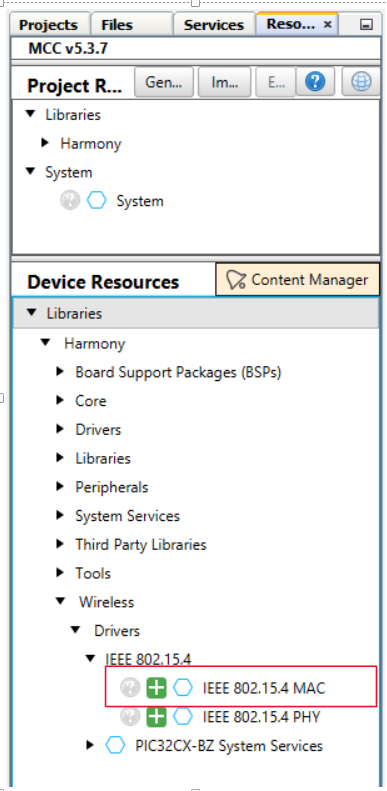
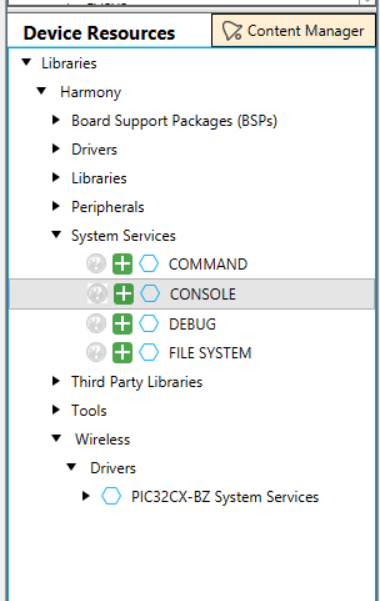
Note: IEEE 802.15.4 PHY and MAC components will appear in Device Resources only if, wireless_15_4_phy and wireless_15_4_mac repo is cloned in MCC framework path.
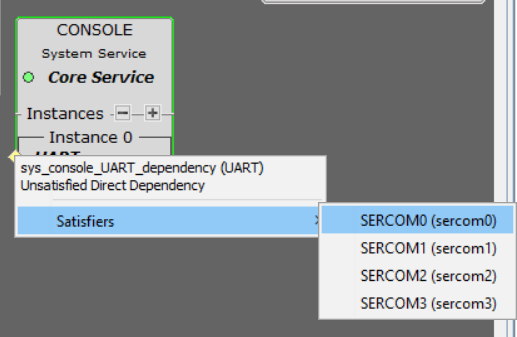
Upon selecting the component, the dependent modules are getting added to the project and Popup will come for getting the approval. Select “Yes” for all of them.
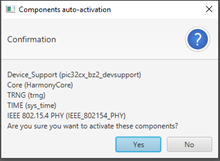
- IEEE 802.15.4 PHY
- TRNG
- Core
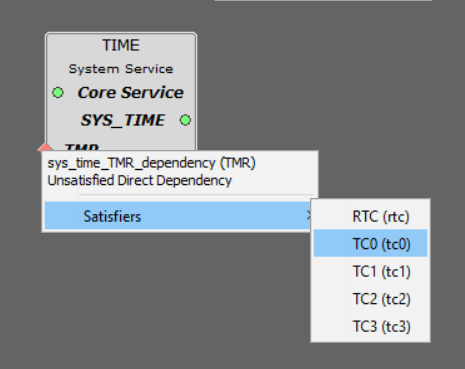
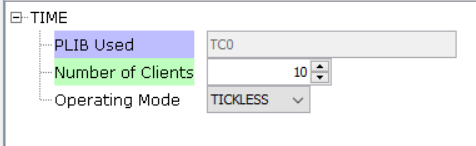
- TIME
PHY component depend on following H3 component,
- Device Support Library
- Core
- TRNG
- SYSTEM Time module (PHY Uses one client of SYS_TIME_MODULE) – So, the number of SYS_TIME_CLIENT should be more than 1
The project graph will look like, 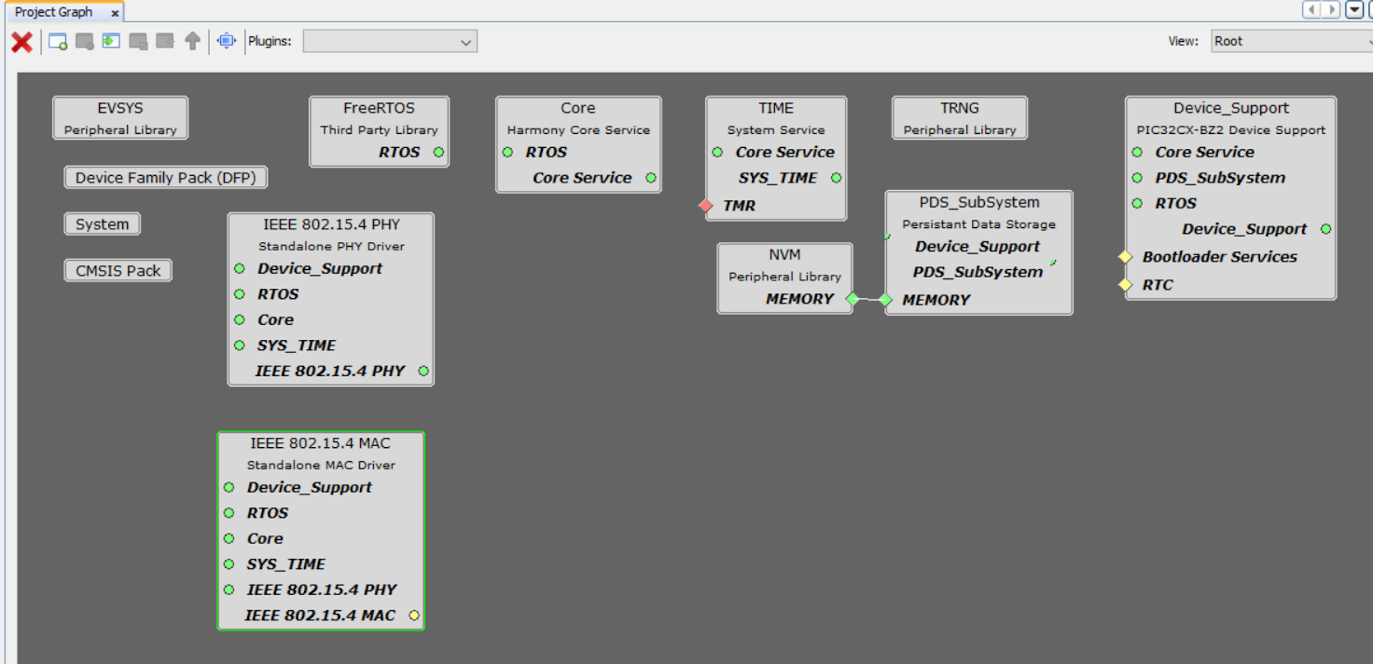
Click on SERCOM 0 -> Go to configuration options -> Change Receive pinout, Transmit
pinout, TX and RX Ring buffer size as 256 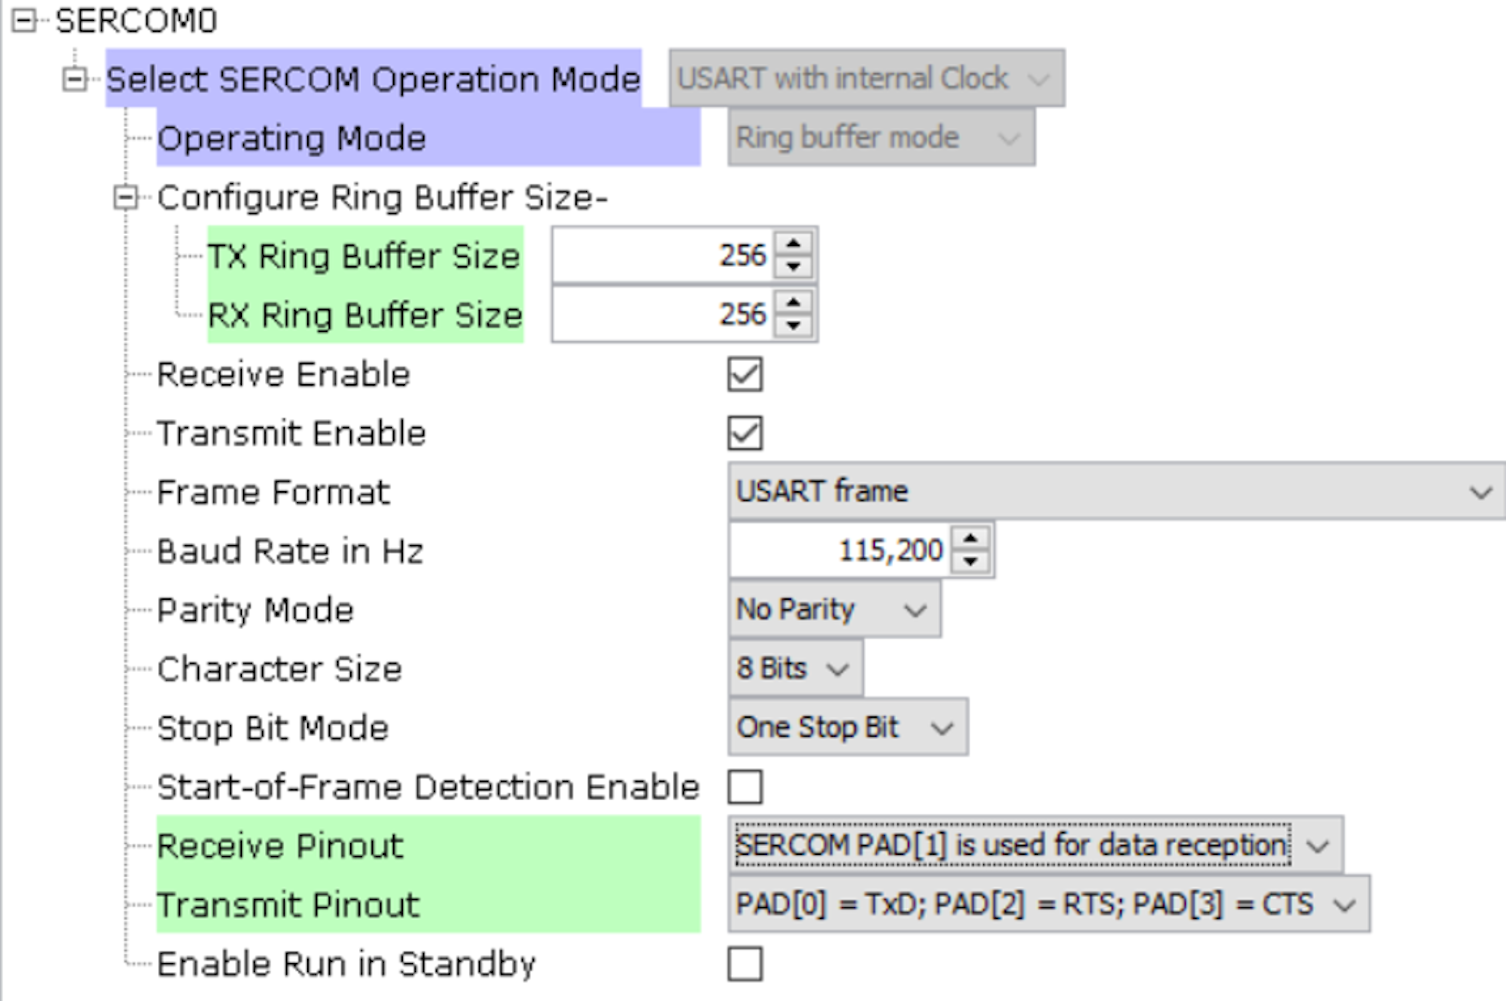
Configure the SERCOM0 system setting to enable the Direct High Speed 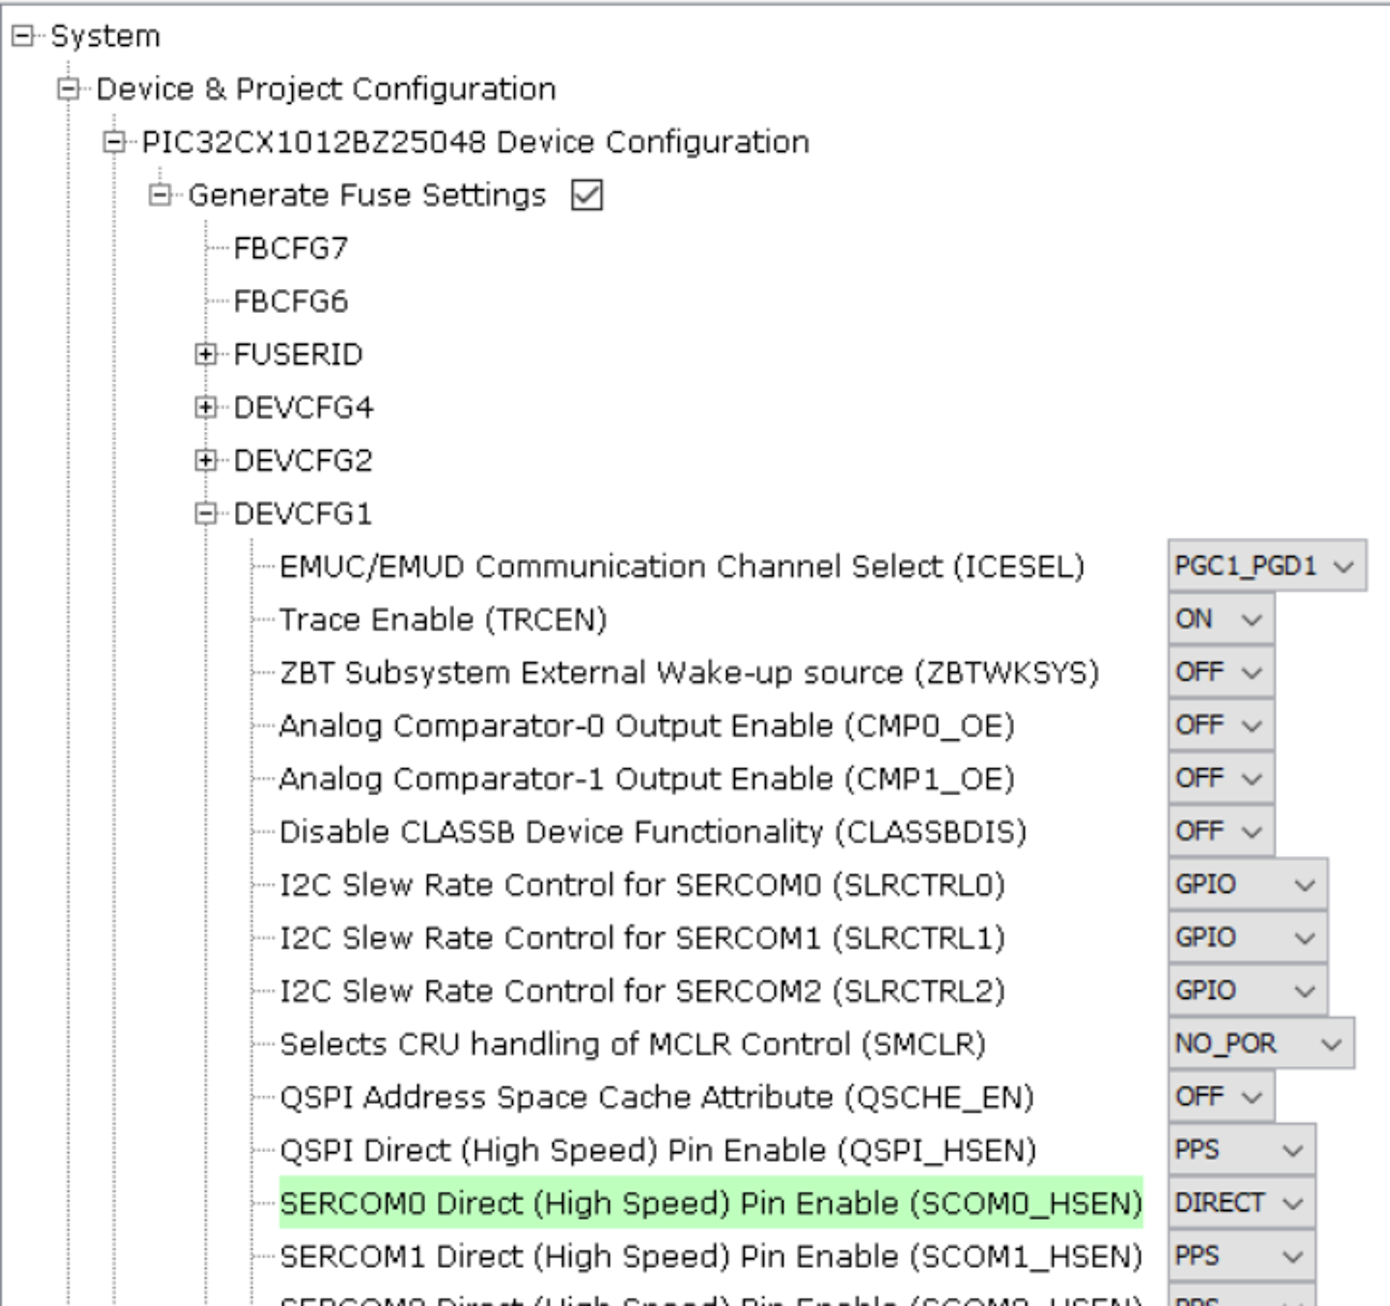
Click on Generate Tab for Code generation. Upon code generation, MAC files will be added to the project.

RTOS task for MAC Layer will be created tasks.c file and WPAN_Init () will be called from
SYS_Initialize() function. Change argument of SYS_Load_Cal () function WSS_ENABLE_NONE
to WSS_ENABLE_ZB in initialization.c file. 
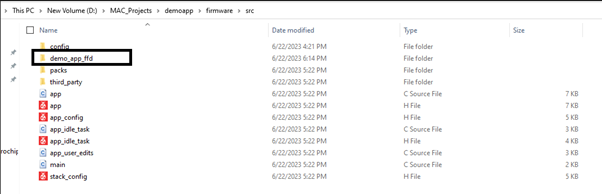
Copy the demo app ffd application files from following repo in MAC demo app FFD project folder (wireless_apps_pic32cxbz2_wbz45/apps/ieee_802_15_4/MAC/push_pull_mac_app/demoapp_ffd/firmware/src/) into created project folder (../firmware/src/) Repo URL: bitbucket.microchip.com/projects/MH3/repos/wireless_apps_pic32cxbz2_wbz45/browse Tag Name : v1.3.0
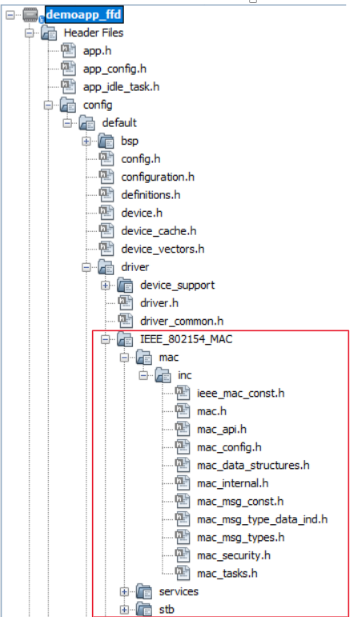
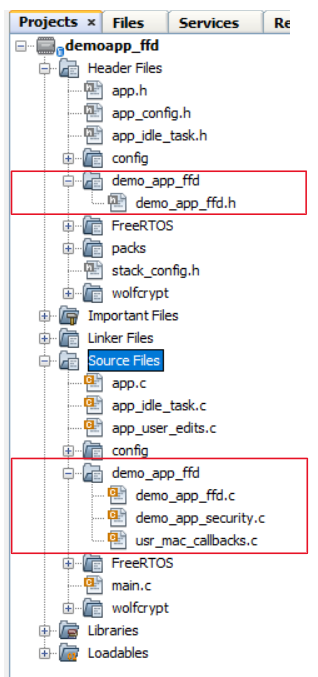
Include demoapp ffd folder as corresponding FFD project of Header files. 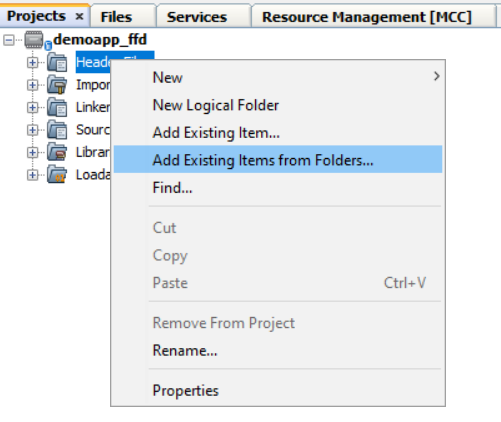
For including demoapp ffd header files in project.
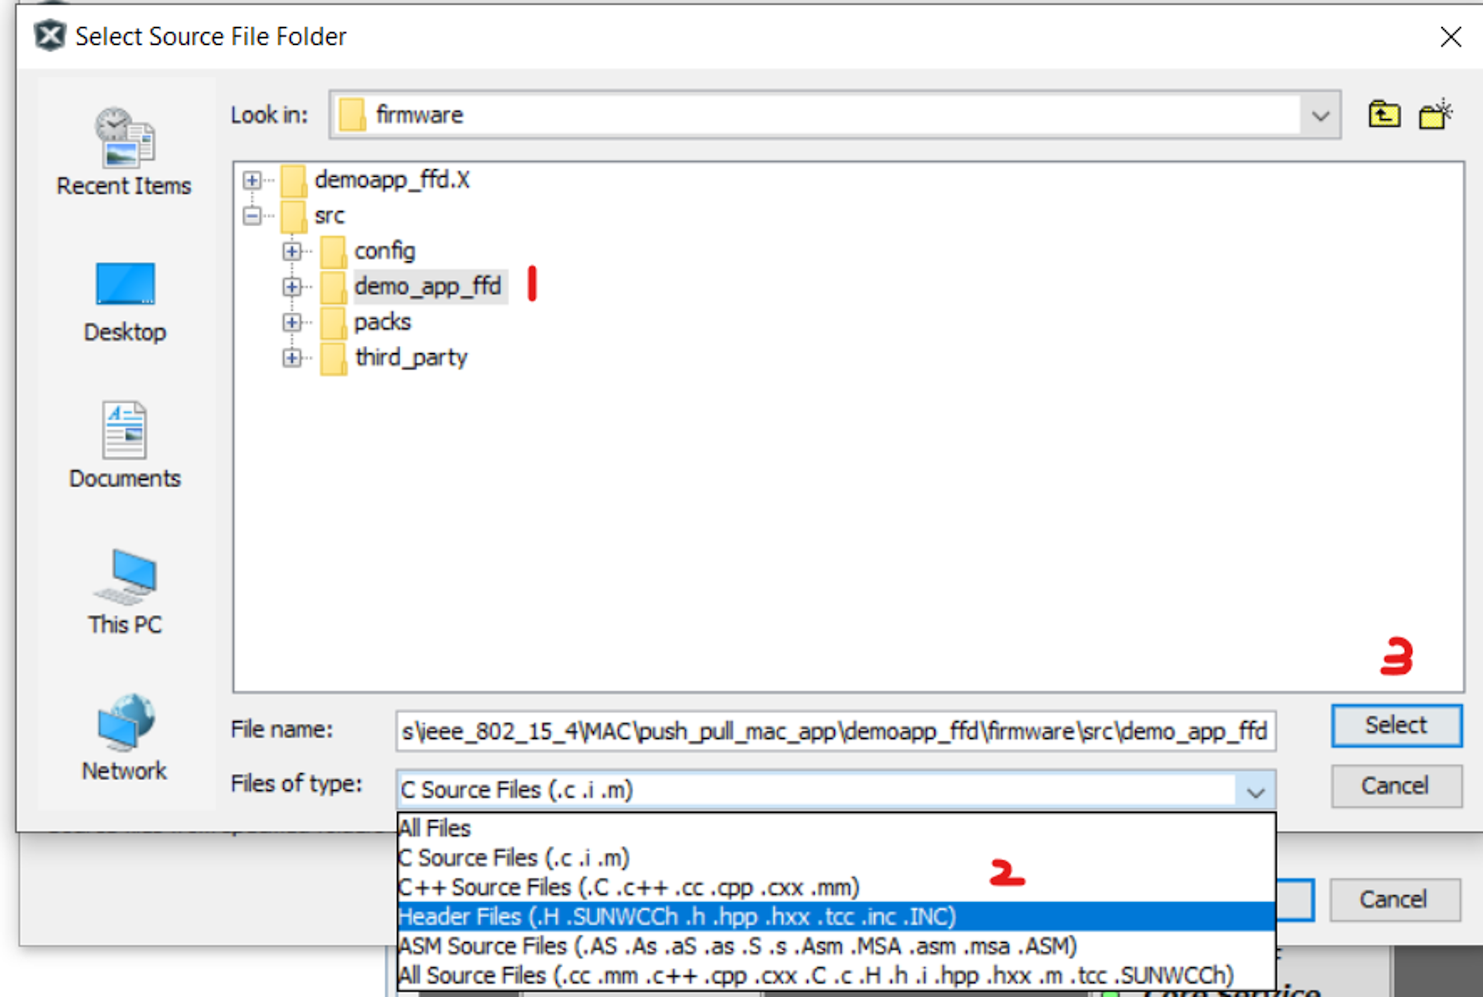
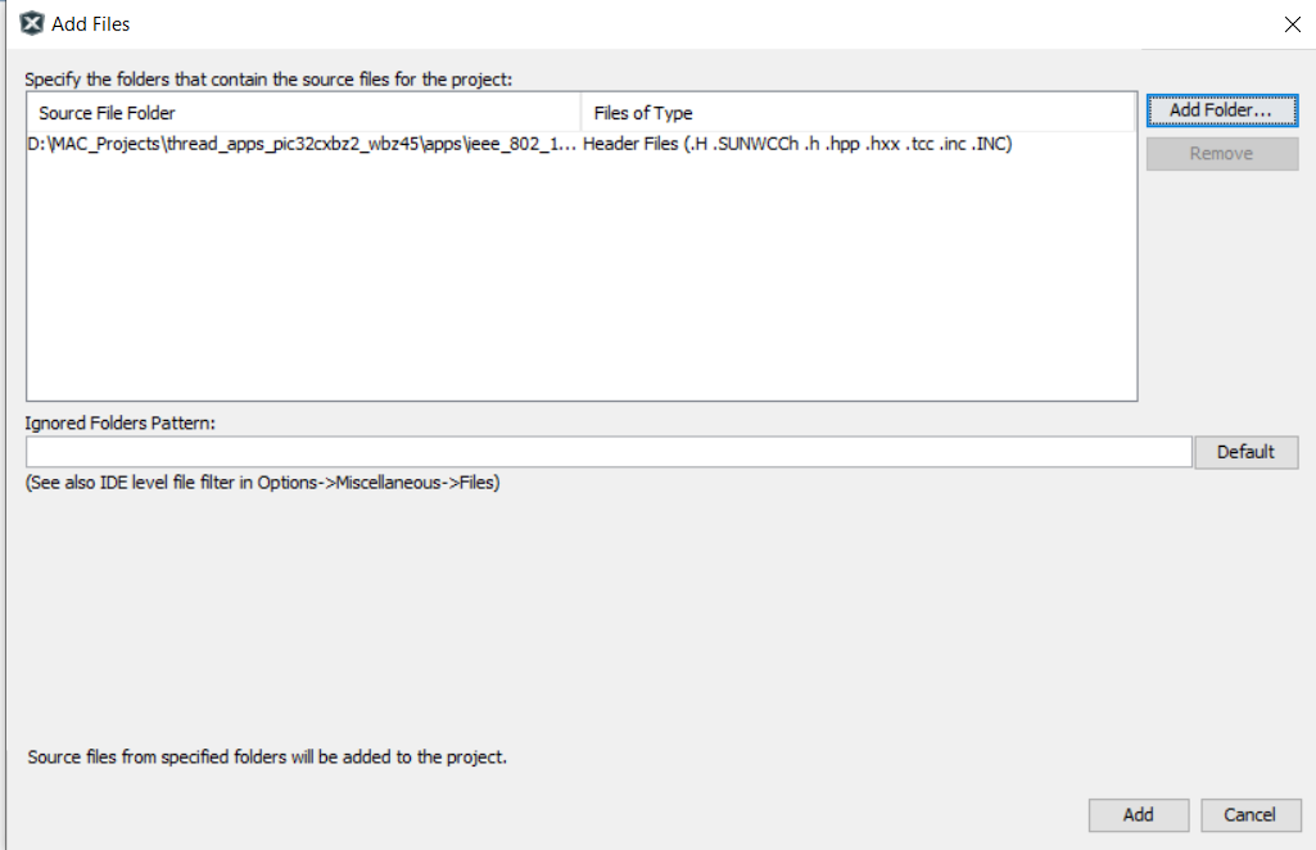
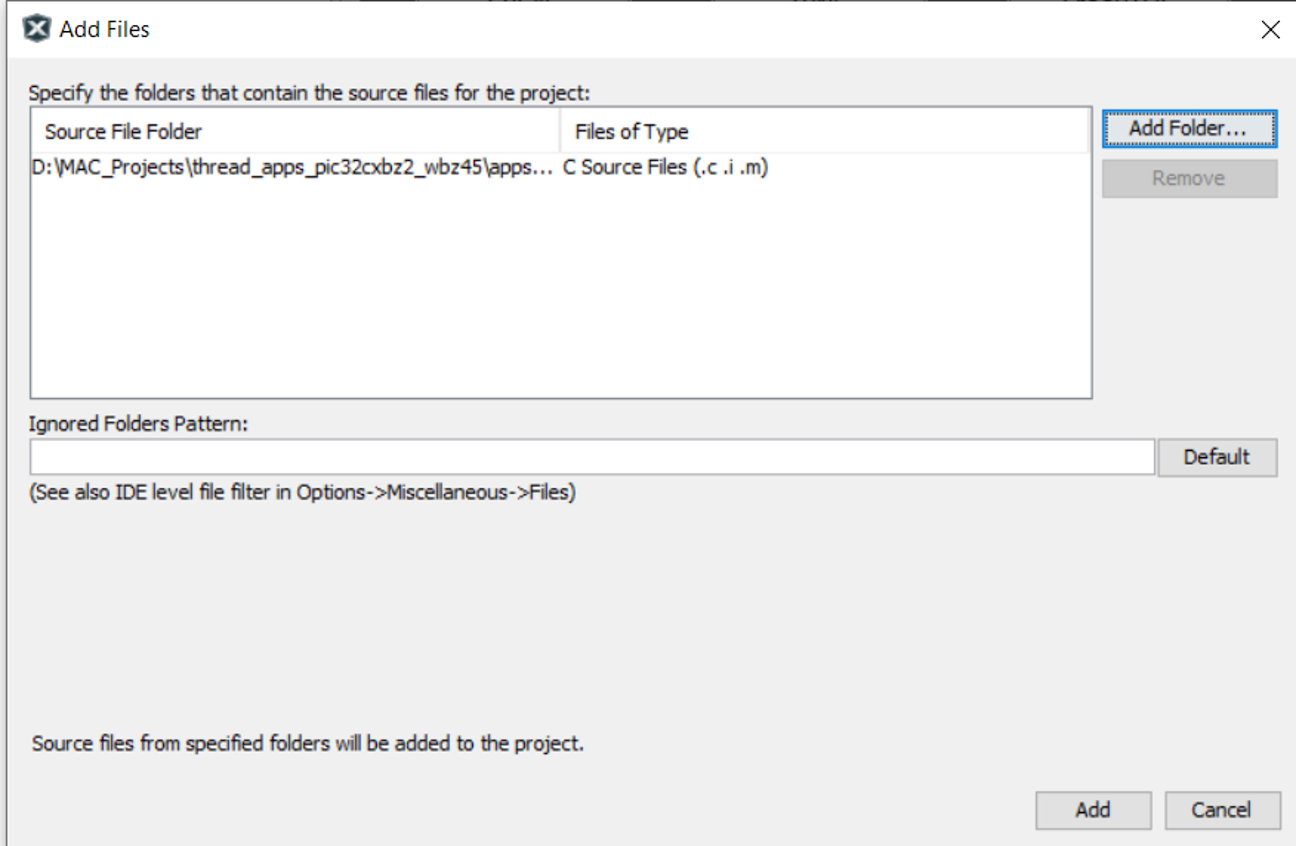
After select demoapp ffd folder from current project folder, it will show as below image. And click on Add.
Include demoapp ffd folder as corresponding FFD project of Source files. 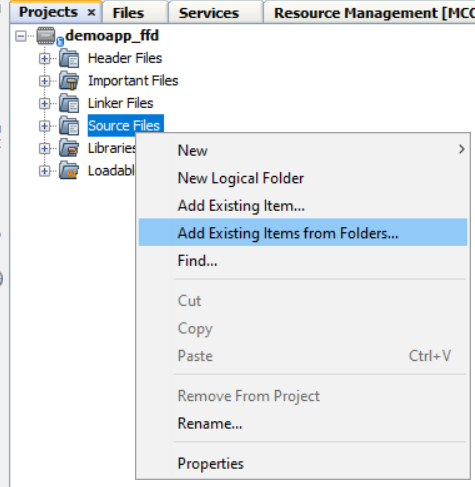
For including demoapp ffd source files in project. 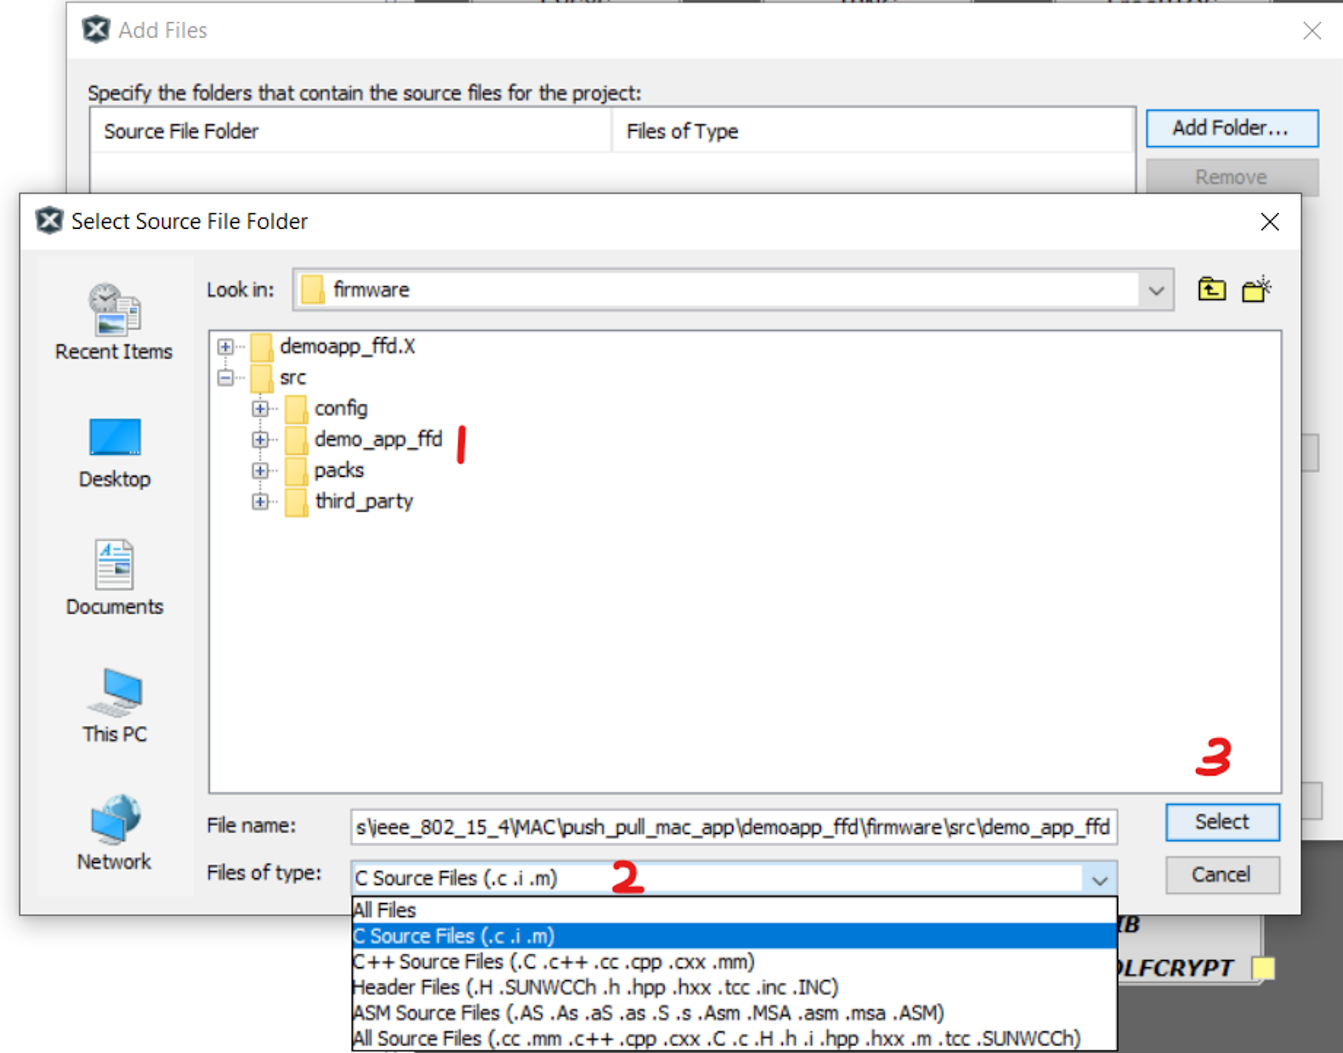
After select demoapp ffd folder from current project folder, it will show as below image. And click on Add.
Added FFD files.
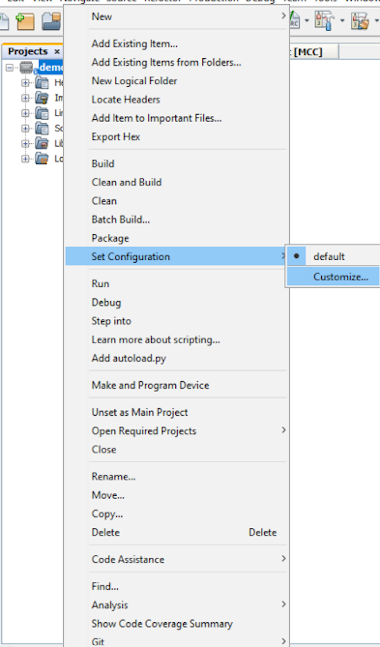
Open Configuration for adding include header files directories.
Select XC32-gcc -> Select Preprocessing and messages in option categories -> Click on Include directories.
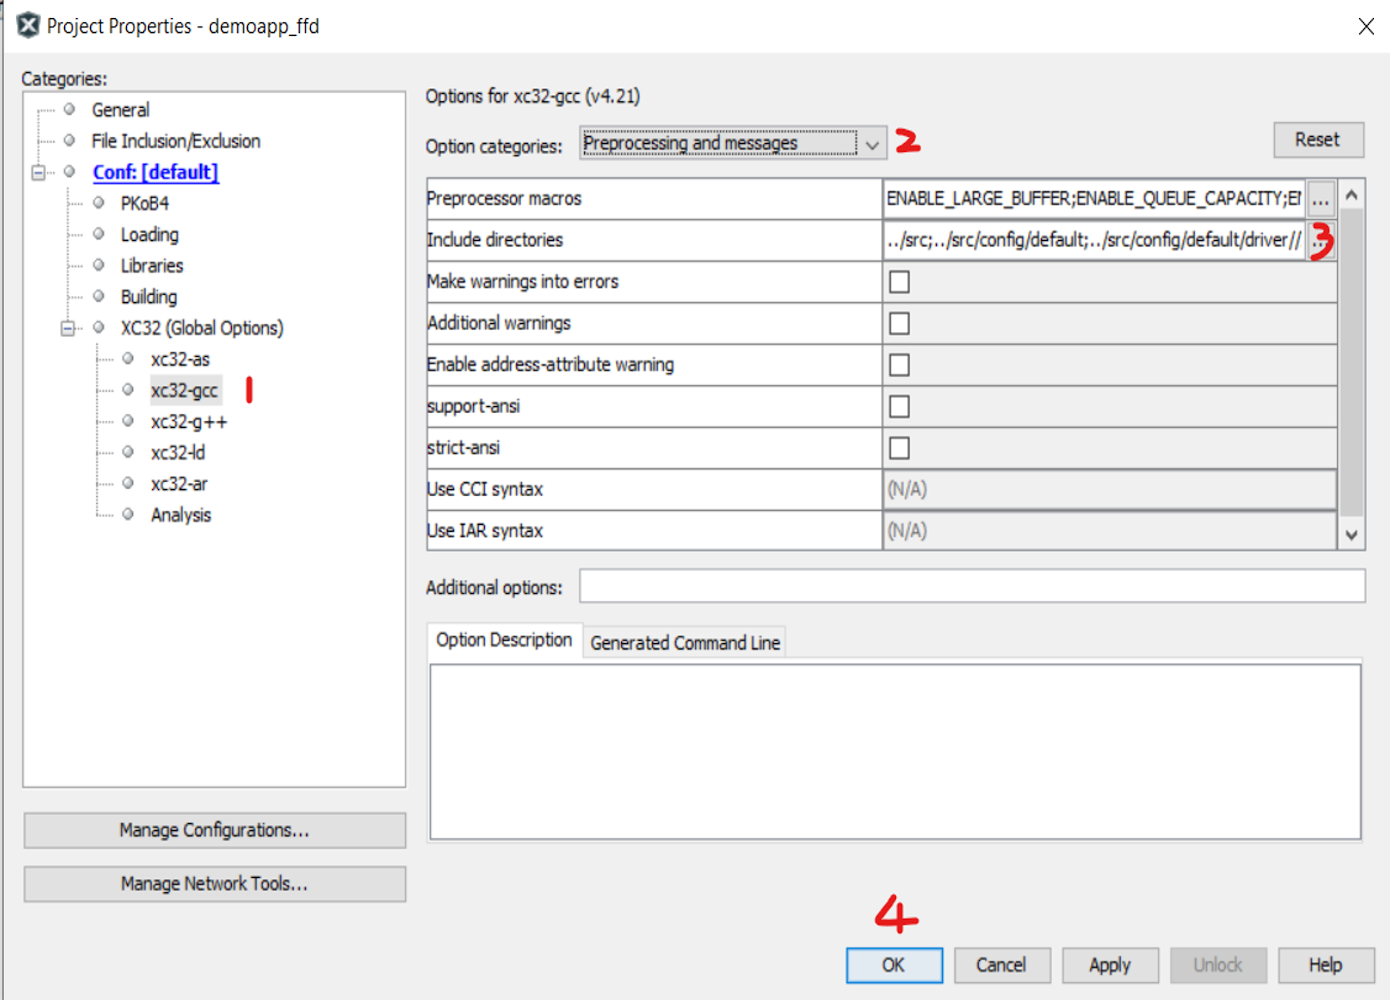
Browse and include demoapp ffd folder and click Apply and OK. 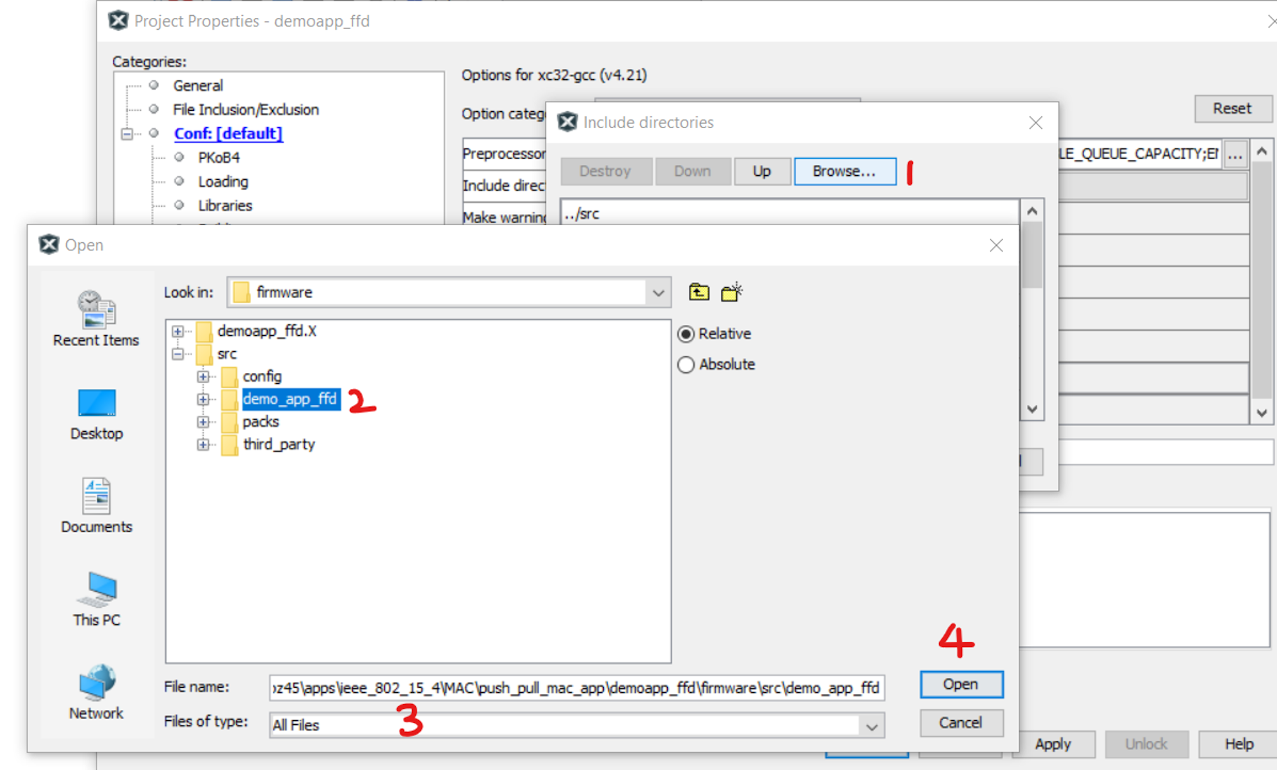
app.h file changes: add FFD Demo No beacon APP message ID’s. 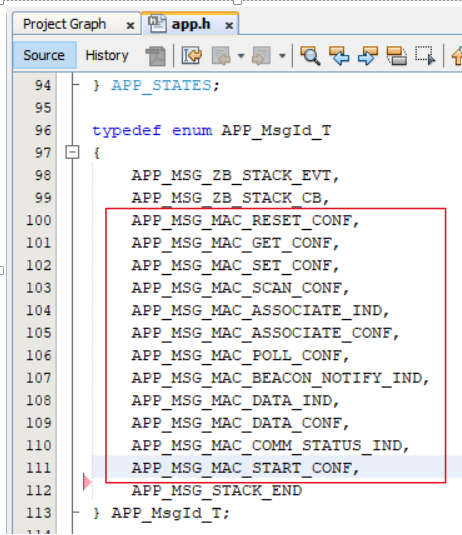
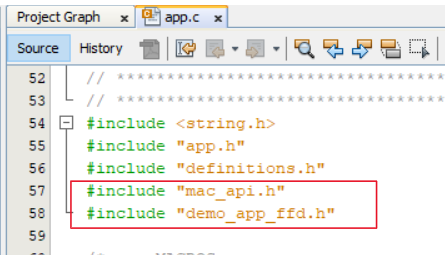
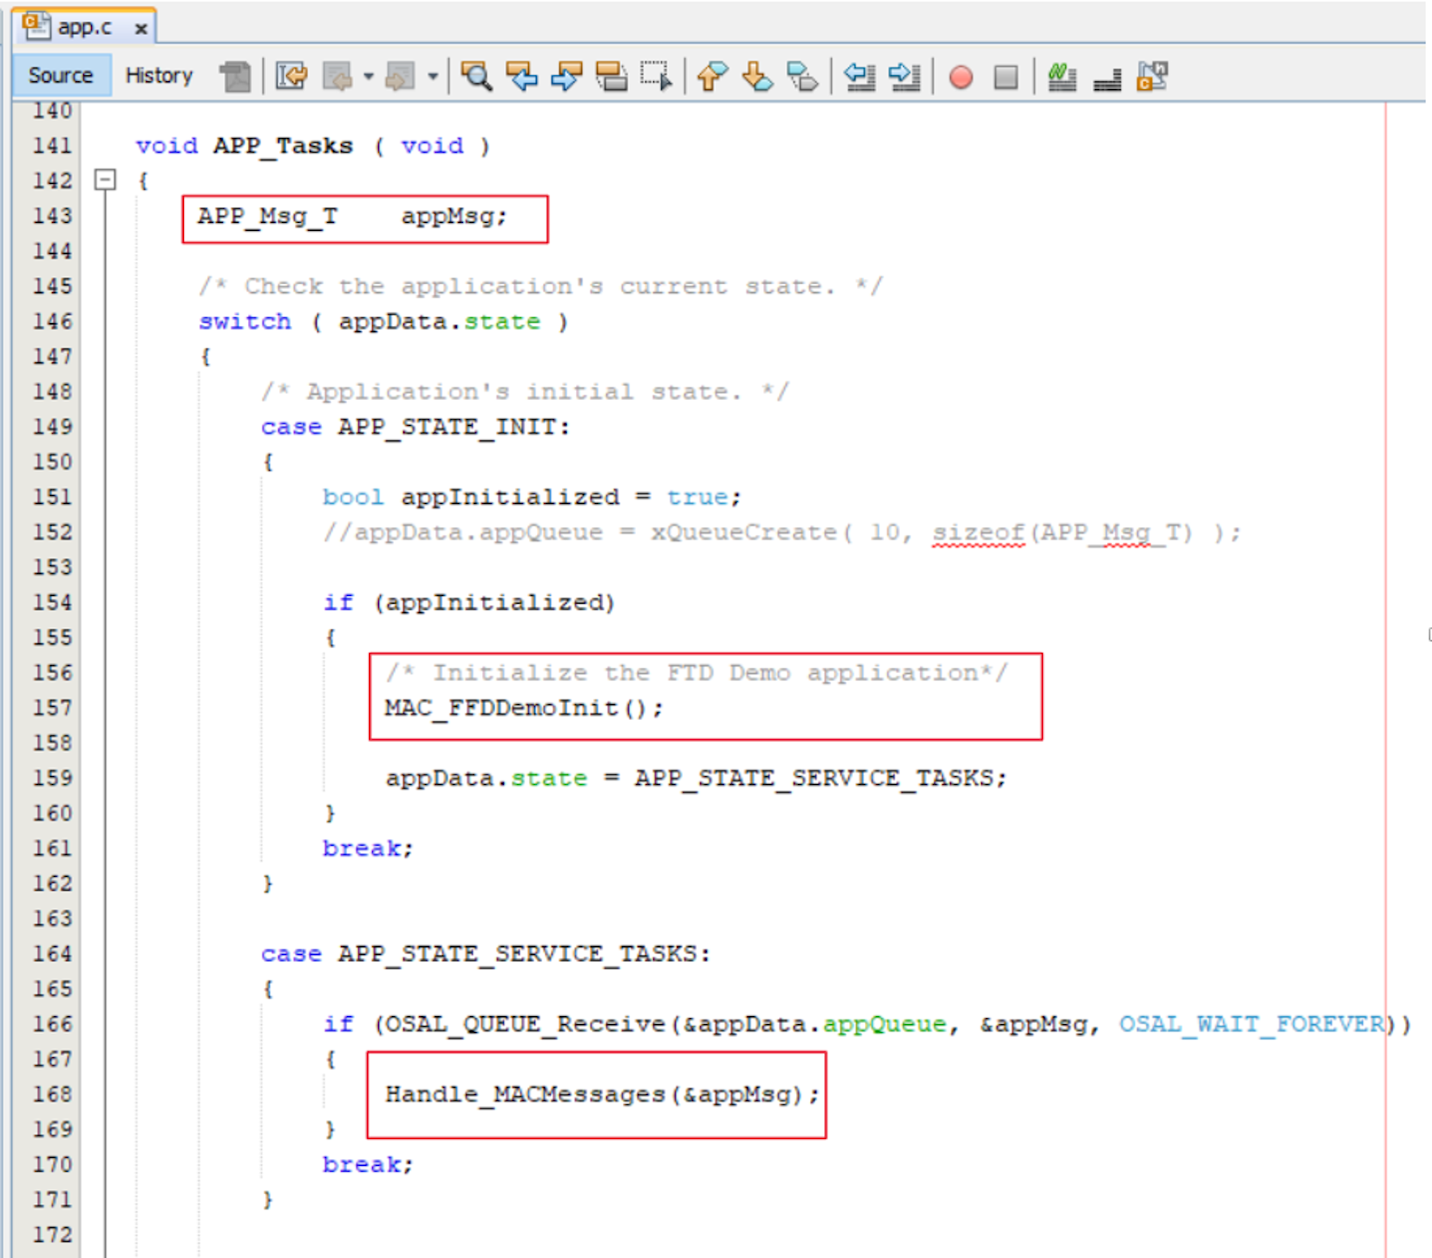
app.c file changes :
app_user_edits.c file changes: selected line should be commented. 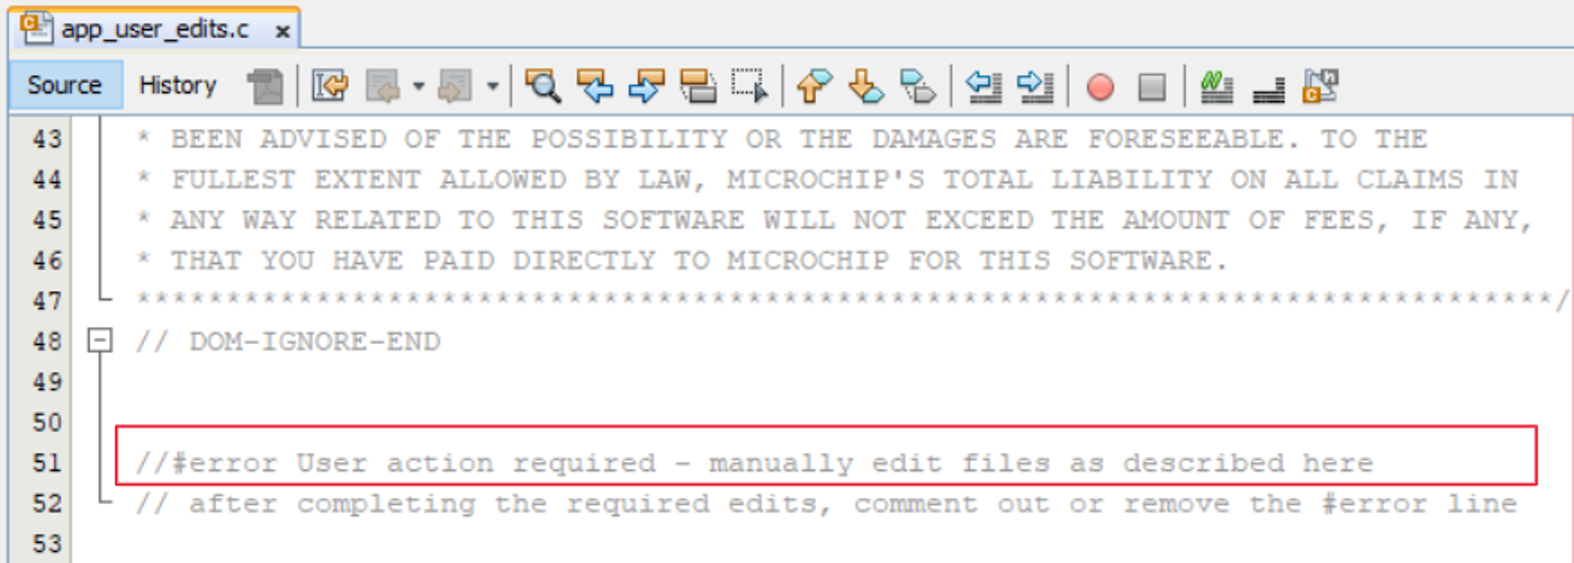
app_idle_task.c change: 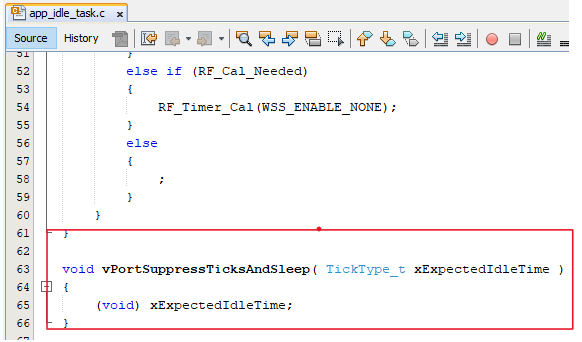
For channel configuration (example:CHANNEL_OFFSET :3 , Channel => 11 + 3 = 14) 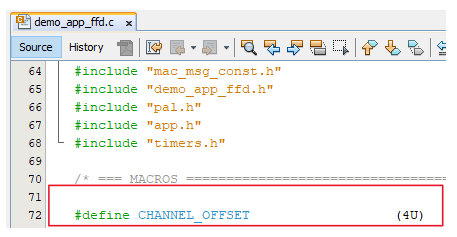
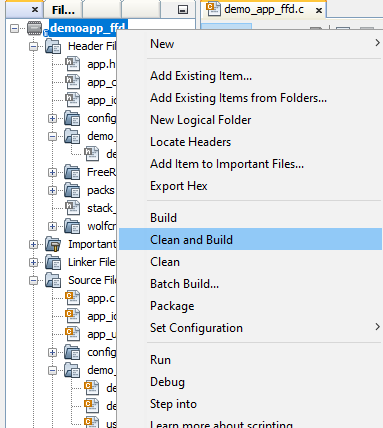
Right click on the project and Click on Clean and Build