Note: It is assumed that this is the first time a debug tool has been
used for this project, even if other tools are available.
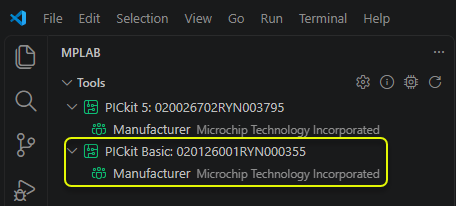
Once PICkit Basic is connected to the PC (and optionally
a target), verify that MPLAB for VS Code is aware of the PICkit Basic by clicking .Figure 8-1. PICkit Basic in VS Code
Next, ensure that PICkit Basic is connected to a target
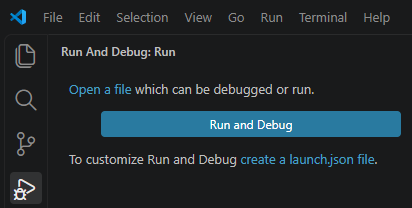
and then begin a debugging session by clicking . To create
a launch.json file before debugging, click
“create a launch.json file.” Otherwise, click the Run and Debug
button.
Figure 8-2. Run and Debug Selections
Click
next to the project name to start debugging. A Quick Pick UI will appear at the top of
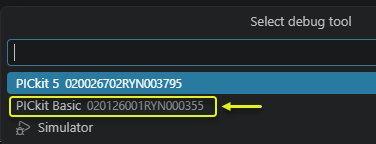
the editor requesting that a debug tool be selected. Choose the PICkit Basic.
Figure 8-3. PICkit Basic Selection
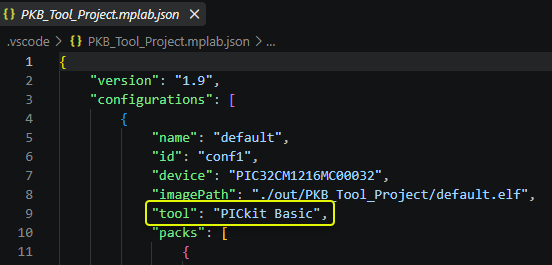
Debugging of the project code will begin. Open the <project
name>.mplab.json file in the editor to see that the tool is now set as
PICkit Basic.
Figure 8-4. Added to mplab.json file: Project
tool is PICkit Basic

 .
 . To create
a launch.json file before debugging, click
“create a launch.json file.” Otherwise, click the Run and Debug
button.
 next to the project name to start debugging. A Quick Pick UI will appear at the top of
the editor requesting that a debug tool be selected. Choose the PICkit Basic.