6 Running the example
- Create a new project in MPLAB® X IDE. (for ex: ATmega4808)
- Open MCC by clicking Tools→
Embedded→ MPLAB® Code Configurator or click on the MCC
icon

- In the Device Resources panel under Libraries dropdown select CryptoAuthLibrary
- Check below for the Notifications [MCC] tab
- Resolve the notifications one by
one. For example, in GUI select:
- Generate Example:
Tick.Note: MCC will automatically load the UART Foundation Services module once the Generate Example checkbox is ticked.
- Ensure I2C Clock Frequency is 100 kHz.
- Generate Example:
Tick.
- Configure dependent Libraries.
- For UART, enable options to Transmit. Receive and to Redirect STDIO to UART.For the rest of the settings, configure to match your preferred serial terminal settings.
- Configure CryptoAuthLibrary
GUI:
- Device - select the type of Secure device being used.
- 7-bit left-aligned device I2C address - provide the device I2C address as provisioned into the Secure device, meaning it is a left-aligned 7-bit hexadecimal value. Default address for ATECCx08A devices is 0xC0, while default address for ATSHA204A devices is 0xC8.
- Wait for maximum
command response time - Enable this if the preference is to wait
until the Secure device is ready to respond to a command before asking
for its response. Ticking this box defines the “ATCA_NO_POLL”
macro in the library.Note: If using Foundation Services v0.1.34, the I2C Master driver only supports the ATCA_NO_POLL option. Manual adjustments may be needed to I2C Master code if this macro is not defined.
- Print debug statements in library - Enable this if the preference is to print to a serial terminal the debug statements included in the library. Ticking this box defines the “ATCAPRINTF” macro in the library.
- Use a constant host nonce for encrypted read - Enable this if the preference is to use a constant host nonce for read operations rather than supplying different host nonce for each use of read operation. The latter option is the default setting and is the recommended more secure practice.
- Click Generate button
- Connect the Secure device of your choice.
- Include the header
CryptoAuth_Example.hinmain.c. Call the functionCryptoAuth_Example()inmain(). - Build and program the board.
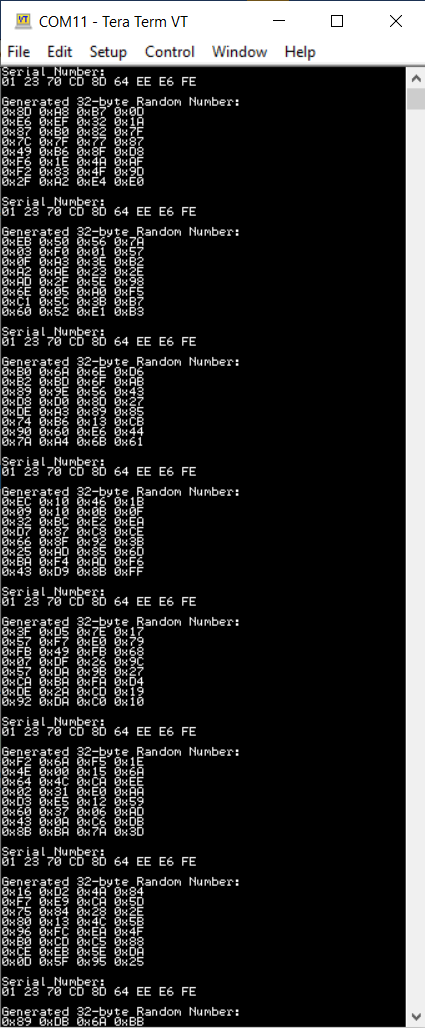
- Open a Serial Terminal to view the output of the example.
- Expected output is for the program to print the Serial number of the chip and a 32-byte random number for ten (10) times.

