2 Drawing a Schematic
Getting started with logic design.
This section contains an introduction to the components in CLB Synthesizer and getting started with a logic design.
2.1 Components in CLB Synthesizer
Components available in the CLB Synthesizer.
2.1.1 Ports
Port components represent the interface between a hierarchical layer and the layer above and are strictly input or output.
An input port is an input to the CLB:

An output port is an output from the CLB:

- I/O ports (global)
- Off-sheet ports (hierarchical)
Global Input Ports
Global I/O ports represent the interface to other peripherals on the MCU. To place an input port, drag and drop the input port symbol onto the canvas and select the I/O option in the Properties panel.
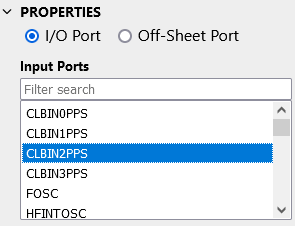
The selection box specifies to which signal the input is mapped.
Input ports from other peripherals have one of four synchronizer options selected in the Input Synchronizer options box. For more information, see Input Synchronizers.
Input ports from the CPU do not have synchronizer options. For more information, see Using CLBSWIN.
Usually, the global ports are used only at the top level (main), but there are cases in which it makes sense to use global input ports on sub-sheets. It is also possible to use the same input signal with an alternative synchronizer option, in which case a second input port symbol must be used, and the alternative synchronizer option applied to that input.
Global Output Ports
To place an output port, drag and drop the output port symbol onto the canvas and select the I/O option in the Properties panel.
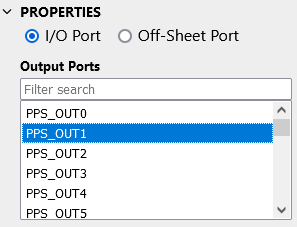
The selection box specifies to which signal the output is mapped.
For more information on output signals, see CLB Outputs to Other Peripherals.
Off-Sheet I/O Ports
Off-sheet ports represent the interface from the module defined on that particular sheet to the sheets in which the module is used. To place an off-sheet port, drag and drop the input or output symbol onto the canvas, select the Off-Sheet Port option in the Properties panel, and give the signal an appropriate name.
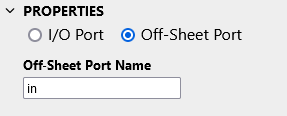
For more information on hierarchical design, see Using Hierarchical Modules.
2.1.2 Logic Gates
Building blocks of a configurable logic design.
The CLB Synthesizer provides a palette of common logic gates in the left hand panel.
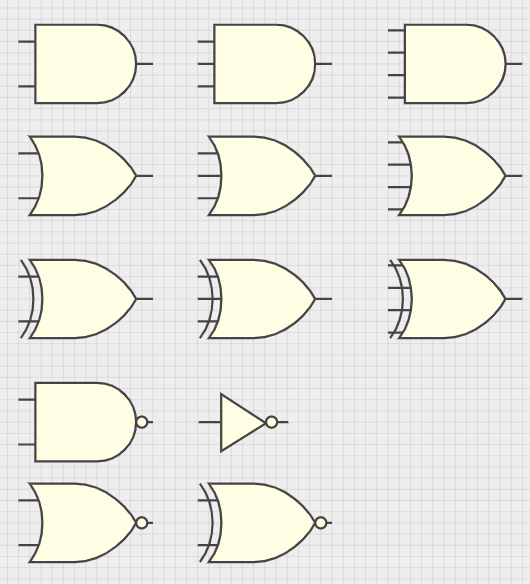
To use a logic gate, drag and drop the symbol from the palette onto the canvas and connect it as required.
2.1.3 Flip-Flops
Building blocks for synchronous logic designs.
The CLB Synthesizer provides four basic types of flip-flops to use in synchronous designs.

- The CLB architecture has only one type of flip-flop, identical to its BLEs.
- It is not possible to provide an input clock to any flip-flops. For more information, refer to Clocking the Configurable Logic Block.
2.1.4 Multiplexers
Switching between signals.
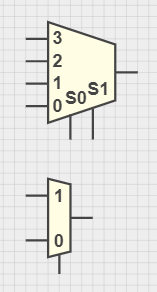
The CLB Synthesizer provides two multiplexers (MUXes) for logic designs—one with a single-bit select input and one with a 2-bit select input.
2.1.5 Tables
Manually configured logic functions.
The CLB Synthesizer provides a 4-bit Table implementation.
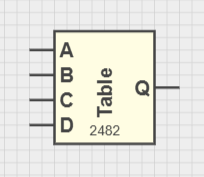
To use the Table, drag and drop the Table symbol onto the canvas and set the output (Q) states in the properties panel according to the required logic function.

2.1.6 Constants
A source of a fixed signal.
The CLB Synthesizer provides several ways to give a fixed signal to an input:
- Individual constant output bits can be connected to inputs

- Multi-signal constants

Configure the number of bits and their values in the Properties panel
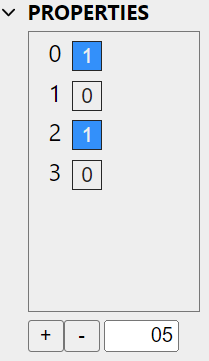
A Zero port can also be used to provide a constant by using an input MUX position

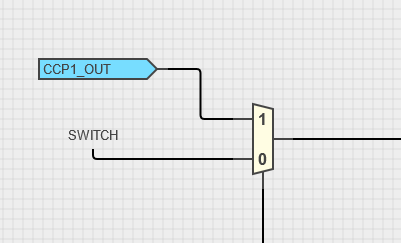
2.1.7 Net Labels
Using the same signal in many places in a design.
A netlabel component dispenses a signal to be used in several places in a logic design, which can increase the readability of a schematic by reducing the number of crossing lines.
For example, then inverted CLBIN1PPS signal is used immediately (connection not shown) and routed to a netlabel SWITCH.
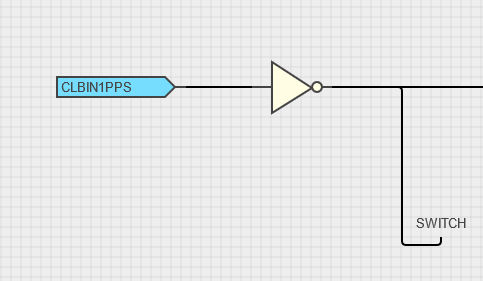
The SWITCH signal can then be used elsewhere in the design as a source.
2.2 Drawing a Basic Schematic
How to get started with a logic design.
The CLB Synthesizer GUI simplifies the process of creating a logic design.
Step 1: Add and Configure Logic Input Sources
- Drag-and-drop an input port from the left side
panel onto the canvas

-
Select the input port and configure its source properties in the right-hand panel

- Repeat as needed
Step 2: Add and Configure Logic Outputs
- Drag and drop an output port from the left side
panel onto the canvas

-
Select the output port and configure its destination properties in the right-hand panel

- Repeat as needed
Step 3: Add Logic Content
-
Drag and drop logic gates, flip-flops, multiplexers, LUTs and constants from the palette on the left side panel onto the canvas

-
Connect them up by dragging connections from outputs to inputs, or vice versa

Add comments for future understanding

Step 4: Synthesize
- Click the Synthesize button, and the logic design is converted into a bit stream using a Microchip online service
