
3 Appendix 1: Programming the Device Using FlashPro Express
(Ask a Question)This chapter describes how to program the PolarFire device with the Job programming file using a FlashPro programmer. The default location of the Job file is: mpf_AN4661_v2024p1_eval_df\Programming_Job
To program the PolarFire device using FlashPro Express, perform the following steps:
- Ensure that the jumper settings on the
board are the same as listed in Table 2-1.Important: The power supply switch must be switched OFF while making the jumper connections.
- Connect the power supply cable to the J9 connector on the board.
- Connect the USB cable from the Host PC to the J5 (FTDI port) on the board.
- Power on the board using the SW3 slide switch.
- On the host PC, launch the FlashPro Express software.
- Click New or
select New Job Project from to create a new job project, as shown in the following figure.
Figure 3-1. FlashPro Express Job Project 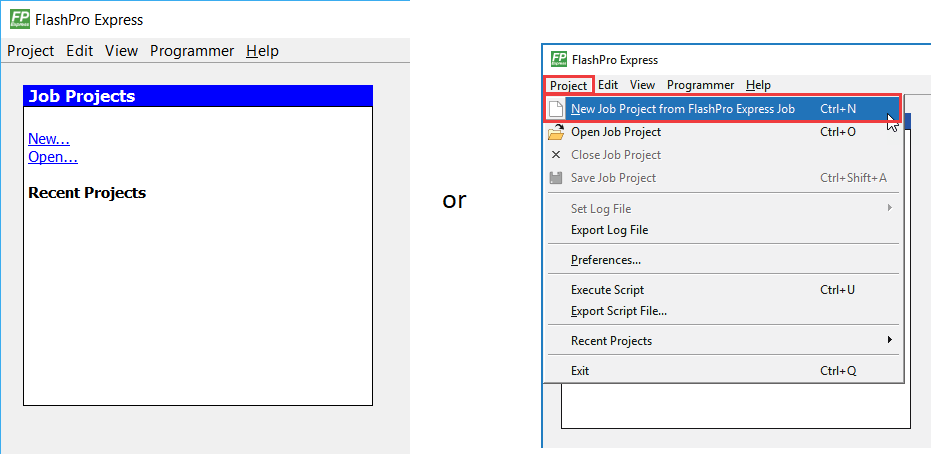
- Enter the following in the New Job Project from FlashPro Express Job dialog box:
- Programming job file: Click Browse, navigate to the location where the .job file is located, and select the file. The default location is: <download_folder>\mpf_AN4661_v2024p1_eval_df\Programming_Job.
- FlashPro Express job project location: Click Browse and navigate to the location where user want to save the project.
Figure 3-2. New Job Project from FlashPro Express Job 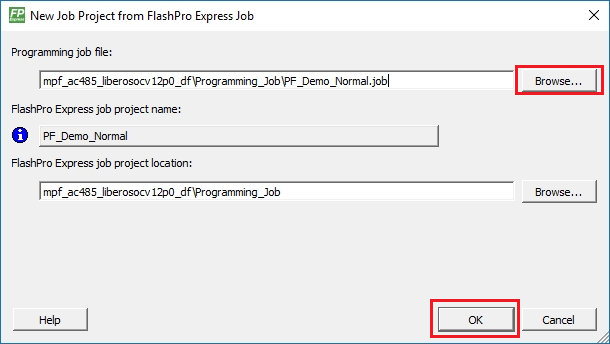
- Click OK. The required programming file is selected and ready to be programmed in the device.
- The FlashPro Express window appears, as
shown in the following figure. Confirm that a programmer number appears in the
Programmer field. If it does not, confirm the board connections and click
Refresh/Rescan programmers.
Figure 3-3. Programming the Device 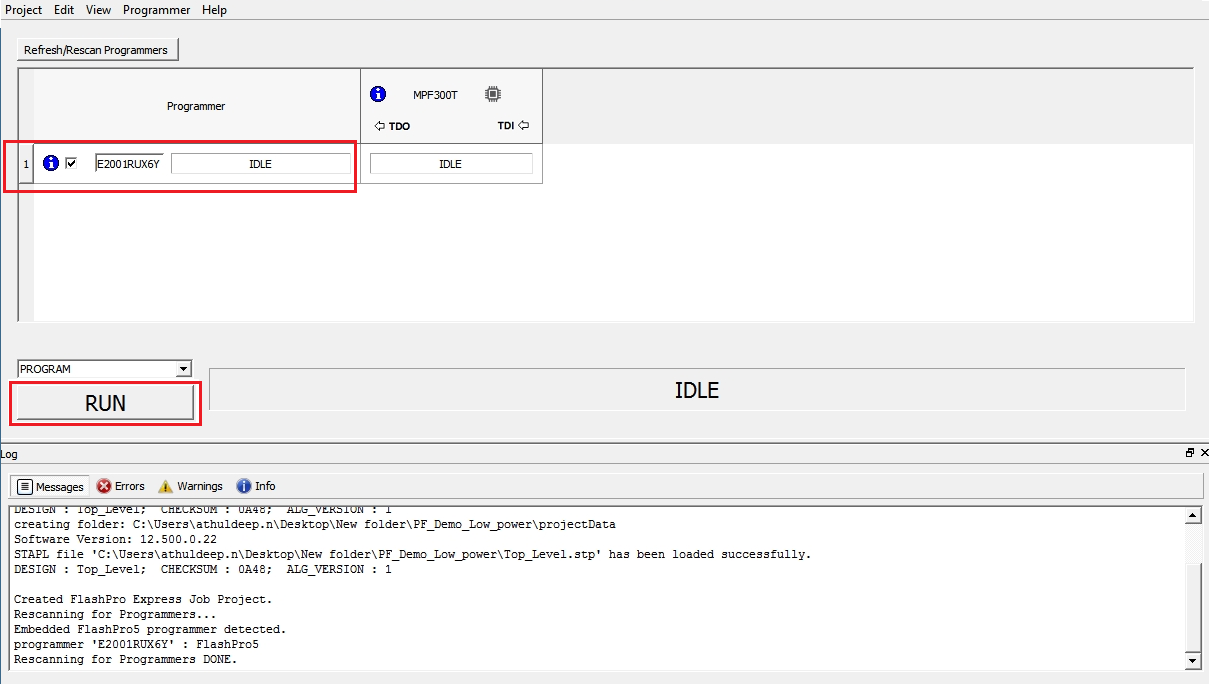
- Click RUN to
program the device. When the device is programmed successfully, a RUN PASSED status is
displayed as shown in the following figure.
Figure 3-4. FlashPro Express—RUN PASSED 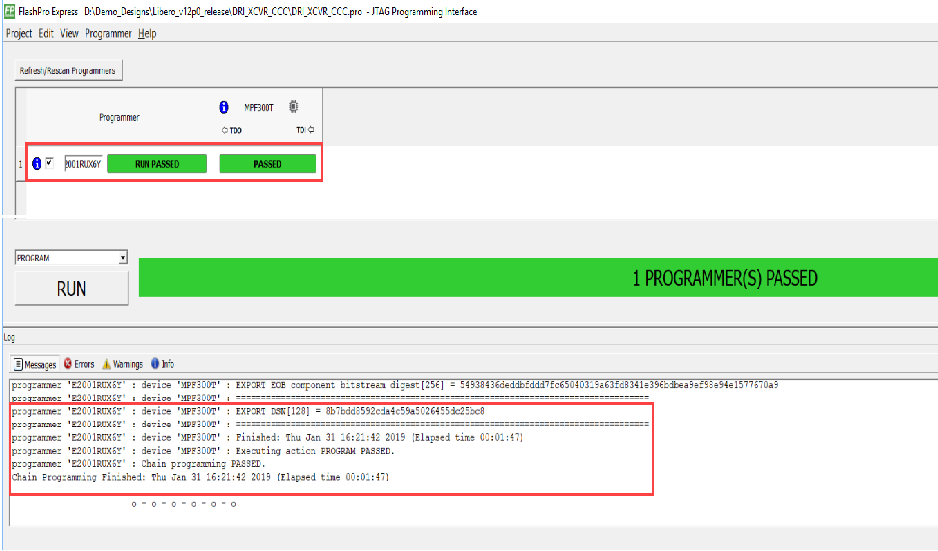
- Close FlashPro Express, or in the Project tab click Exit.