
3.4 Create a new MCC Harmony Project from Scratch
Follow the below mentioned steps to create the new PIC32MZW1/WFI32E01 project in which the device will act as Wi-Fi Station(STA).
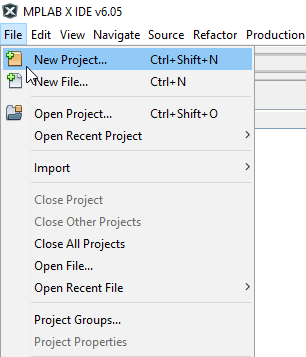
Project Creation
Open MP Lab
Go to File Menu and select New Project
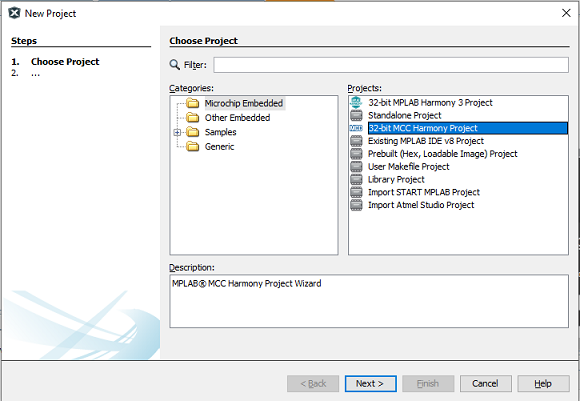
Project Selection
Under the Projects section, select 32bit MCC Harmony Project and click on Next.
Select the "Harmony Repository" path as "http://github.com/MIcrochip-MPLAB-Harmony
Framework Selection
In the "Framework Path", enter the local system path where the packages are needs to be downloaded. Then click Next.

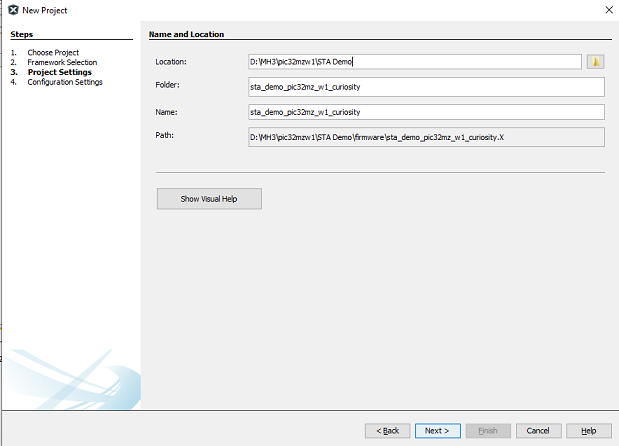
Project Settings
Select the project folder
Enter the full path including the newly created project folder.
Enter the Folder name and Project name and click on Next (To know about “Folder” and “Name” please click “Show visual Help” button).
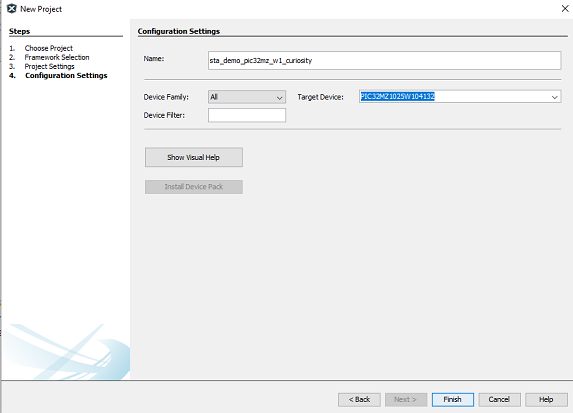
Configuration Settings
Enter a Name for the config setting folder
select the Target device name
Click Finish.
Now MPLABx Code Configurator will be launched automatically.
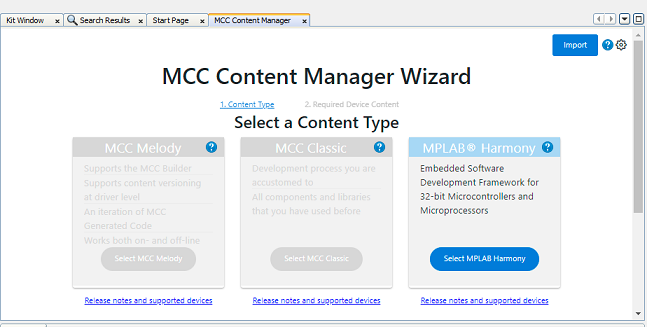
Click on "Select MPLAB Harmony"
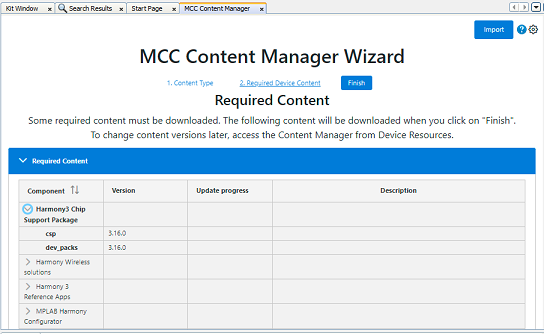
In the next window, select the latest versions of below mentioed repositories and press "Finish". Then the content manager will start download
"csp" and "dev_packs" will be already selected in the "Required Content" window under "Harmony3 Chip support Package". Select the remaining repositories in the "Optional Content".
csp
core
wireless_wifi
dev_packs
wireless_system_pic32mzw1_wfi32e01
wolfssl
net
crypto
CMSIS-FreeRTOS
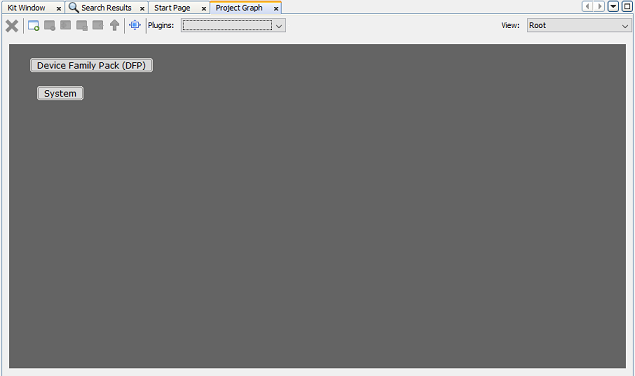
After completing the download, MCC will open the project graph with some components as shown below.
If the user wants to use any one of the System services, add the required System service from the "Device Resourecs" as shown in the image below.
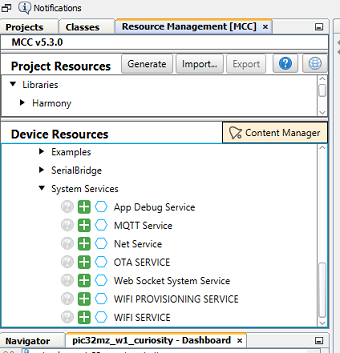
Then select "Yes" for all the "Components auto-activation" requests.
Then press "Generate" button to generate the code.