1.1 Creating an MPLAB Harmony v3-based Project
To create an MPLAB Harmony v3-based project, follow these steps:
- On the Start menu, launch MPLAB X IDE.
- In MPLAB X IDE, on the File menu, click New Project or click on the New Project icon.
- In the New Project window, in the left navigation bar, under Steps click Choose Project.
- In the right Choose Project property
page:
- Categories: Select Microchip Embedded.
- Projects: Select Application Projects.
Figure 1-1. Choose Project 
- Click Next.
- In the left navigation bar, click Select Device.
- In the Select Device property page,
in the Device box, type or select the device PIC32CM5164LS60100.
Figure 1-2. Select Device 
- Click Next.
- In the left navigation bar, click Select Compiler.
- In the Select Compiler property
page, click and expand XC32 list of options and then select the Compiler Toolchain
as shown below.
Figure 1-3. Select Compiler 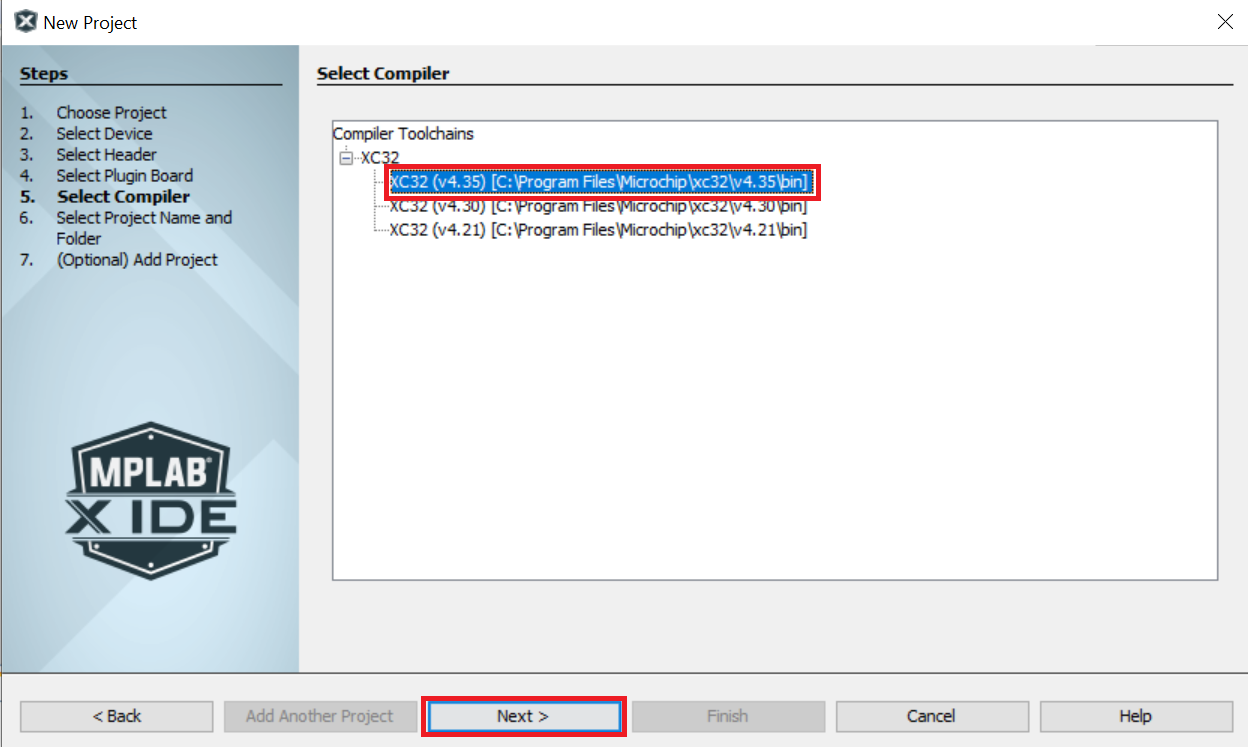
- Click Next.
- In the left navigation bar, click Select Project Name and Folder.
- In the right Select Project Name and
Folder property page:
- Project Name: Enter pic32cm_ls60_cpro.
- Project Location: Click the
Browse button and choose
C:\microchip\h3\Tech_Brief\firmware.
Figure 1-4. Select Project Name and Folder
- Click Finish to launch
MCC.Note: By default, Non-Secure project will be set as the main project while launching MCC.
- Before launching the MCC, the Configuration Database Setup Window will be displayed where the Device Family Pack (DFP) and Cortex® Microcontroller Software Interface Standard (CMSIS) path can be changed, if required. For this demonstration, the default settings are used.
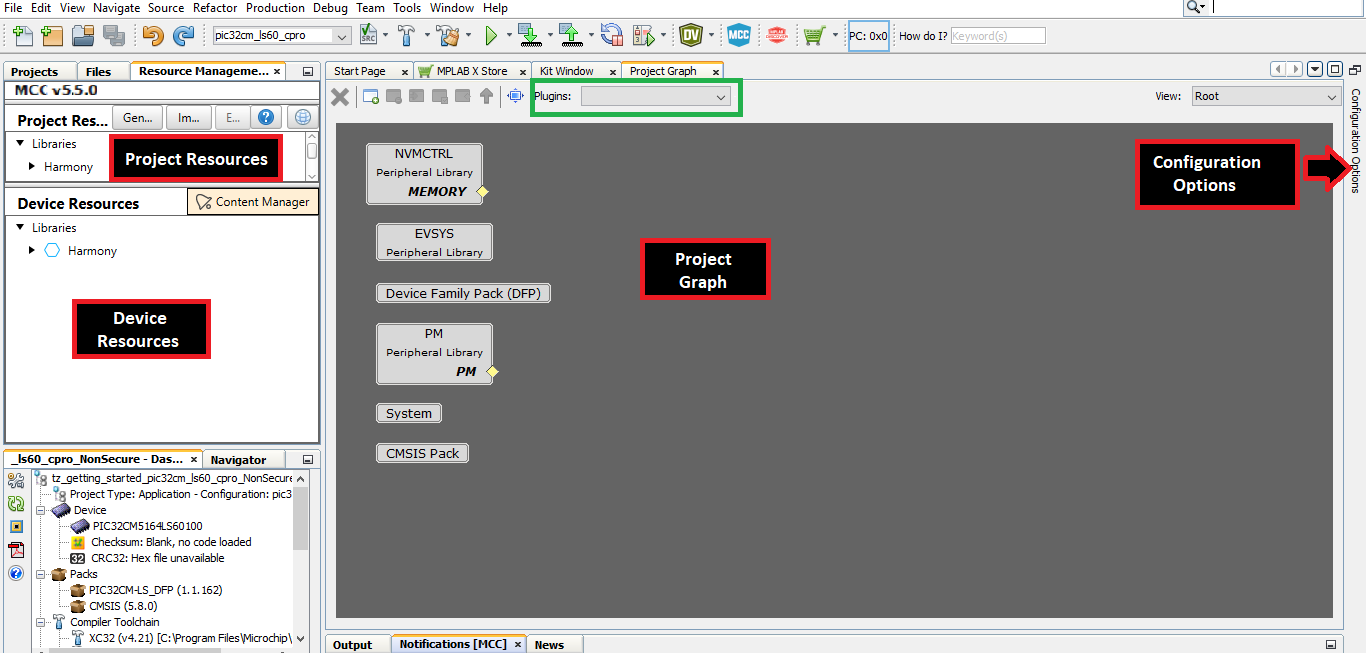
- The MCC plug-in will open in a new
window as shown in the following figure.
Figure 1-5. MPLAB Code Configurator Window