
5.4.1 Manage NVMe Drives from Controller Level
- In Enterprise View, select a controller.
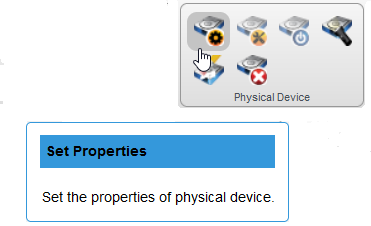
- On the ribbon, in
the Physical Device group, click Set Properties
ribbon icon.
The Set Properties window opens. The Manage NVMe Drives tab is selected, by default.
- Select Configure option from Operation Type drop-down list.
- Select the
checkboxes to configure and add the drives. Provide a label
in ASCII format that does not include spaces and has a
maximum of eight characters. This label is further used to
identify each NVMe drive.
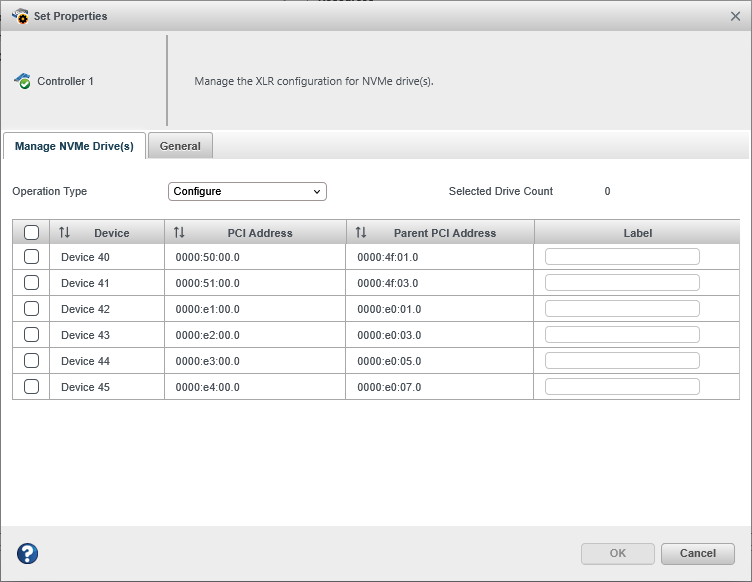
- Click
OK.
The checked drives will get added.
- In Enterprise View, select a controller.
- On the ribbon,
in the Physical Device group, click Set Properties
ribbon icon.
The Set Properties window opens. The Manage NVMe Drives tab is selected, by default.
- Select Unconfigure option from Operation Type drop-down list.
- Select the checkbox to unconfigure the drive that has to be
removed.
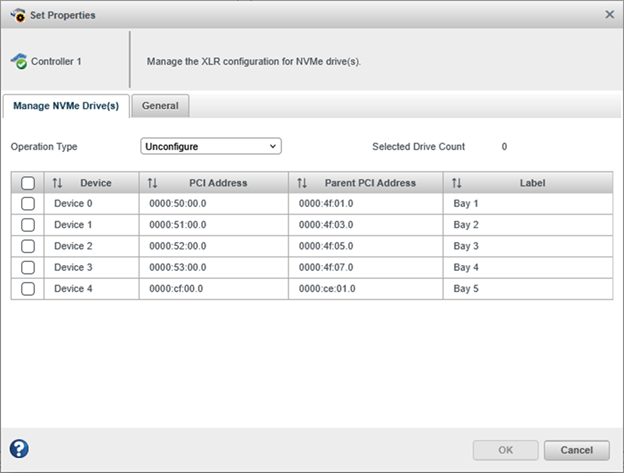
- Click
OK.
The checked drives will get removed.
- In Enterprise View, select a controller.
- On the ribbon,
in the Physical Device group, click Set Properties
ribbon icon.
The Set Properties window opens. The Manage NVMe Drives tab is selected, by default.
- Select Update Label option from Operation Type drop-down list.
- Select the checkbox corresponding to the drive whose label needs
to be modified. Provide a label in ASCII format that does
not include spaces and has a maximum of eight characters.
This label is further used to identify each NVMe
drive.
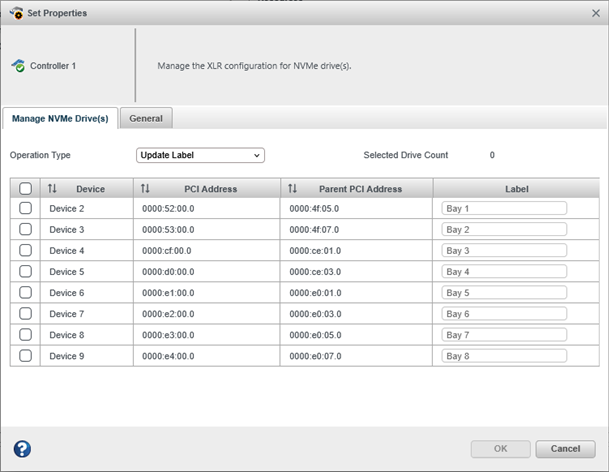
- Click OK.
The label will get updated for the selected drivers.