5.9.1 FFD Project Creation
Developing the Application from Scratch using MCC
-
Create a new MCC Harmony Project. For more details, refer to Creating a New MCC Harmony Project
- From the “Device Resources” field, go to
Harmony>Wireless>Drivers>IEEE 802.15.4>IEEE 802.15.4 MAC
Figure 5-180. IEEE 802.15.4 MAC Component 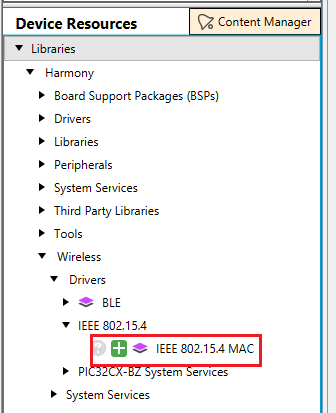 Note: IEEE 802.15.4 PHY and MAC components will appear in Device Resources only if, “wireless_15_4_phy” and “wireless_15_4_mac” repository is cloned in MCC framework path.
 - Click on the plus symbol on the IEEE 802.15.4 MAC component, as illustrated in the above image.
-
Upon selection, user will receive a prompt for auto-activation and auto-connect request of different component dependencies. Select Yes to add all the dependent components and also for all attachment auto-connect requests.
- Click the IEEE 802.15.4 MAC
component, and open Configuration Options and
- In “Device Type Configuration” field,
select FFD from the drop down for FFD project generationNote: If security required, select MAC Security Config as Enabled.
Figure 5-181. IEEE 802.15.4 MAC Configuration 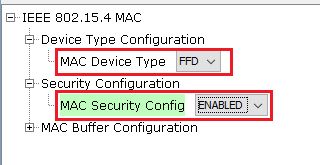
- In “Device Type Configuration” field,
select FFD from the drop down for FFD project generation
-
Right click the TIME module for selecting the timer source, and Select TC0.
Figure 5-182. Timer Component 
- Click the TIME Component, open Configuration Options and,
- Change the Number of Clients as 10 based on software timers.
Figure 5-183. TIME Configuration 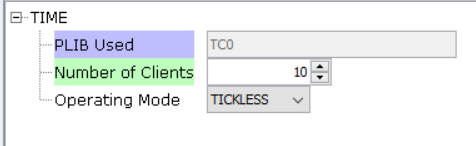
- Change the Number of Clients as 10 based on software timers.
-
Click WBZ451 Curiosity BSP under Device Resources (Device Resources>Libraries>Harmony>Board Support Packages>WBZ451 Curiosity BSP add by using ‘+’ symbol)
Figure 5-184. Device Resources 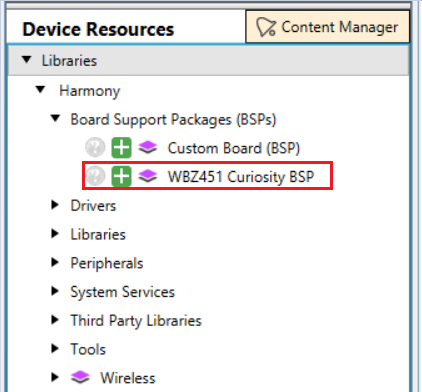
- From the “Device Resources” field, go to Libraries>Harmony>System
Services>BLE Provisioning Add the component by using ‘+’ symbol.
Figure 5-185. BLE Provisioning 
- Upon selection, user will receive a prompt for auto-activation and auto-connect request
of different component dependencies. Select Yes to add all the dependent components
and also for all attachment auto-connect requests.
Figure 5-186. Auto-Activation Request 
- Click the BLE Stack, open Configuration Options and,
- Expand BLE Stack>Generic Access Profile (GAP)>Device Name to update the “Device Name” as MicrochipFFD.
- Expand BLE Stack>Generic Access Profile (GAP)>Advertising>Advertising Data>Local Name to update the “Local Name” as MicrochipFFD
Figure 5-187. BLE Stack 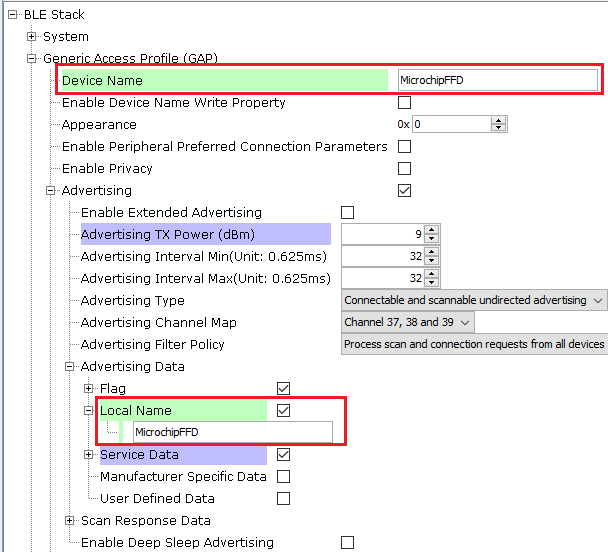
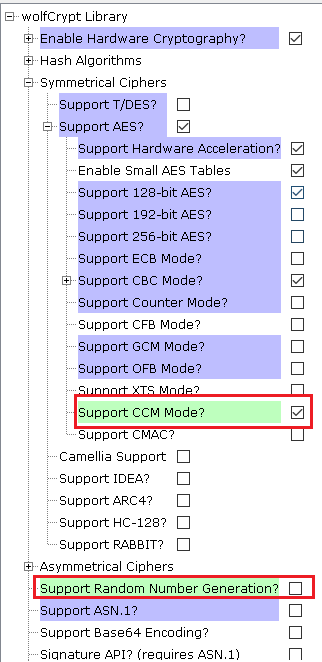
WolfCrypt
Select WolfCrypt Library and disable the Random Number Generation and enable the CCM Mode as shown in the below images.
Free-RTOS
In this component , enable the Use Timers section and do the following modifications -
- Set the Timer task priority as 1
- Set the Timer queue length as 10
- Set the Timer task stack depth as 256
- Disable Use Application Daemon Task Startup Hook

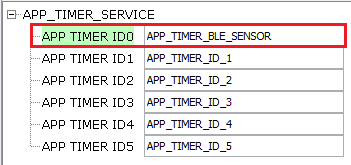
App Timer Service
The APP_TIMER_SERVICE component is available in Device Resources → Wireless → System Services → APP_TIMER_SERVICE . Add the component by using ‘+’ symbol.
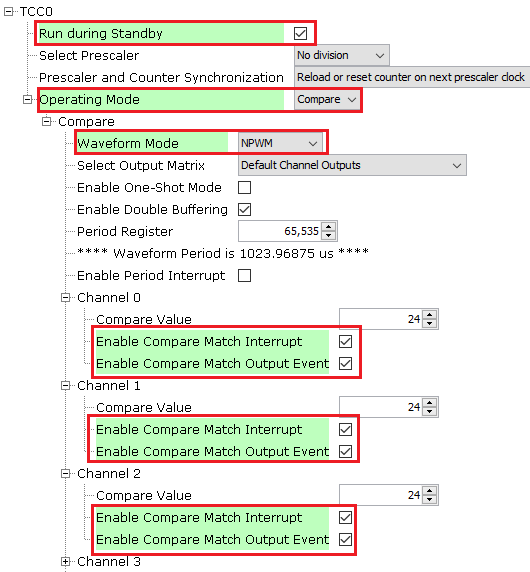
Select TCC0 Timer and configure as shown in the below image
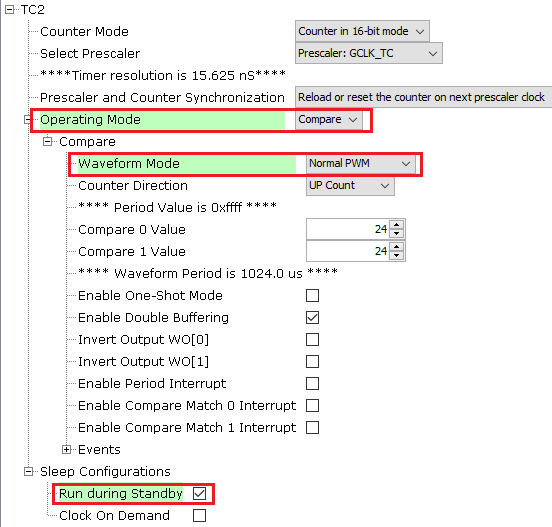
Select TC2 Timer and configure as shown in the below image
Select TC3 Timer and configure as shown in the below image

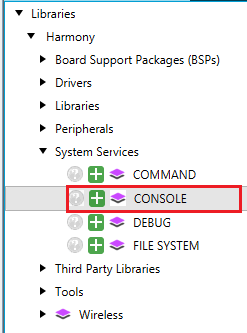
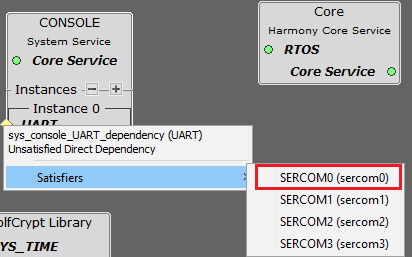
Console Module
The CONSOLE component is available on Device Resources → System Services → CONSOLE . Add by using ‘+’ symbol. The component will be displayed on Project resources section.
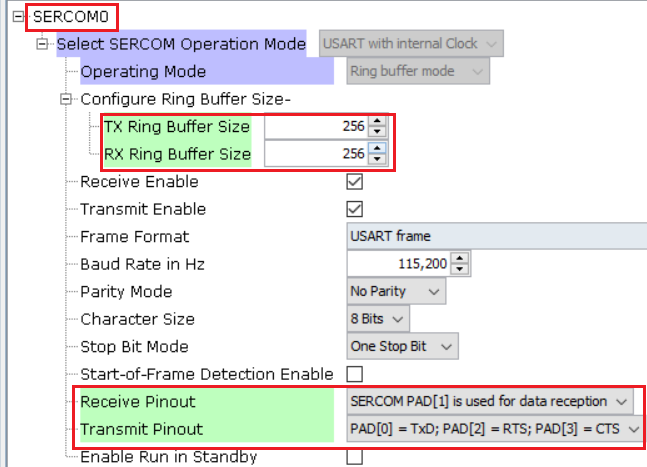
Select the SERCOM0 Component
Select SERCOM0 and do the following modifications -
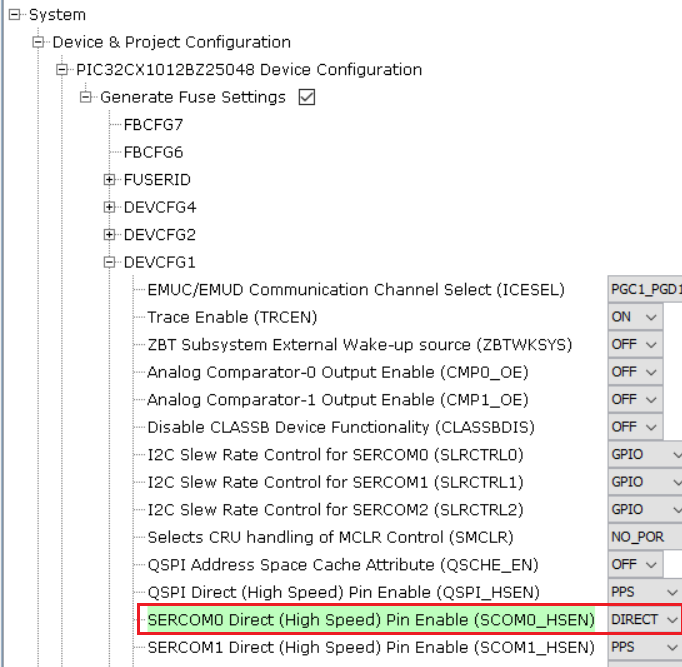
Select System and Set the SERCOM0 Direct Pin Enable as DIRECT
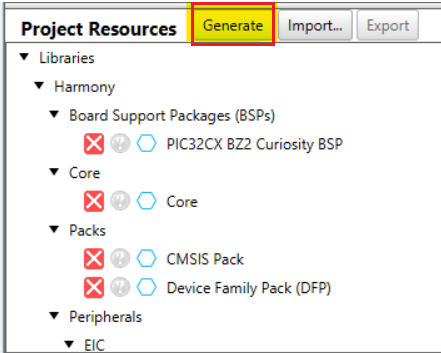
Click Generate Symbol On The Project Resources-
Adding Files To The Project
After the successful generation of the project , the following files and folders are added.
Copy the following files into the project location from the Project Repository
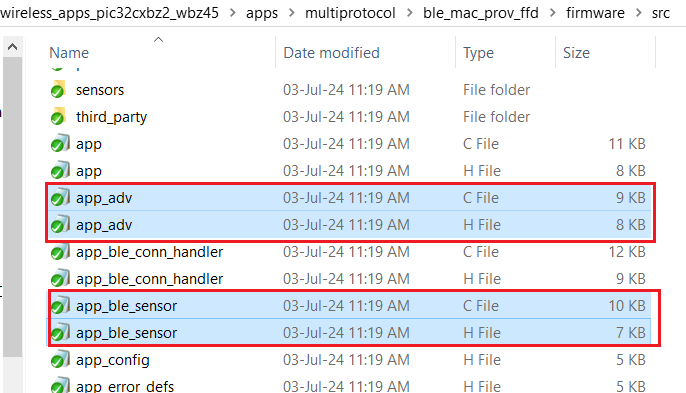
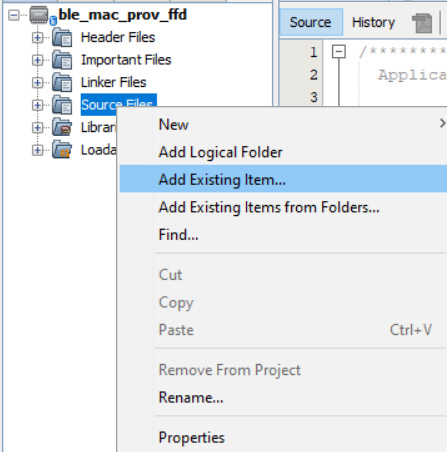
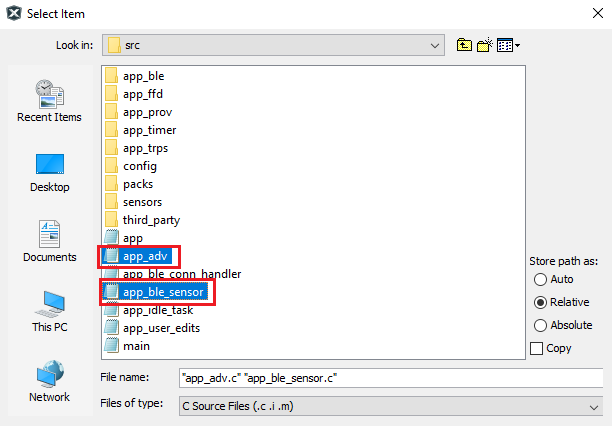
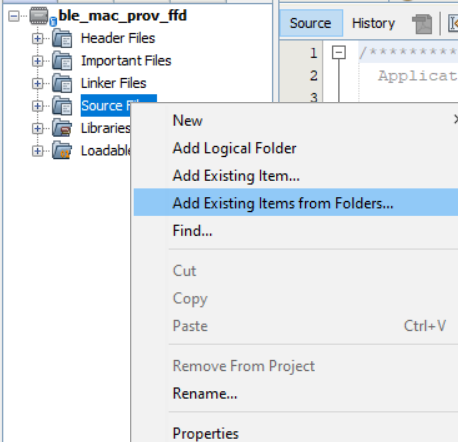
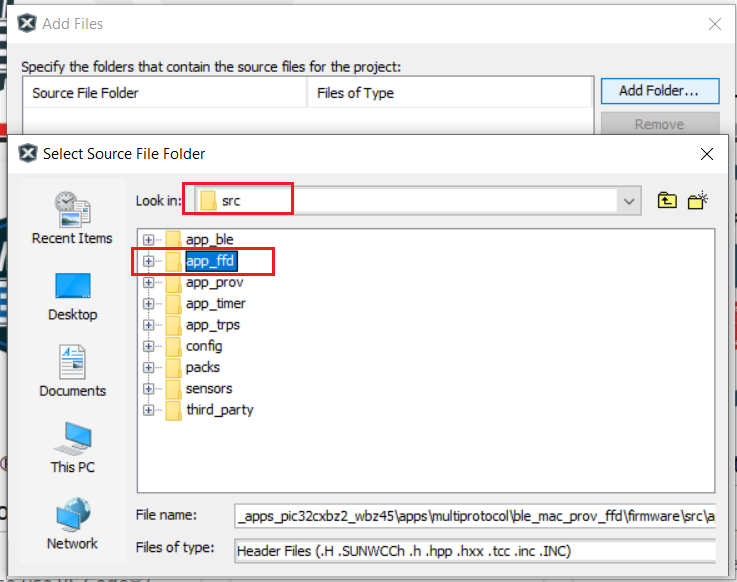
Add the Source files to the project as mentioned below -
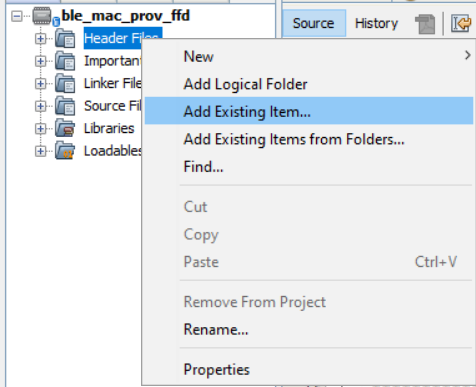
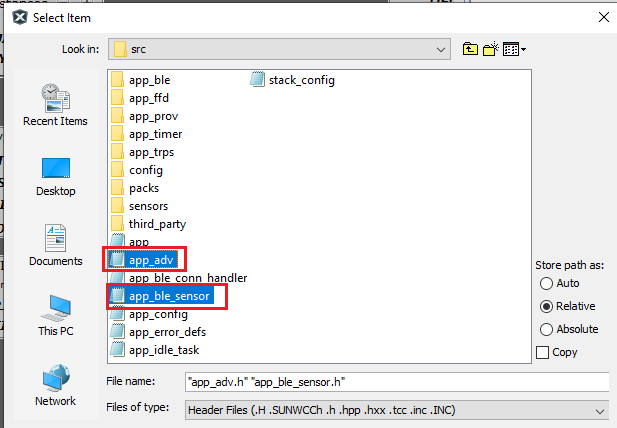
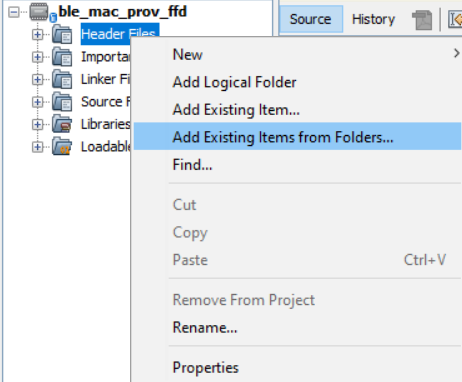
Add the Header Files to the project as mentioned below -
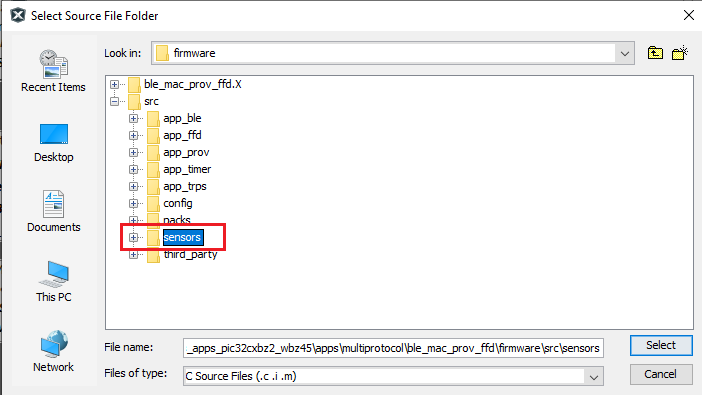
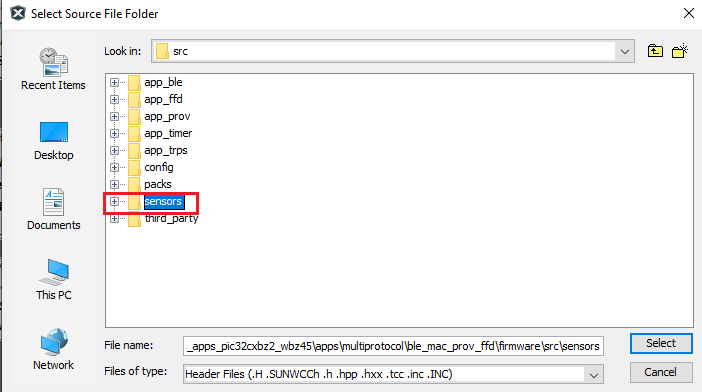
Add the “sensor folder” to the project location as mentioned below -
Now include source files
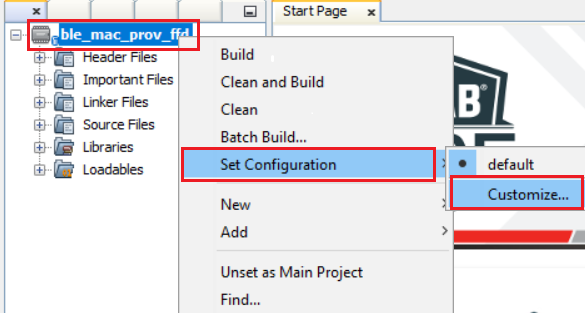
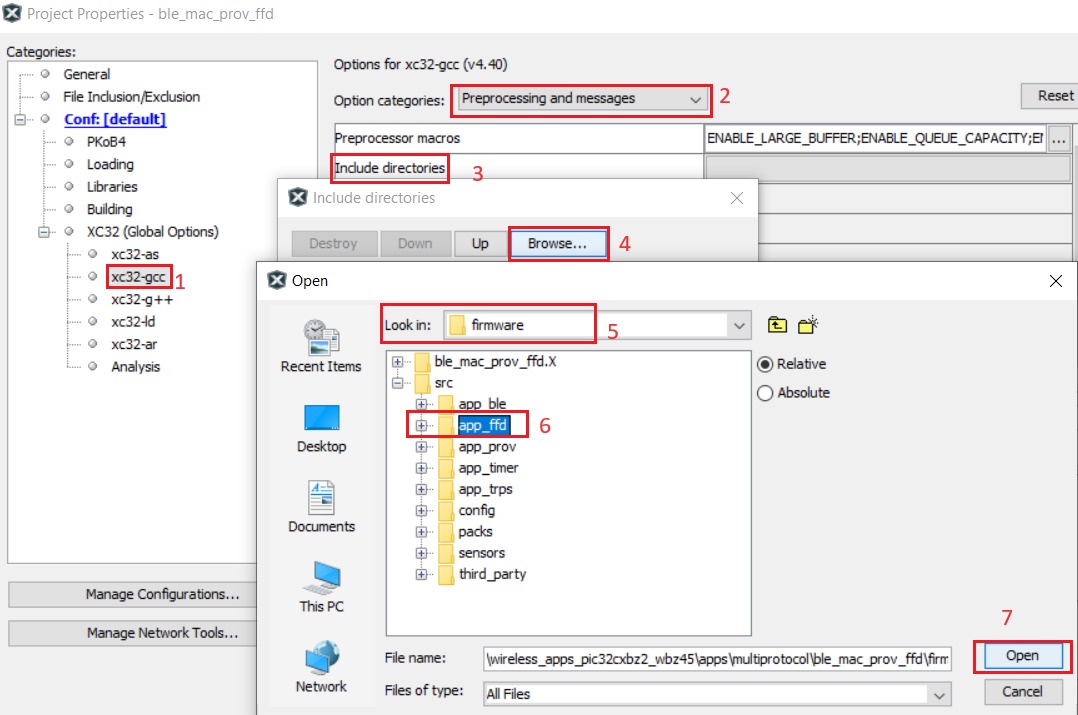
Select the Project folder → ble_mac_prov_ffd → Set Configuration → Customize
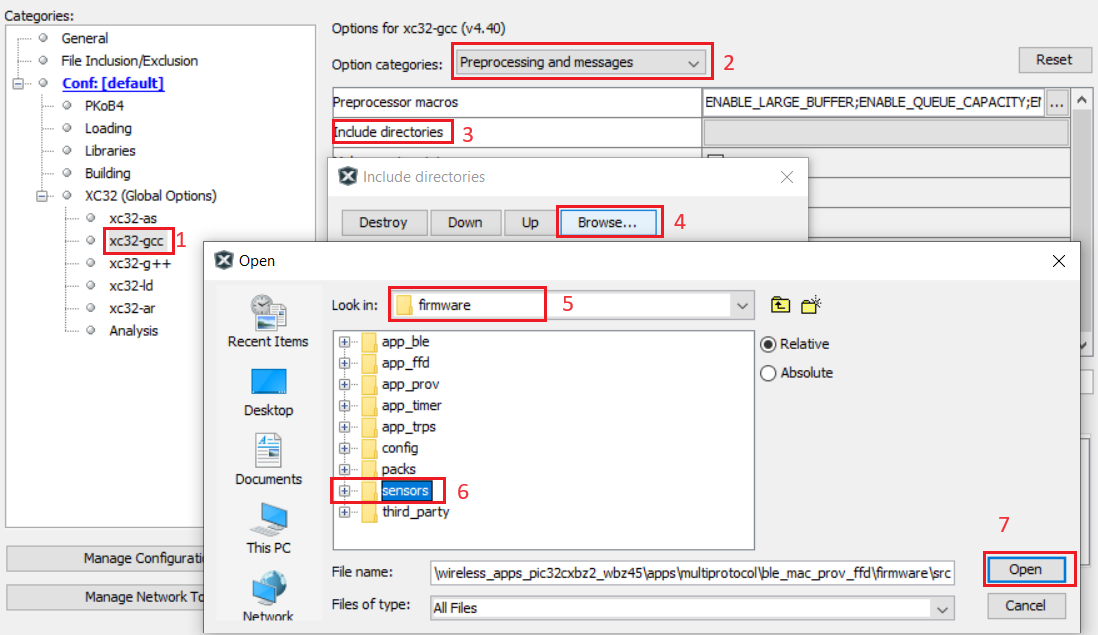
Enter the project properties
Add the “sensor folder” to the project location as mentioned below -

Select the Project folder → ble_mac_prov_ffd → Set Configuration → Customize
Enter the Project Properties -
Code Modifications For FFD project
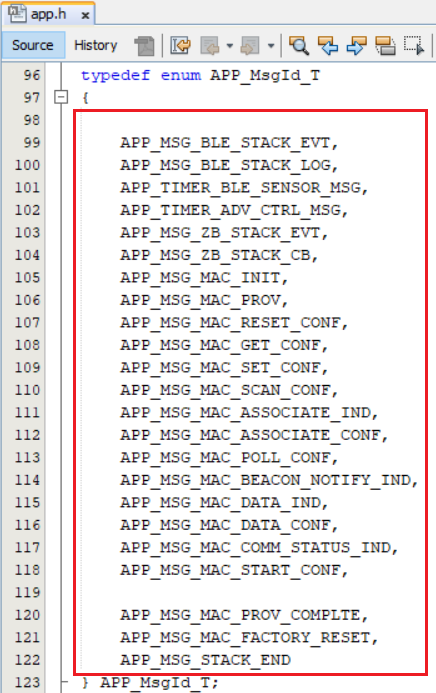
Changes in the app.h file
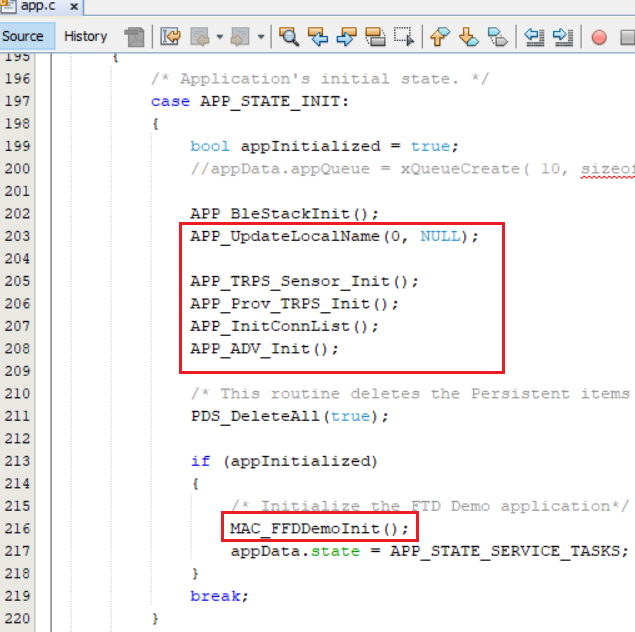
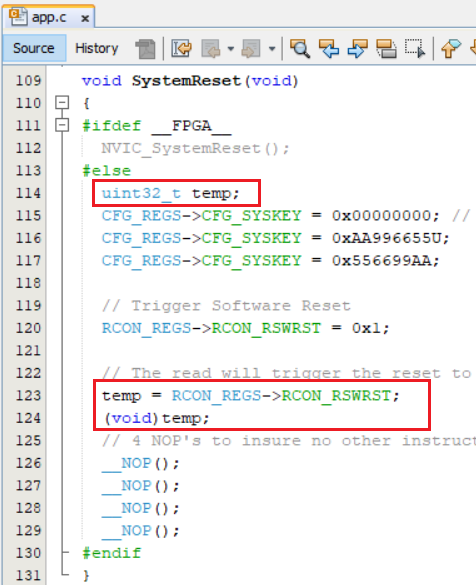
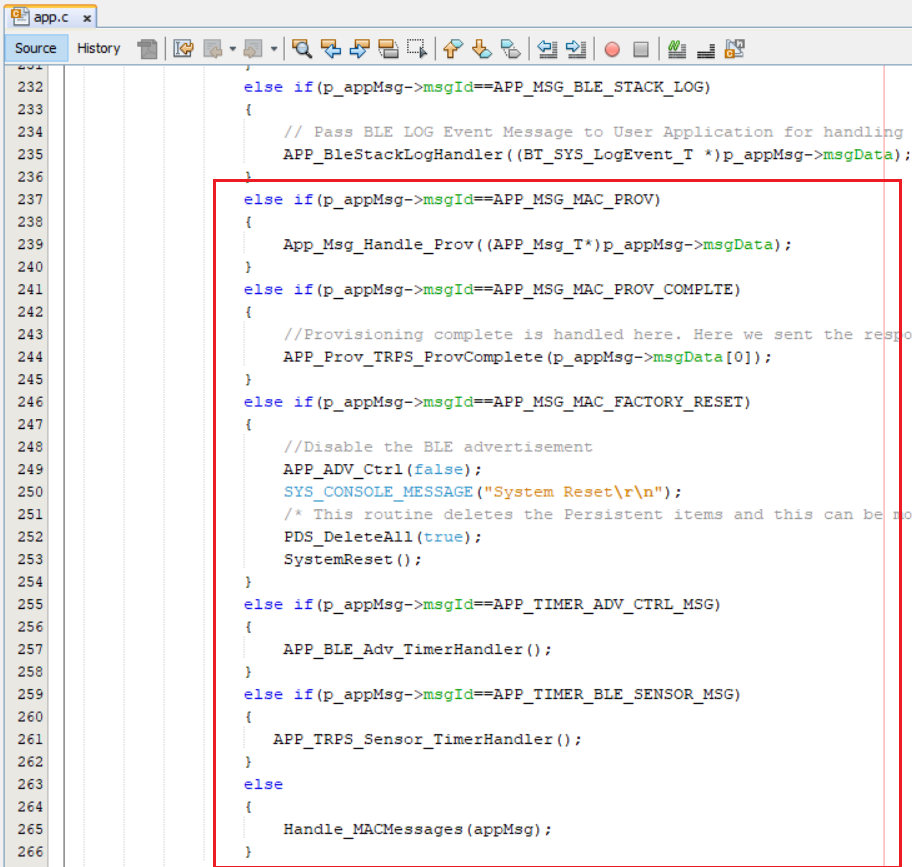
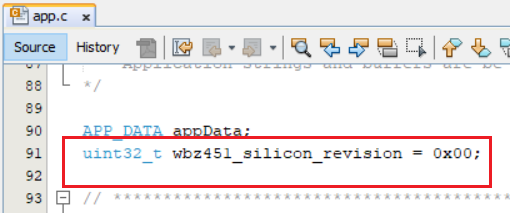
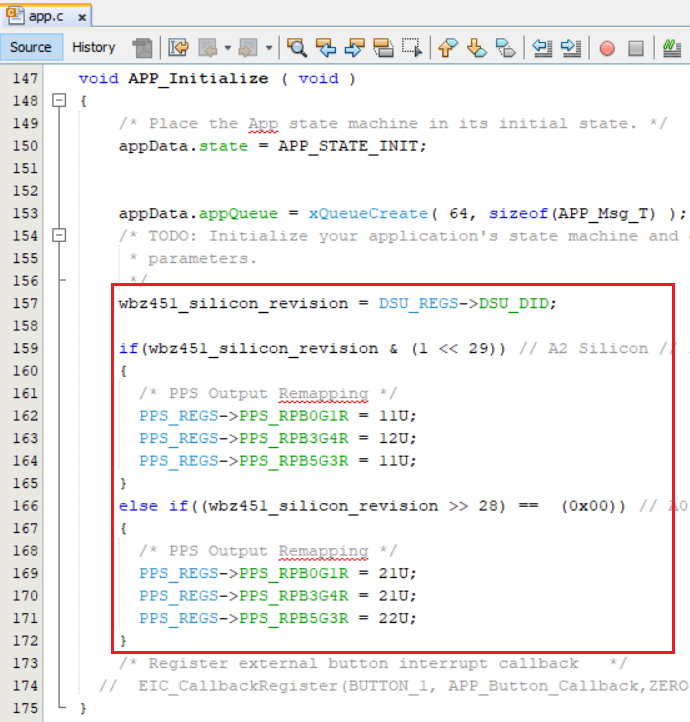
Changes in the app.c file
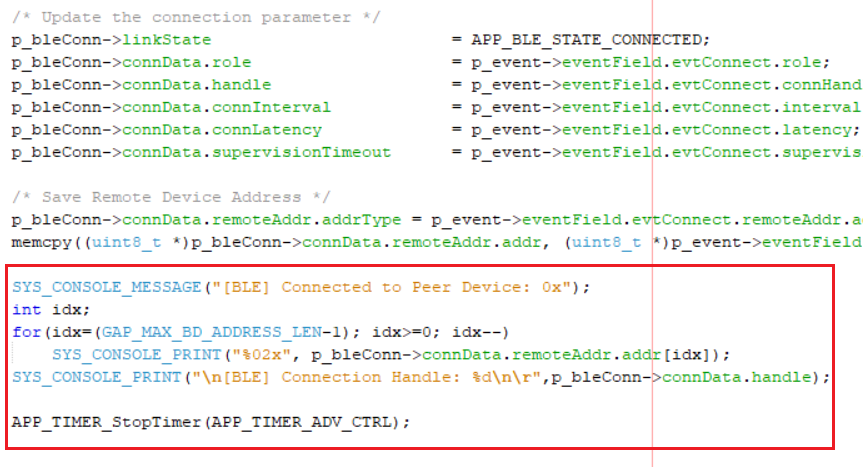
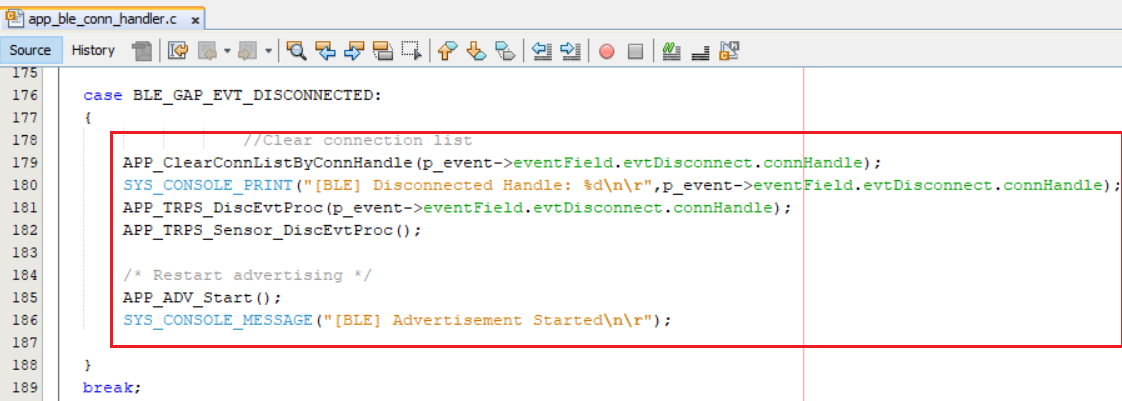
Changes in the app_ble_conn_handler.c file

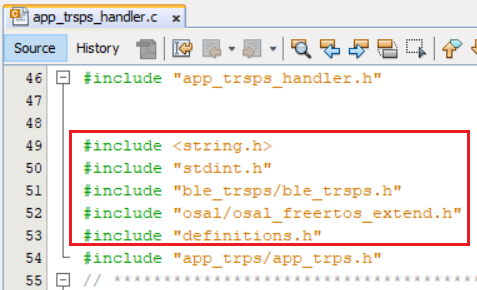
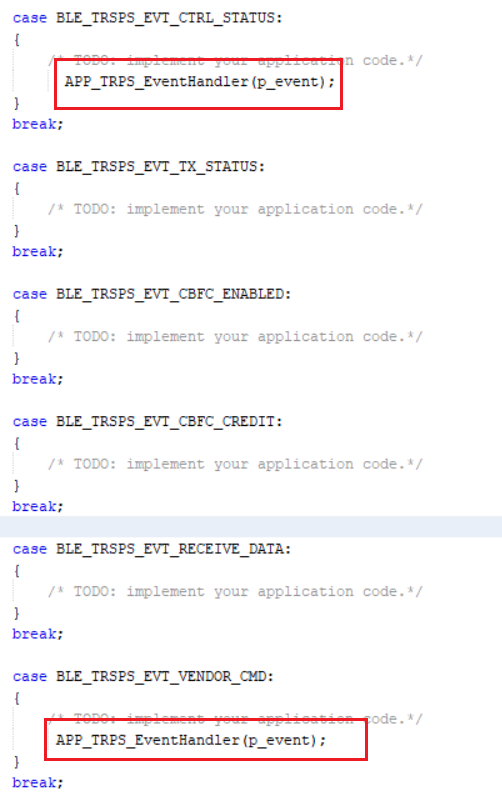
Changes in the app_trps_handler.c
Changes in the app_ble_handler.c file

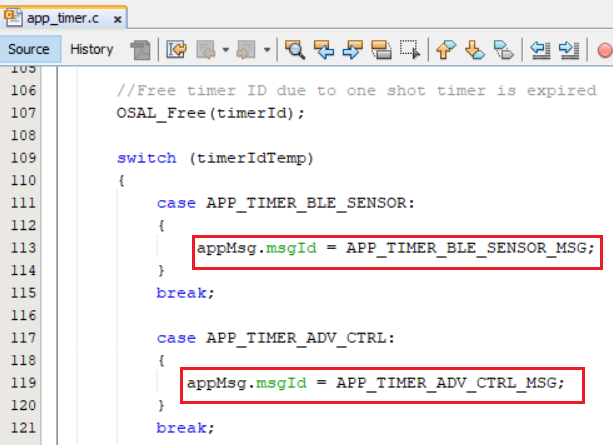
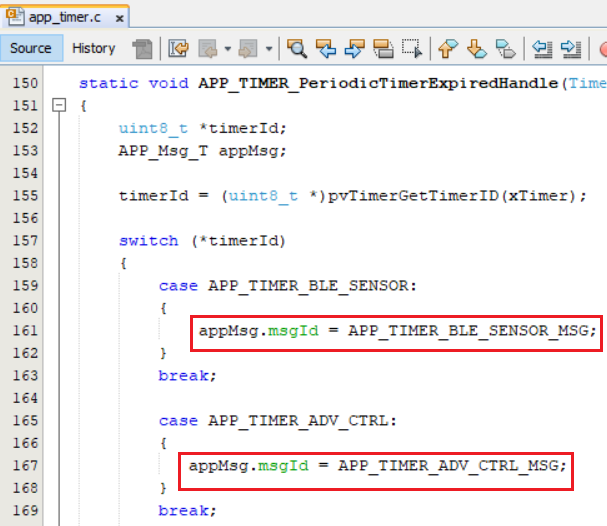
Changes in the app.timer.c file