1 Introduction
The goal of this hands-on lesson is to describe and illustrate how to use Atmel START’s example browser and configuration screens, with specific emphasis on the Event System and Custom Logic Configurator.
Atmel Start (http://start.atmel.com) is a tool that will help you select and configure software components, drivers, middleware and example projects to tailor your embedded application in a usable and optimized manner.
- Filter the microcontrollers (MCUs) by requirements before starting a project
- Next add components to your project
- Configure each component
- Export the project
- Add it into your favorite Integrated Development Environment (IDE) for further development
- ATtiny817 Xplained Pro Overview
- How to find and run projects from START’s example browser
- GPIO Events on Button press and 2 Hz RTC output
- How to turn on LED only when both SW0 & SW1 are pressed
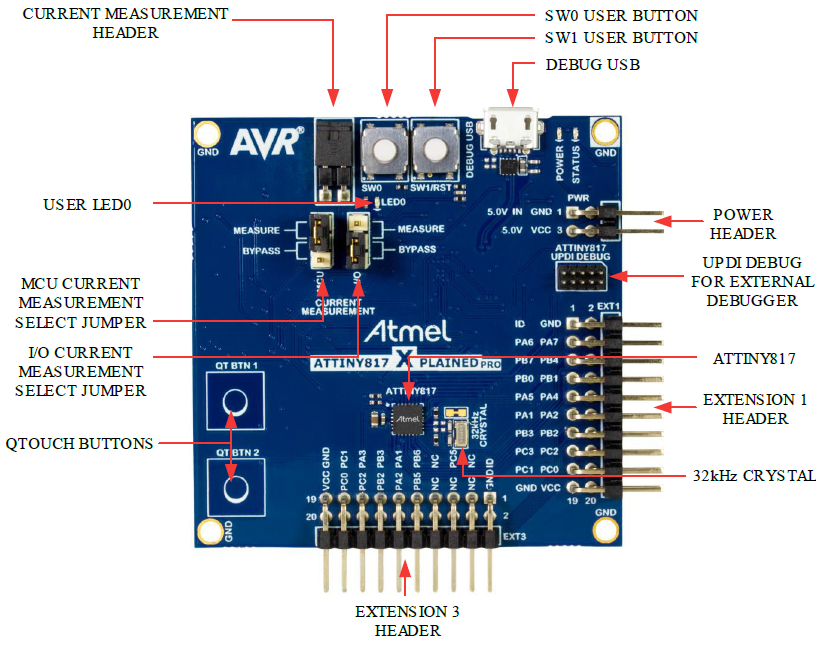
ATtiny817 Xplained Pro Overview
The ATtiny817 Xplained Pro evaluation kit is a hardware platform for evaluating the latest tinyAVR® microcontrollers (ATtiny817, ATtiny816, ATtiny814, ATtiny417). The evaluation kit comes with a fully integrated debugger that provides seamless integration with Atmel Studio.
The ATtiny817 Xplained Pro evaluation kit does not include extension boards, which can be purchased individually.