1.1.2 Create a new MPLAB® Harmony v3 project using MCC
This section offers a step-by-step guide to create a new application project.
Required Software
The instructions in this tutorial assume that you have already installed the following software:
- MPLAB X Integrated Development Environment
- MPLAB XC32/32++ C Compiler
Create a new project
- Open the MPLAB® X IDE.
- Create a New Project by clicking the New Project icon or by selecting File > New Project.
- In the New Project window, select Application Project(s) and click next.
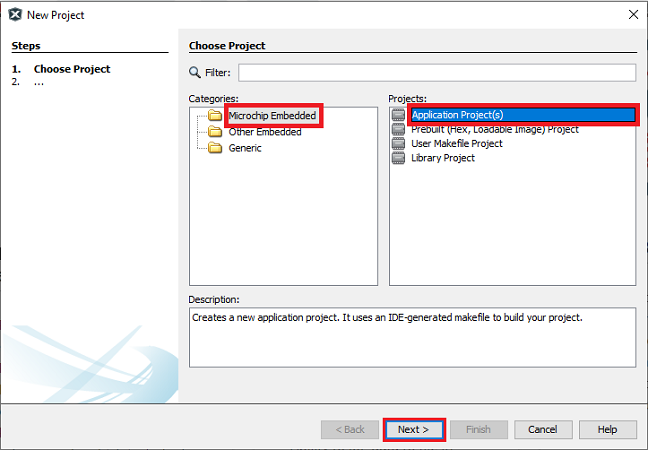
- Note:
- If the option 32-Bit MPLAB Harmony v3 Project is not available, install the MPLAB® Harmony 3 Launcher plug-in from Tools > Plugins > Available Plugins before continuing with this demonstration.
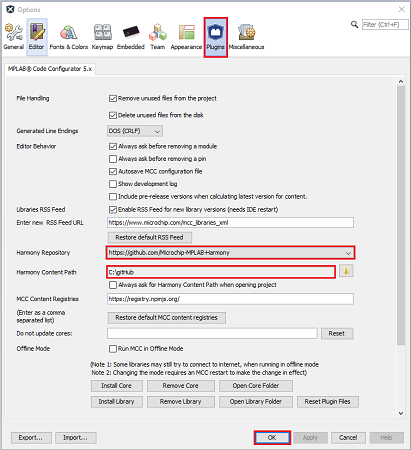
- If the Harmony Content Path and Repository is not set, then go to Tools
> Options, select Plugins and select the Harmony Repository and enter
your Harmony Content Path as shown in the below figure to download the
Harmony packages.
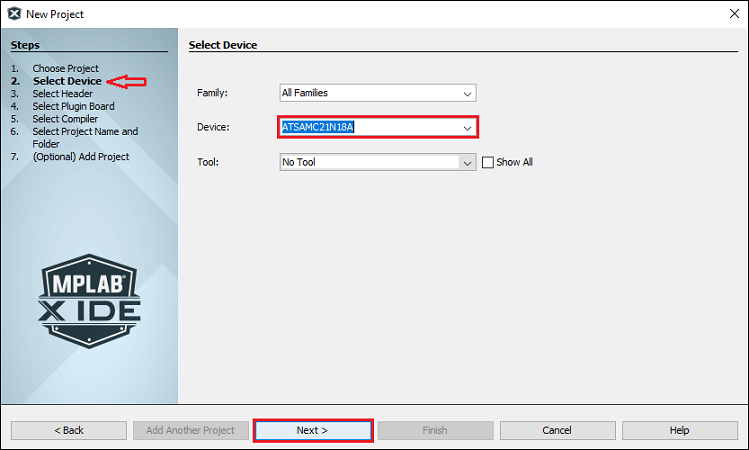
- In the Select Device dialog window, select the target Device ATSAMC21J18A from
the drop-down menu as shown below and click Next.
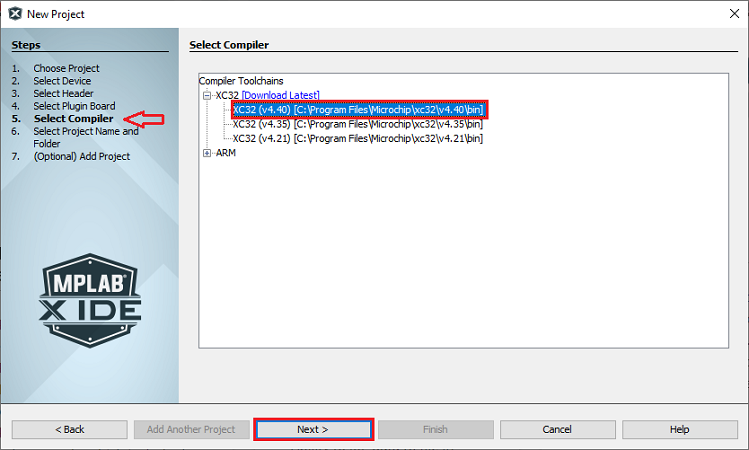
- In the Select Compiler dialog window, select the latest or needed Compiler as
follows and click next:
- In the Select Project Name and Folder dialog window, fill in or select the information needed as follows:
- Project Name: Project name i.e. “atsamc21_project_Qspin”
- Project Location: Select or Enter the Project Location of your choice.
- For Example: atsamc21_project_Qspin and the Project Location is:
C:/Users/<user_id>/atsamc21_project_Qspin/sam_c21/atsamc21_project_Qspin/firmware
- For Example: atsamc21_project_Qspin and the Project Location is:
- Note: Kindly suffix the firmware folder name after the Project folder “atsamc21_project_Qspin”.
- Project Folder: This is a read-only field, MCC automatically creates the .X project folder in the above mentioned project location.
- Click Finish.
- Download the Required Mandatory Harmony Content if not downloaded.
The below MCC Content Manager window will open if the Mandatory Harmony Contents are not present in the Harmony Content Path mentioned in Step 4.
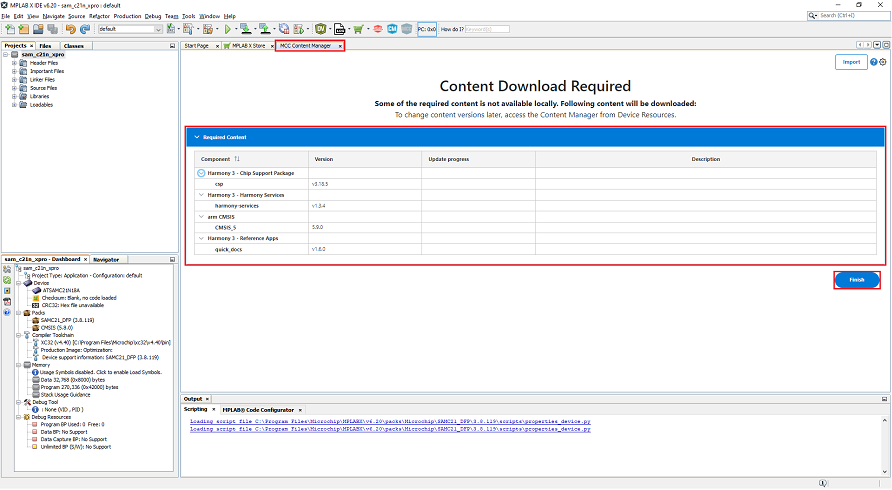
- Click on the Finish Button in the MCC Content Manager Wizard to start downloading the Mandatory Harmony Content.
- Note: For this demonstration application, the following MPLAB Harmony v3 packages are required: csp, harmony-services, CMSIS, and quick_docs. The MPLAB Harmony 3 Content Manager tool simplifies the downloading of the MPLAB Harmony v3 packages. If these packages are not downloaded, then the user can use the MPLAB Harmony 3 Content Manager tool to download them onto their computer.
- If you need, you can select the optional contents like bsp, core,
CMSIS-FreeRTOS, etc., and click apply, then Content Manager will start
downloading these selected packages under the Harmony Content path.
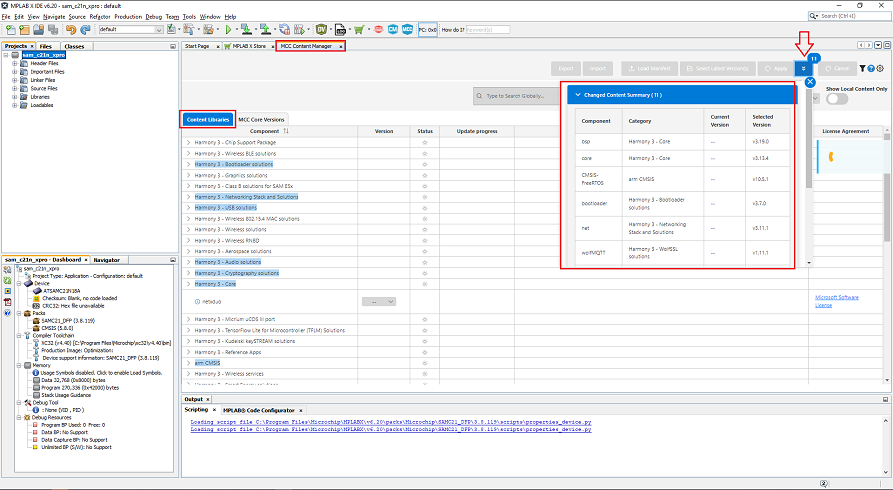
- Similarly, update the MCC Core Versions to the latest if not already updated.

