8 Libraries and Modules
Making a library of modules that can be easily re-used.
The CLB Synthesizer supports hierarchical designs which includes sub-sheets as either schematics or verilog. It is also possible to store these sub-sheets in a way that they can be reused in multiple designs or projects. A single functional item, which may itself be implemented across multiple sheets, is referred to as a module, and a collection of modules is referred to as a library.
8.1 The Built-In PIC16F131 Device Library
The hardware counter in the CLB is accessed by using a counter module in the built-in PIC16F131 Device Library.
Working with the built-in counter module is no different to working with a custom module from a custom library.
8.2 Using the Hardware Counter
How to work with the built-in hardware counter.
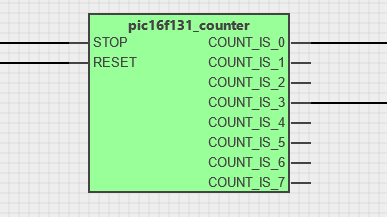
The CLB peripheral contains a dedicated 3-bit hardware counter. This is a convenient building block to use when, for example, implementing state machines. The counter has STOP and RESET inputs, which must be connected, and 8 one-hot outputs which can be used according to needs.
The counter is always available in the PIC16F131 Device Library in the Library section of the left side-bar.

Click the + icon nect to the pic13f131_counter to add the counter to a design.
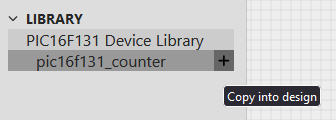
Once added to a design, it will appear as a module in the modules section of the left side-bar.

The counter can now be placed onto the schematic canvas and connected up as required.
8.3 Using Modules from the Microchip Library
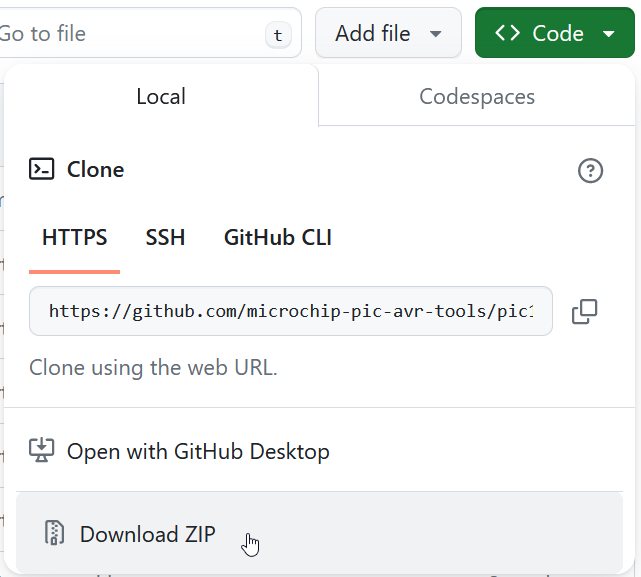
Microchip publishes a library of modules for the CLB Synthesizer on GitHub in the Microchip PIC&AVR Tools pages. This library includes counters, shifters and other utility functions that can be used in a logic design in the CLB Synthesizer.
Download the library from GitHub before it can be used in a logic design. To save the library to local storage, use the Download ZIP menu option in the Code drop-down menu.
Follow the procedure outlined in Using Modules from a Custom Library to use a module from the library.
8.4 Using Modules from a Custom Library
Load a library into the CLB Synthesizer before its modules can be used in a design.
- Use the Load Library from file option on the drawer menu on the library section of the left-side panel.
- Browse and select the library zip archive.
- The newly loaded library will appear as a new entry in the library section of the left-side panel. The individual modules included in that library are listed below the library.
- Click the + next to a module to include that module in the current design. It appears in the modules section, and the associated sheets and Verilog files appear in the documents section.
- Use the module by dragging the module representation from the modules section onto the canvas and connecting it as required in the design.
8.5 Creating a Library with Modules
The re-used logic functionality designs can be saved as modules, which can be included in a library archive.
Step 1: Create the module using sub-sheets
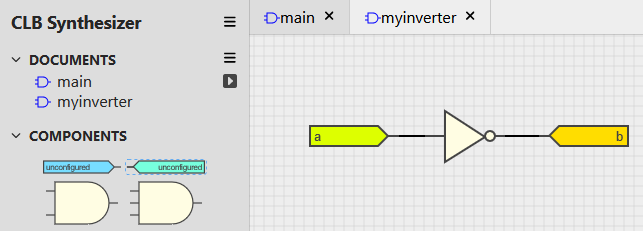
Start with a new design in the CLB Synthesizer. Create at least one document in addition to main and sketch logic content or write Verilog to perform the function of the module. During this process the main schematic page (top-level) functions as a test bench. The entire module (all sub-sheets) and the test bench (main) must synthesize successfully before continuing.
- Creates a document called "myinverter"
- Uses off-sheet ports to invert signal 'a' to signal 'b'
- Uses the "myinverter" module in main and connects it to PPS ports as a test bench
- Synthesizes successfully

Step 2: Remove the testbench
Before exporting a module, the test bench must be removed since it is not part of the module.
Click the trash can icon next to main in the documents section and remove it.

Step 3: Save the module
In the main drawer-menu in the CLB Synthesizer, select Save design as module
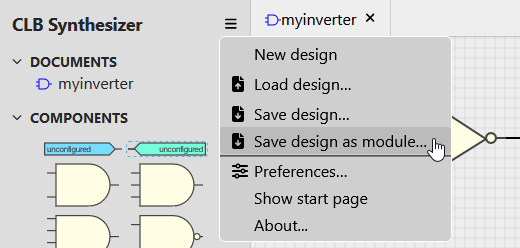
Give the module an appropiate name.
This example saves the module as "myinverter.zip"
Save the module in a convenient place.
Step 4: Create a library structure
Inside the library folder, create a new folder/directory with the same name as the module in a conveient place and copy the entire contents of the archive from Step 3: Save the module into this folder. This includes a manifest, readme and one or more sheets.
Step 5: Document the library
In the library folder, create a new text file called manifest.json and add a manifest in this form, using a suitable name in the "name" field and a new GUID in the "id" field.
{
    "type": "CLB Synthesizer Library",
    "formatversion": "1.0",
    "name": "DemoLib",
    "id": "xxxxxxxx-xxxx-xxxx-xxxx-xxxxxxxxxxxx",
    "version": "1.0.0"
}Add a readme.md file and describe the library using markdown format.
Step 6: Document the module (optional)
Edit the readme.md to describe the module
Step 7: Create and test the library archive
Add all the content of the library folder to a new zip archive. Any name can be used here, but take care not to include the library folder itself inside the archive.
The resulting zip archive is now the library which contains the module.
To test it, start a new design in the CLB synthesizer and use the Load library from file option in the drawer-menu in the library section of the left-pane. The newly created library should appear, with the module inside it, ready to be used.
Step 8: Deployment of libraries
A library can be deployed in the simplest of ways by storing the archive zip file and distributing it.
Once under version control, new modules can be added and module versions managed accordingly.
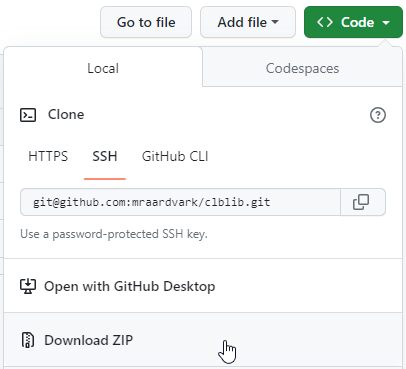
Users can download library archives using the web interface to the version control system as supported by most modern version control system interfaces. For example this is done in GitHub using the Download ZIP menu on the repository.
