This section explains how to create a peripheral device with custom profile and control.
The RGB LED and user button 2 on the PIC32-BZ6 Curiosity board
shall be used to enable or disable the LED status. The peripheral device will be the PIC32-BZ6 Curiosity board and the central device can either be
a smartphone with a Light Blue app or another PIC32-BZ6
Curiosity board. The instructions mentioned below are applicable for a BLE peripheral
device.
Users can choose to either run the precompiled Application Example hex file provided on
the PIC32-BZ6 Curiosity Board or follow the steps to develop
the application from scratch.
It is recommended to follow the examples in sequence to understand the basic concepts
before progressing to the advanced topics.
Recommended Readings
Getting Started with Application Building Blocks – See Building
Block Examples from Related Links.
Getting Started with Peripheral Building Blocks – See Peripheral
Devices from Related Links.
See BLE Connection from
Related Links.
See BLE Custom Service from Related Links.
BLE Software Specification – See MPLAB®
Harmony Wireless BLE in Reference Documentation from Related
Links.
Hardware Requirement
Table 5-22. Hardware Prerequisites
S. No.
Tool
Quantity
1
PIC32-BZ6 Curiosity Board
1
2
Micro USB Cable
1
3
Android/iOS Smart
phone
1
SDK Setup
Refer to Getting Started with Software Development from Related Links.
Software
To install Tera Term tool, refer to the Tera Term web page in Reference
Documentation from Related Links.
Smartphone App
Light Blue iOS/Android app available in stores
Programming the Precompiled Hex
File or Application Example
Using MPLAB® X IPE:
Import and program the
precompiled hex file: <Harmony Content Path>\wireless_apps_pic32_bz6\apps\ble\building_blocks\peripheral\profiles_services\custom_service\precompiled_hex\custom_service.X.production.signed.hex.
For detailed steps, refer to
Programming a Device in MPLAB® IPE in
Reference Documentation from Related Links.
Note: Ensure to choose the correct Device and
Tool information.
Using MPLAB® X IDE:
Perform the following the steps mentioned in Running a Precompiled
Example. For more information, refer to Running a Precompiled
Application Example from Related Links.
Open and program the application
<Harmony Content Path>\wireless_apps_pic32_bz6\apps\ble\building_blocks\peripheral\profiles_services\custom_service\firmware\custom_service.X.
For more details on how to find the Harmony Content Path, refer to Installing
the MCC Plugin from Related Links.
Demo Description
This application enables users to control a RGB LED on the PIC32-BZ6 Curiosity board and read its status using a central device. On
reset, demo will print “[BLE] Device Initialized. Ready for connection” which
denotes the start of advertisements and then “[BLE] Connected to Peer Device”: when
connection is established. Application data to be sent to the connected central
device (smartphone or another PIC32-BZ6 Curiosity board)
is entered in a terminal emulator like Tera Term.
Testing
Using a micro USB cable, connect
the Debug USB on the Curiosity board to a PC.
Program the precompiled hex file
or application example as mentioned.
Open TeraTerm and configure as
mentioned below:
Terminal Settings:
Baud
Rate/Speed – 115200 (as configured in SERCOM
configuration)
Parity –
None
Data Bits –
8
Stop Bits –
1
Flow Control –
None
For more details on how to set the “Serial Port” and “Speed”, refer
to COM Port Setup in Running a Precompiled Application Example
from Related Links.
Press the NMCLR button on the
Curiosity board. This must be displayed in Tera Term.Figure 5-113. Tera Term
Launch the Light Blue mobile app
and search for the device name “pic32cx-bz6” and press Connect. Users with an iOS device may see
the device name as “Microchip”.Figure 5-114. LightBlue® App
Figure 5-115. Tera Term
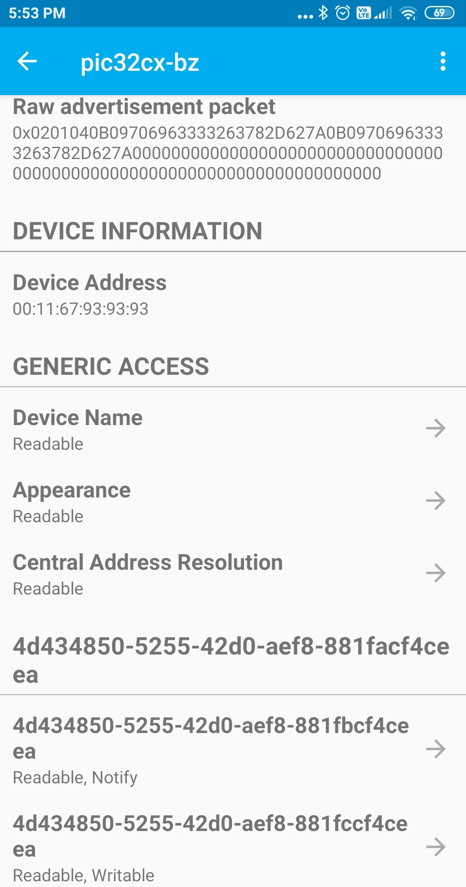
Once connected, basic information like Advertisement Data and Device
Information will be available.
Figure 5-116. LightBlue® App
Find the custom service with the
UUID: 4d434850-5255-42d0-aef8-881facf4ceea. Two characteristics will be
available with the custom service. The button characteristics with the
Readable/Notify property and RGB LED characteristics with Readable/Writable
property.Figure 5-117. LightBlue® App
Click on the button
characteristics and press subscribe. Press the User button 2 on the curiosity
board. The Read Value in the app will give its current status. Pressing the
button will also toggle the RGB LED.Figure 5-118.
Figure 5-119.
Go back and click on the RGB LED
characteristics which has a read/write option. The write option changes the RGB
LED Colour by writing a hex value in the form of XXXXXX. A value of 000000 will
turn OFF the LED and value of FFFFFF turns the Red, Green and Blue LED of RGB
LED ON. The read option will give the current value stored for the RGB LED.Figure 5-120.
Figure 5-121.
Press back two times to disconnect the BLE connection. A disconnected device
will advertise again.Figure 5-122. Tera Term
Developing the Application from
Scratch using MCC
Follow the steps below to build the application manually:
Note:
It is recommended for the new users of the MPLAB Code Configurator to refer
MPLAB® Code Configurator (MCC) User’s Guide
in Reference Documentation from Related Links.
Create a new harmony project. For more details, see Creating a New MCC
Harmony Project from Related Links.
To setup the basic components and
configuration required to develop this application, import component
configuration: <Harmony Content Path>\wireless_apps_pic32_bz6\apps\ble\building_blocks\peripheral\profiles_services\custom_service\firmware\custom_service.X\custom_service.mc.
Note: Import and Export functionality of the Harmony
component configuration will help users to start from a known working setup
of the MCC configuration.
Accept dependencies or satisfiers
when prompted.
Verify if the project graph window has all the expected configuration.Figure 5-123. Project
Graph
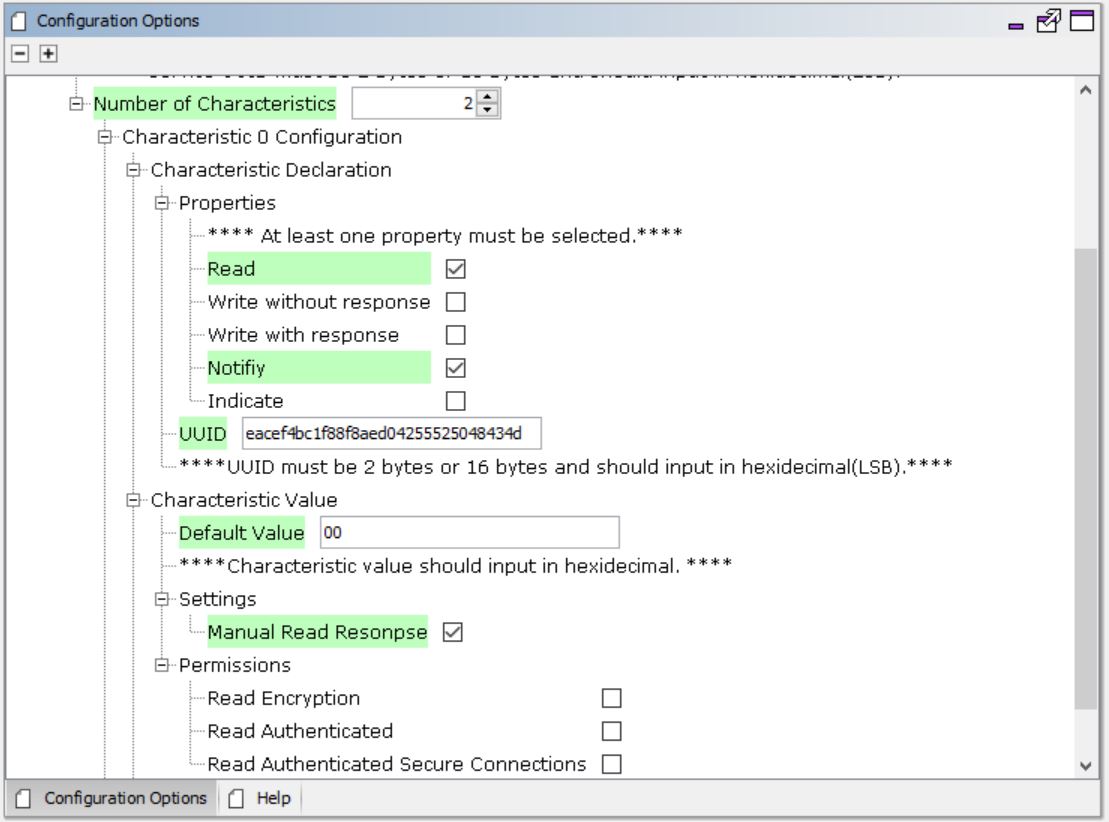
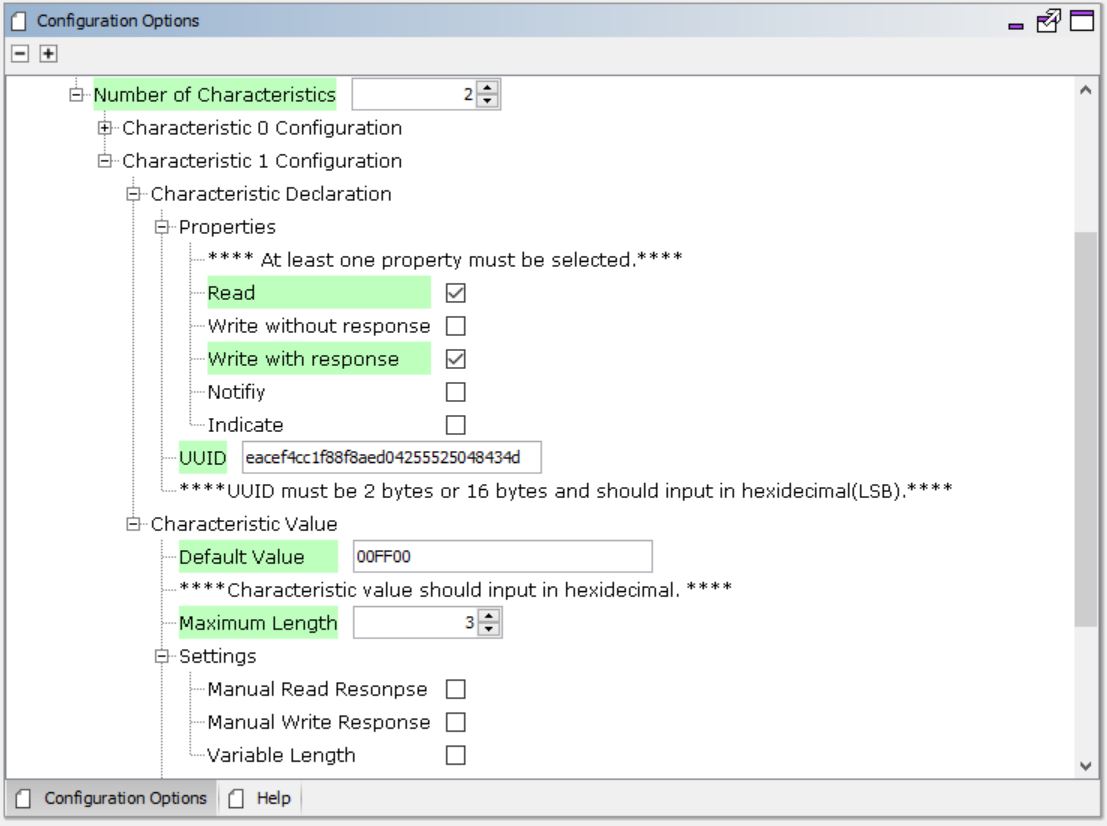
Verify Custom Service Configuration
Select BLE Stack component the Project Graph and configure the
following in the Configuration Options panel.
Note: If users cannot see the
Configuration Options panel in the right-hand side of the MPLAB X IDE, it
might be minimized. Hover the cursor towards the Configuration Options side
tab and click the “dot” on the top right-hand corner to pin it (see the
following figure).Figure 5-124. Configuration
Panel
.
Select the FreeRTOS component in the Project Graph and configure the following.Figure 5-125. FreeRTOS
Configuration
Select the SERCOM0 component in the Project Graph and configure the following.Figure 5-126. SERCOM0
Configuration
Select the System component in the Project Graph and configure the following.Figure 5-127. System
Configuration
Select the EIC component in the Project Graph and configure the following.Figure 5-128. EIC
Configuration
Select the Customized Service component in the Project Graph and configure the
following.Figure 5-129. Customized
Service ConfigurationFigure 5-130. Customized
Service ConfigurationFigure 5-131. Customized
Service Configuration
Generating a Code
For more details on code generation, refer to MPLAB Code Configurator (MCC) Code
Generation from Related Links.
Files and Routines Automatically
generated by the MCC
After generating the program source from the MCC interface by clicking Generate Code,
the BLE configuration source and header files can then be found in the following
project directories.Figure 5-132. Project
Files
Initialization routines for OSAL, RF System, and BLE System are auto-generated by the
MCC. See OSAL Libraries Help in Reference Documentation from Related
Links. Initialization routine executed during program initialization can be found in
the project file.
Figure 5-133. initialization.c
The BLE stack initialization routine executed during Application Initialization can be
found in project files. This initialization routine is automatically generated by
the MCC. This call initializes and configures the GAP, GATT, SMP, L2CAP and BLE
middleware layers.
Figure 5-134.
Autogenerated, Advertisement Data FormatFigure 5-135. AD Structures and
Types
Table 5-23. Source Files
Source Files
Usage
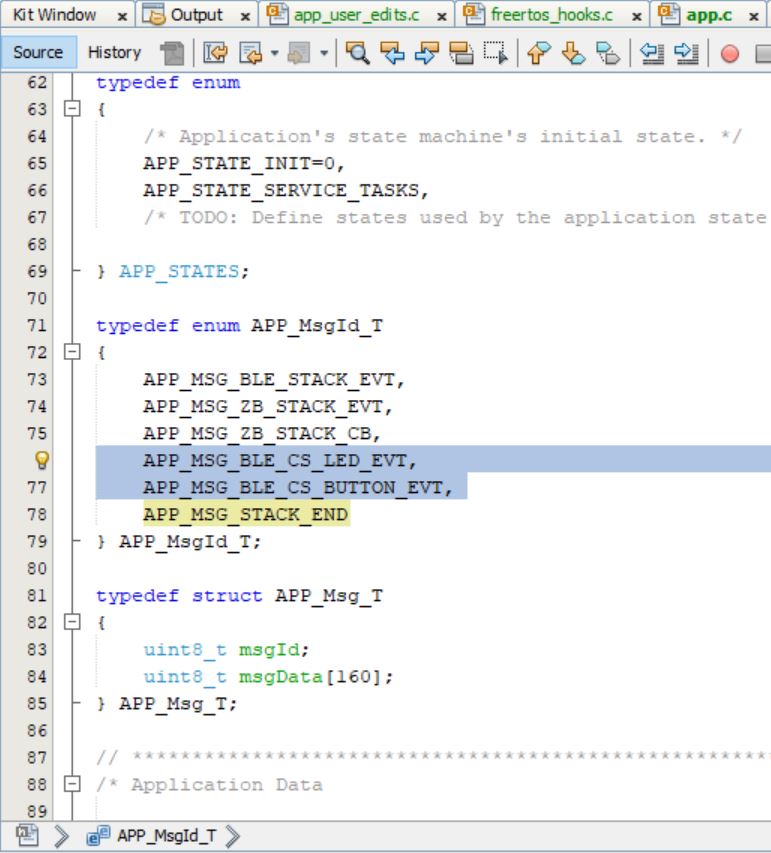
app.c
Application State machine, includes calls for
Initialization of all BLE stack (GAP,GATT, SMP, L2CAP) related
component configurations
app_ble\app_ble.c
Source code for the BLE stack related component
configurations, code related to function calls from
app.c
app_ble\app_ble_handler.c
All GAP, GATT, SMP and L2CAP event
handlers
ble_button_led_svc.c
All custom service button GREEN LED configurations and functions
Note:app.c is autogenerated and has a state
machine-based application code. Users can use this template to develop their own
application.
User Application Development
Add the code to enable advertisement, call the button external interrupt callback
functions and initialize custom service in APP_STATE_INIT of the
function APP_Tasks() in app.c
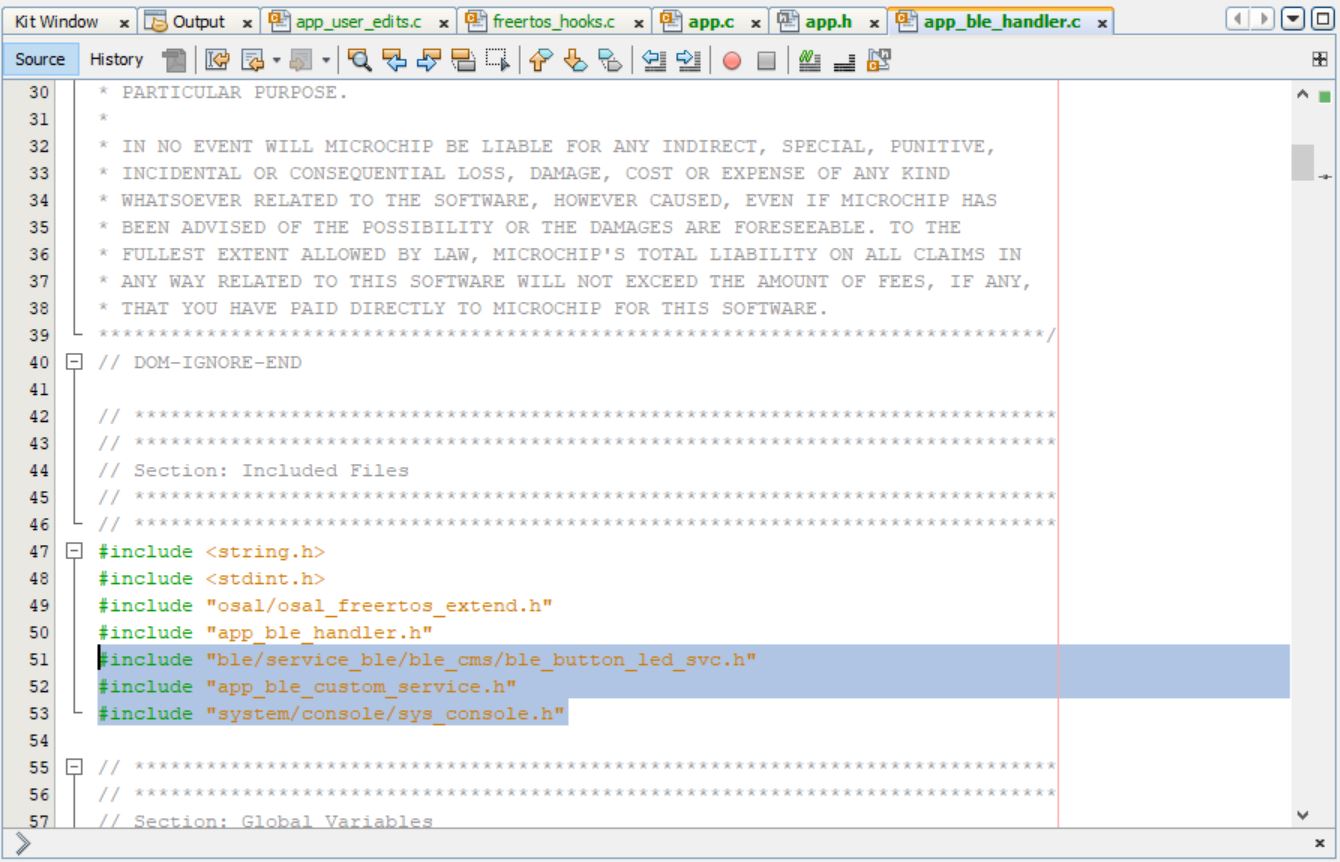
Add the custom service source and header files “<Harmony Content Path>\wireless_apps_pic32_bz6\apps\ble\building_blocks\peripheral\profiles_services\custom_service\firmware\src\app_ble_custom_service.c
and app_ble_custom_service.h and
app_ble_custom_service.h which has the supporting
functions for the button LED custom service file.
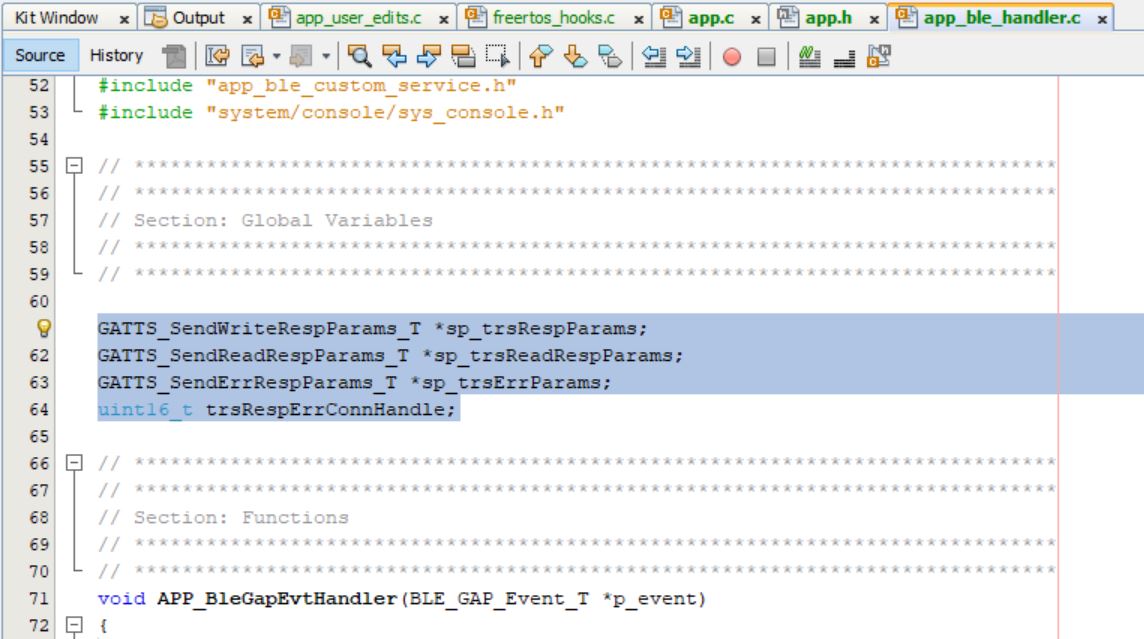
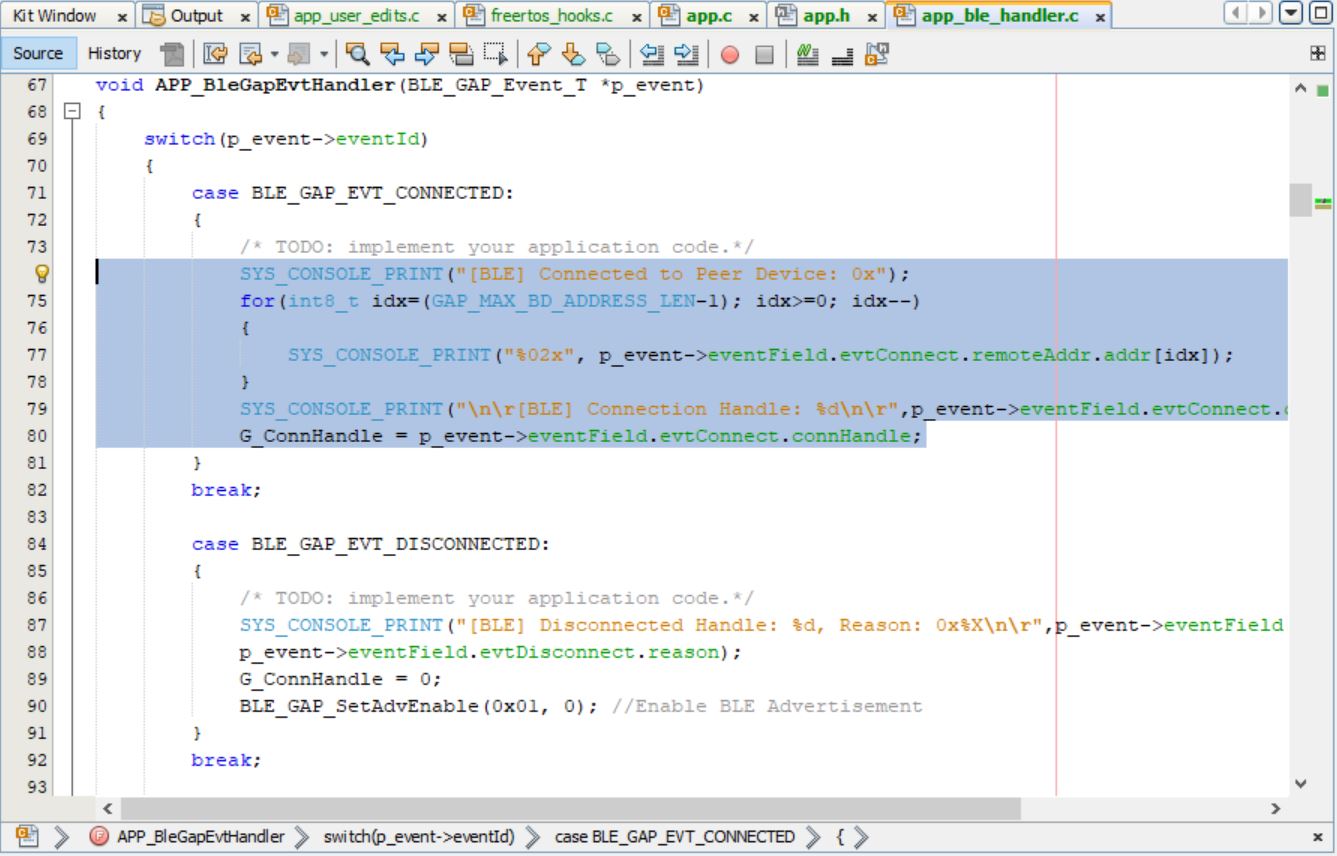
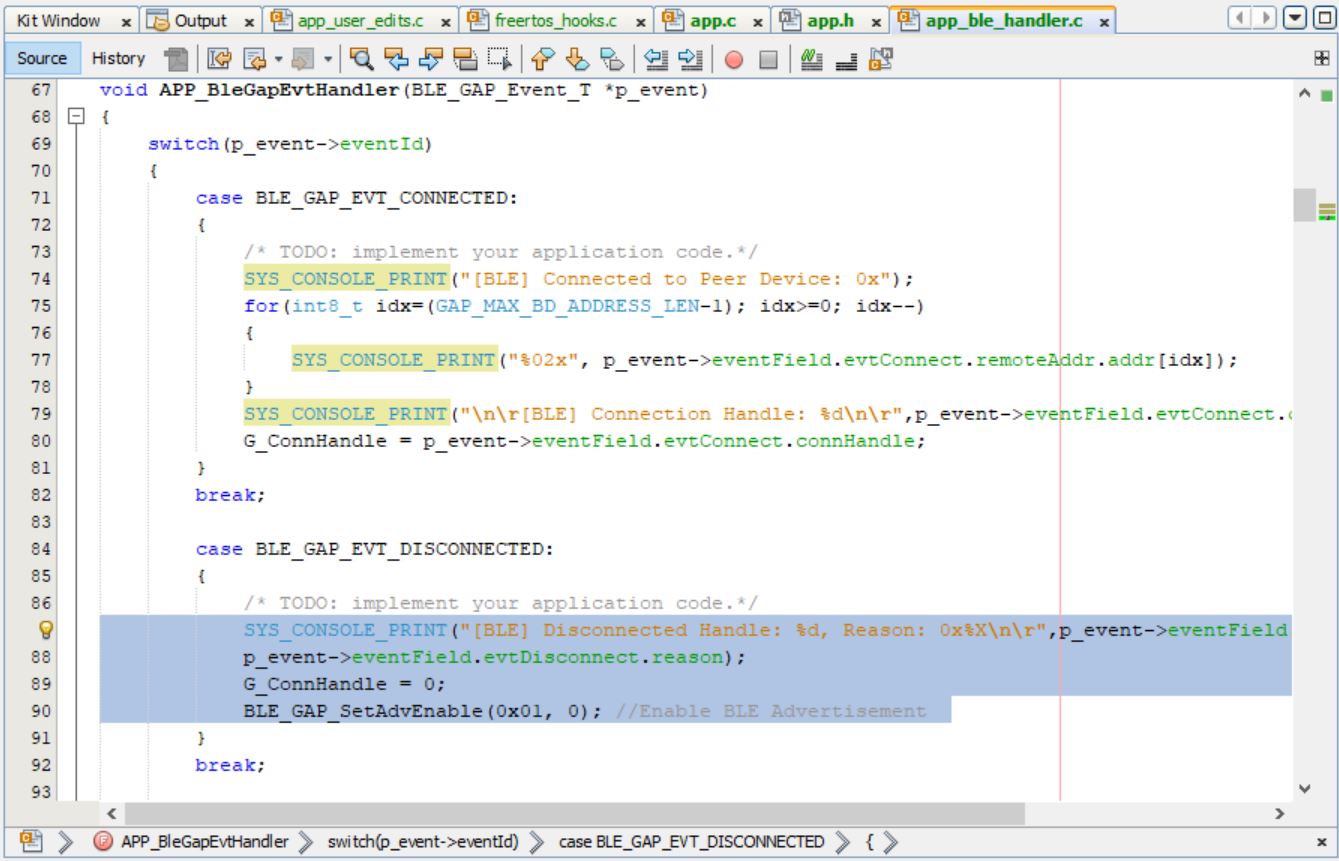
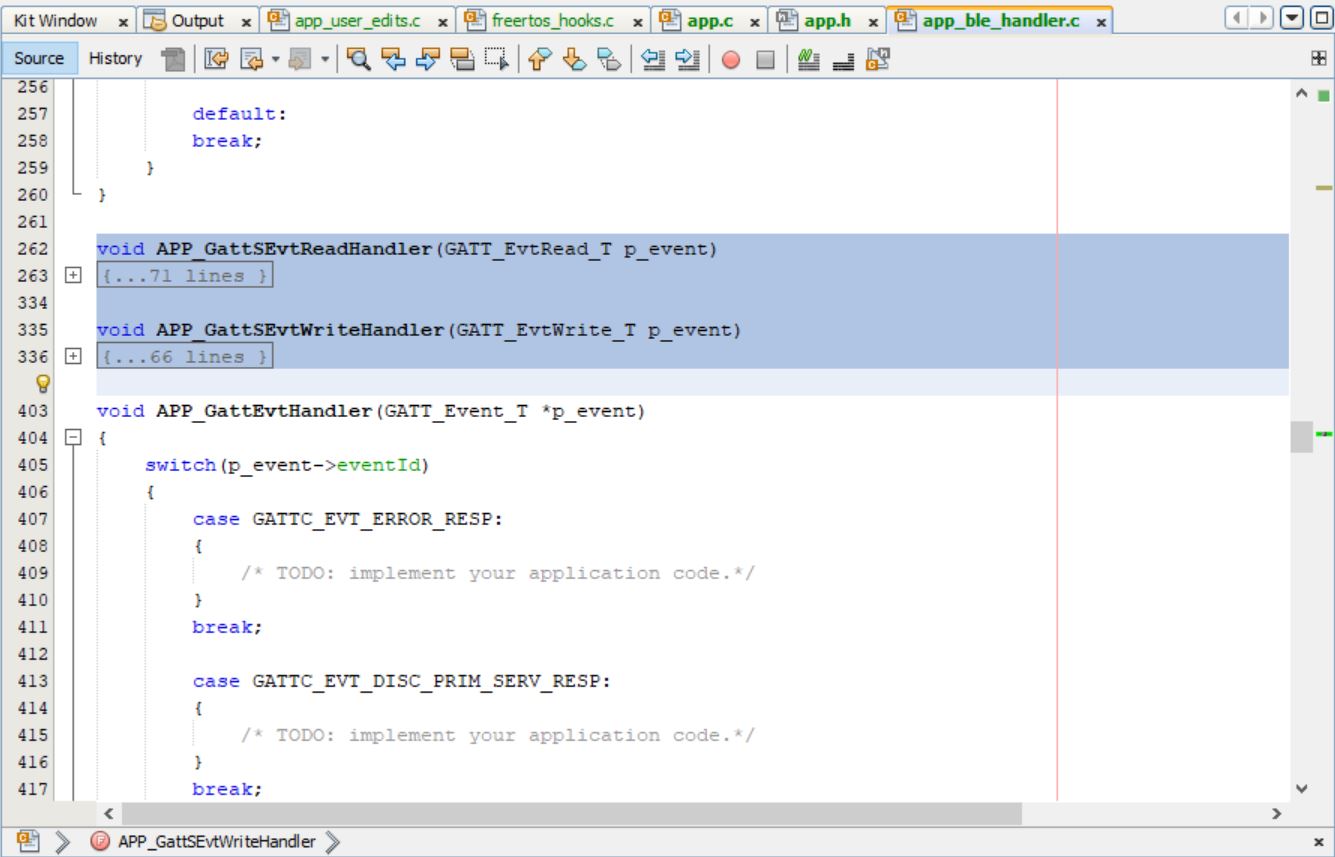
Figure 5-139. Project FilesAdd the required variables, functions and callback handlers for the GATT
read/write response in app_ble_handler.c along with the connect and
disconnect message information.
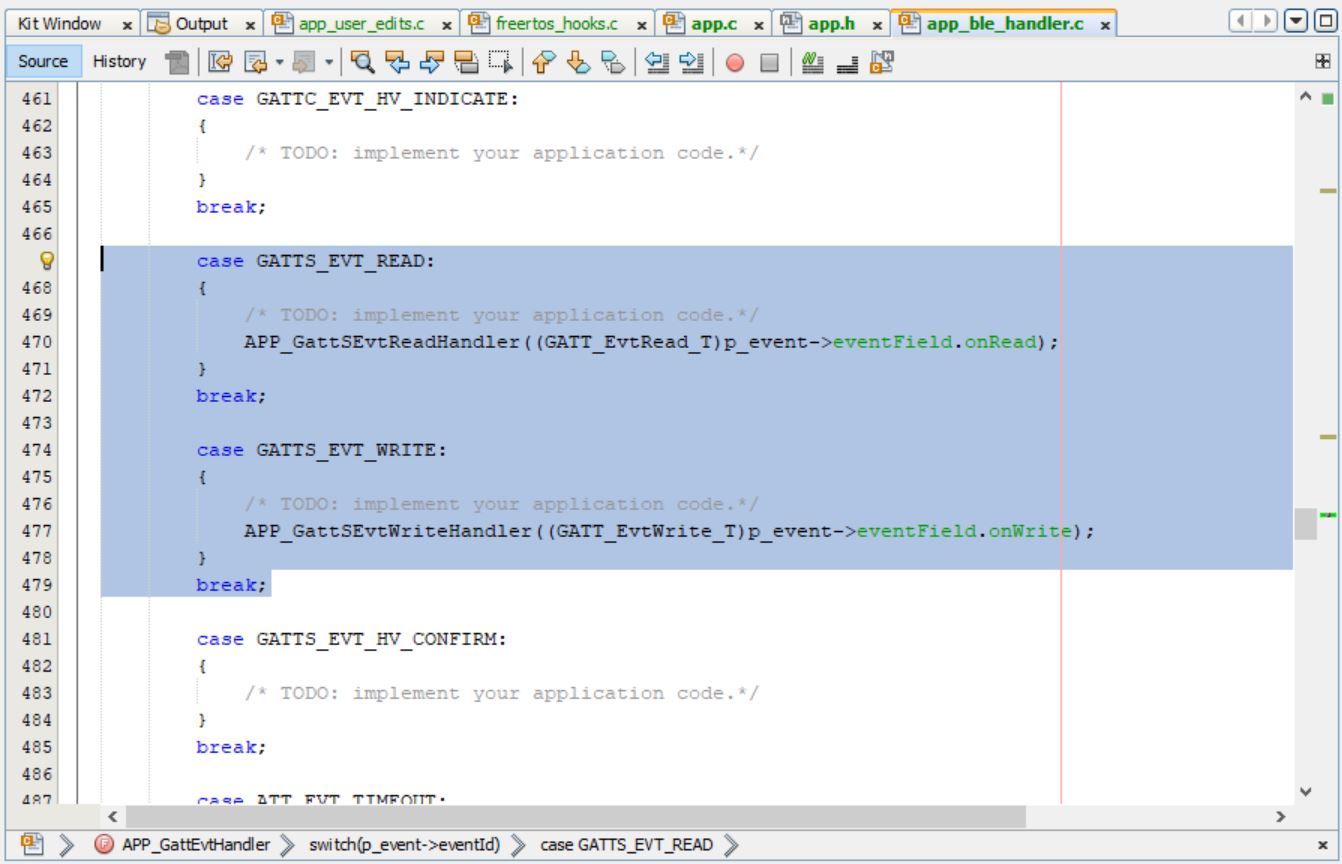
void APP_GattSEvtReadHandler(GATT_EvtRead_T p_event)
{

    uint8_t error = 0;
    uint16_t status;
    SYS_CONSOLE_PRINT("[BLE] GATT Read ATTR Handle 0x%X \r\n",p_event.attrHandle);

    if ((p_event.attrHandle <= BUTTON_LED_START_HDL) ||
        (p_event.attrHandle > BUTTON_LED_END_HDL))
    {
        /* Not BLE Custom Service characteristic. */
        return;
    }

        switch(p_event.attrHandle)
        {
            case BUTTON_LED_HDL_CHAR_0:                            /**< Handle of characteristic 0. */
            case BUTTON_LED_HDL_CCCD_0:                            /**< Handle of characteristic 0 CCCD . */
            case BUTTON_LED_HDL_CHAR_1:                            /**< Handle of characteristic 1. */
            case BUTTON_LED_HDL_CHARVAL_1:                         /**< Handle of characteristic 1 value. */
                error = ATT_ERR_APPLICATION_ERROR;
                break;
            case BUTTON_LED_HDL_CHARVAL_0:                         /**< Handle of characteristic 0 value. */
//                SYS_CONSOLE_PRINT(" ATTR Handle Read 0x%X \r\n",p_event.attrHandle);
                break;
        }

    if ((p_event.readType == ATT_READ_REQ)
    || (p_event.readType == ATT_READ_BLOB_REQ))
    {
        if (!error)
        {
            sp_trsReadRespParams = (GATTS_SendReadRespParams_T *)OSAL_Malloc(sizeof(GATTS_SendReadRespParams_T));
            if (sp_trsReadRespParams == NULL)
            {
                return;
            }
            trsRespErrConnHandle = p_event.connHandle;
            sp_trsReadRespParams->responseType = ATT_READ_RSP;
            sp_trsReadRespParams->attrLength = 0x01;
            sp_trsReadRespParams->attrValue[0]= bleCSdata.rgbOnOffStatus;
            status = GATTS_SendReadResponse(p_event.connHandle, sp_trsReadRespParams);
            if (status == MBA_RES_SUCCESS)
            {
                OSAL_Free(sp_trsReadRespParams);
                sp_trsReadRespParams = NULL;
            }
        }
        else
        {
            sp_trsErrParams = (GATTS_SendErrRespParams_T *)OSAL_Malloc(sizeof(GATTS_SendErrRespParams_T));
            if (sp_trsErrParams == NULL)
            {
                return;
            }
            trsRespErrConnHandle = p_event.connHandle;
            sp_trsErrParams->reqOpcode = p_event.readType;
            sp_trsErrParams->attrHandle = p_event.attrHandle;
            sp_trsErrParams->errorCode = error;
            status = GATTS_SendErrorResponse(p_event.connHandle, sp_trsErrParams);
            if (status == MBA_RES_SUCCESS)
            {
                OSAL_Free(sp_trsErrParams);
                sp_trsErrParams = NULL;
            }
        }
    }
}
void APP_GattSEvtWriteHandler(GATT_EvtWrite_T p_event)
{
    uint8_t error = 0;
    uint16_t status;
    SYS_CONSOLE_PRINT("[BLE] GATT Write ATTR Handle 0x%X \r\n",p_event.attrHandle);

    if ((p_event.attrHandle <= BUTTON_LED_START_HDL) ||
        (p_event.attrHandle > BUTTON_LED_END_HDL))
    {
        /* Not BLE Custom Service characteristic. */
        error = ATT_ERR_INVALID_HANDLE;
        return;
    }

        switch(p_event.attrHandle)
        {
            case BUTTON_LED_HDL_CHAR_0:                            /**< Handle of characteristic 0. */
            case BUTTON_LED_HDL_CHARVAL_0:                         /**< Handle of characteristic 0 value. */
            case BUTTON_LED_HDL_CCCD_0:                            /**< Handle of characteristic 0 CCCD . */
            case BUTTON_LED_HDL_CHAR_1:                            /**< Handle of characteristic 1. */
                error = ATT_ERR_APPLICATION_ERROR;
                break;
            case BUTTON_LED_HDL_CHARVAL_1:                         /**< Handle of characteristic 1 value. */
//                SYS_CONSOLE_PRINT(" ATTR Handle %d \r\n",p_event.attrHandle);
                APP_CustomService_RGB_Callback(p_event.writeValue);
                break;
        }

    if ((p_event.writeType == ATT_WRITE_REQ)
    || (p_event.writeType == ATT_PREPARE_WRITE_REQ))
    {
        if (!error)
        {
            sp_trsRespParams = (GATTS_SendWriteRespParams_T *)OSAL_Malloc(sizeof(GATTS_SendWriteRespParams_T));
            if (sp_trsRespParams == NULL)
            {
                return;
            }
            trsRespErrConnHandle = p_event.connHandle;
            sp_trsRespParams->responseType = ATT_WRITE_RSP;
            status = GATTS_SendWriteResponse(p_event.connHandle, sp_trsRespParams);
            if (status == MBA_RES_SUCCESS)
            {
                OSAL_Free(sp_trsRespParams);
                sp_trsRespParams = NULL;
            }
        }
        else
        {
            sp_trsErrParams = (GATTS_SendErrRespParams_T *)OSAL_Malloc(sizeof(GATTS_SendErrRespParams_T));
            if (sp_trsErrParams == NULL)
            {
                return;
            }
            trsRespErrConnHandle = p_event.connHandle;
            sp_trsErrParams->reqOpcode = p_event.writeType;
            sp_trsErrParams->attrHandle = p_event.attrHandle;
            sp_trsErrParams->errorCode = error;
            status = GATTS_SendErrorResponse(p_event.connHandle, sp_trsErrParams);
            if (status == MBA_RES_SUCCESS)
            {
                OSAL_Free(sp_trsErrParams);
                sp_trsErrParams = NULL;
            }
        }
    }
}
Note: Manual read/write responses, permissions and other standard events like GAP and
GATT can be executed in app_ble_handler.c
Note: Users can explore more BLE Advertisement functionalities
using the BLE Stack APIs. For more information, refer to BLE Stack in
Reference Documentation from Related Links.