6.5.1 FFD Project Creation
Developing the Application from Scratch using MCC
-
Create a new MCC Harmony Project. For more details, refer to Creating a New MCC Harmony Project from Related Links.
- From the “Device Resources” field, go to
Harmony>Wireless>Drivers>IEEE 802.15.4>IEEE 802.15.4 MAC
Figure 6-45. IEEE 802.15.4 MAC Component 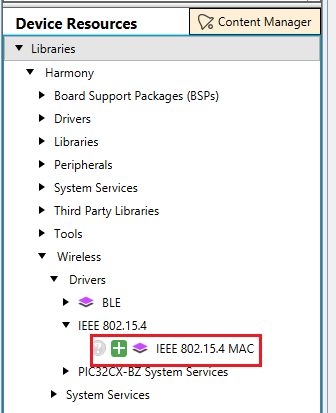 Note: IEEE 802.15.4 PHY and MAC components will appear in Device Resources only if, “wireless_15_4_phy” and “wireless_15_4_mac” repository is cloned in MCC framework path.
 - Click on the plus symbol on the IEEE 802.15.4 MAC component, as illustrated in the above image.
-
Upon selection, user will receive a prompt for auto-activation and auto-connect request of different component dependencies. Select Yes to add all the dependent components and also for all attachment auto-connect requests.
- Click the IEEE 802.15.4 MAC component,
and open Configuration Options and
- In “Device Type Configuration” field,
select FFD from the drop down for FFD project generationNote: If security required, select MAC Security Config as Enabled.
Figure 6-46. IEEE 802.15.4 MAC Configuration 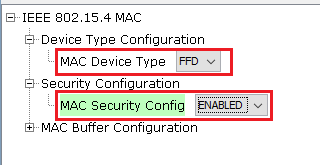
- In “Device Type Configuration” field,
select FFD from the drop down for FFD project generation
-
Right click the TIME module for selecting the timer source, and Select TC0.
Figure 6-47. Timer Component 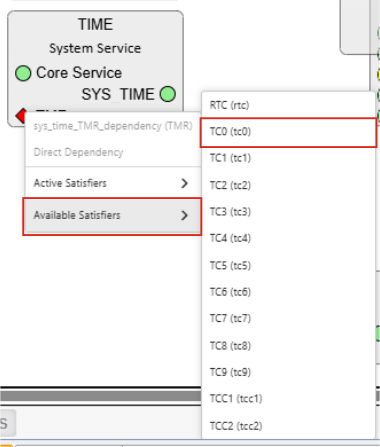
- Click the TIME Component, open
Configuration Options and,
- Change the Number of Clients as 10 based on software timers.
Figure 6-48. TIME Configuration 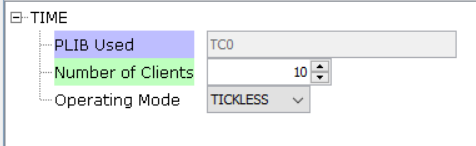
-
Click PIC32 BZ6 Curiosity BSP under Device Resources (Device Resources>Libraries>Harmony>Board Support Packages>PIC32 BZ6 Curiosity BSP add by using ‘+’ symbol)
Figure 6-49. Device Resources 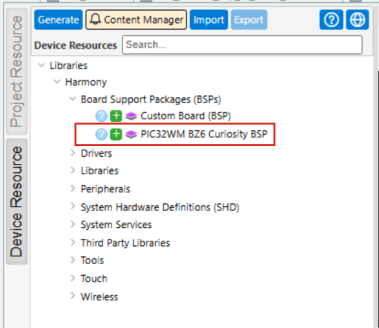
- From the “Device Resources” field, go to
Libraries>Harmony>System Services>BLE Provisioning Add the
component by using ‘+’ symbol.
Figure 6-50. BLE Provisioning 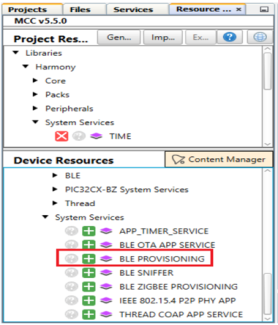
- Upon selection, user will receive a
prompt for auto-activation and auto-connect request of different component dependencies.
Select Yes to add all the dependent components and also for all attachment
auto-connect requests.
Figure 6-51. Auto-Activation Request 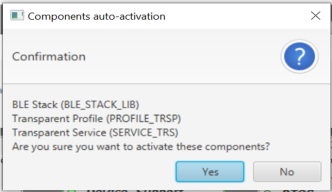
- Click the BLE Stack, open
Configuration Options and,
- Expand BLE Stack>Generic Access Profile (GAP)>Device Name to update the “Device Name” as MicrochipFFD.
- Expand BLE Stack>Generic Access Profile (GAP)>Advertising>Advertising Data>Local Name to update the “Local Name” as MicrochipFFD
Figure 6-52. BLE Stack 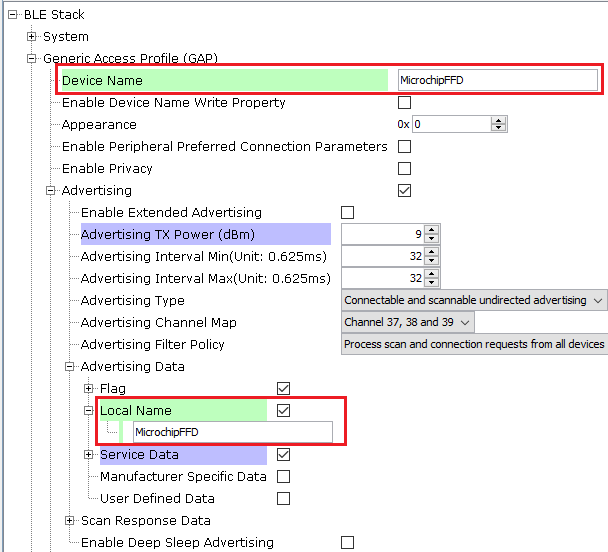
- In the Free-RTOS component , Select Use
Timers and ensure to do the following modifications
- Set the Timer task priority as 1
- Set the Timer queue length as 10
- Set the Timer task stack depth as 256
- Disable Use Application Daemon Task Startup Hook
Figure 6-53. Free-RTOS Configuration 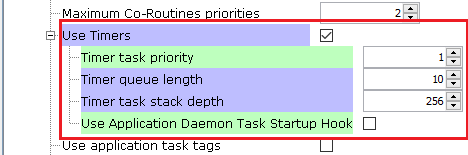
- Add The “APP_TIMER_SERVICE” component,
available in Device Resources>Wireless>System Services>
APP_TIMER_SERVICE .
Figure 6-54. APP_TIMER_SERVICE 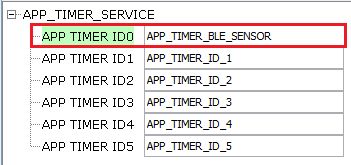
- Select TCC0 Timer and configure as
illustrated in the following figure
Figure 6-55. Timer Configuration 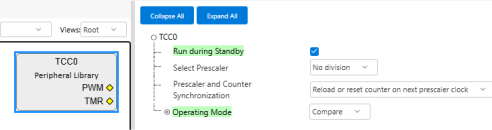
- Select TC3 Timer and configure as illustrated in the following figure
Figure 6-56. Timer Configuration 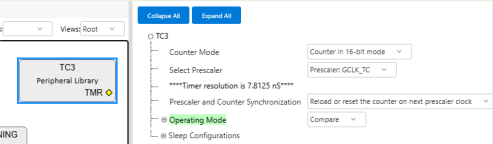
- Add the CONSOLE component available in Device Resources>System
Services>CONSOLE.
Figure 6-57. CONSOLE 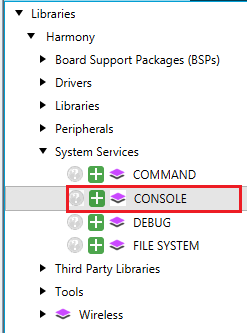
- Right click on CONSOLE and add SERCOM0Satisfiers>SERCOM0
Figure 6-58. SERCOM0 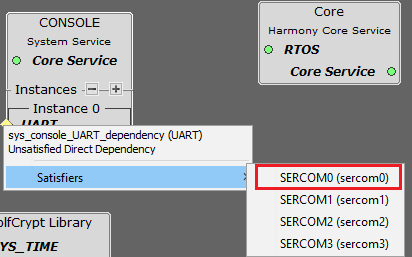
- Configure SERCOM0 as illustrated in the following figure
Figure 6-59. SERCOM0 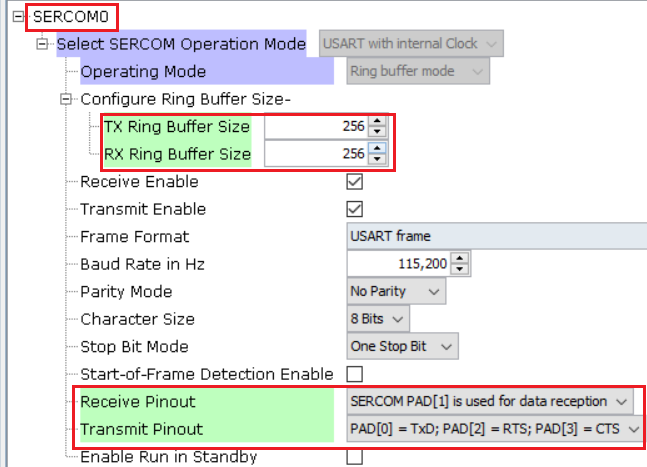
- Click on System component in the
project graph and set the SERCOM0 Direct Pin Enable as DIRECT
Figure 6-60. System Configuration 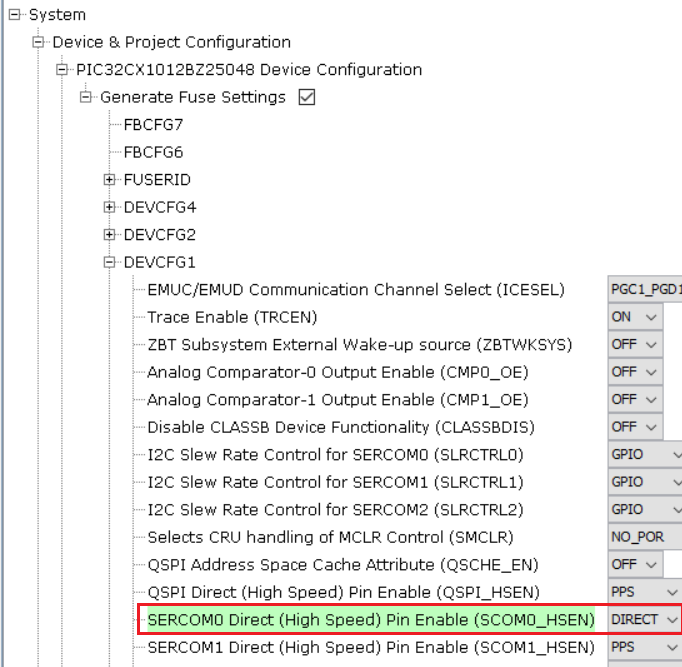
- Configure SERCOM0 as illustrated in the following figure
- Ensure that the project graph resembles the one illustrated in the following figure.
Figure 6-61. Project Graph 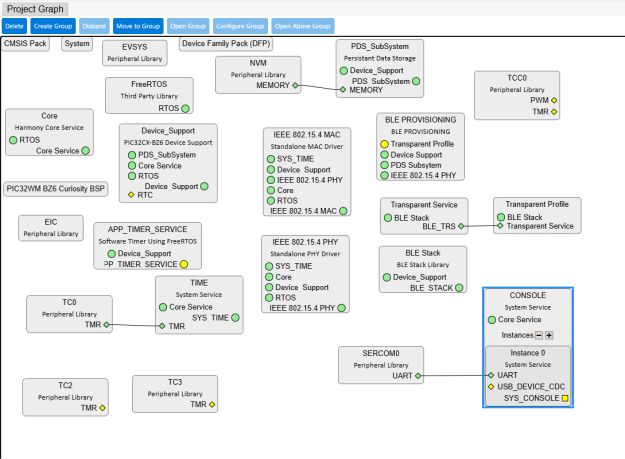
Generating a Code
For more details on code generation, refer to MPLAB Code Configurator (MCC) Code Generation from Related Links.
Adding Files To The Project
- After the successful generation of the project , the following files and folders are
added. Copy the following files into the project location from the Project Repository
(
<Harmony Content Path>\wireless_apps_pic32_bz6\apps\multiprotocol\ble_mac_prov_ffd\firmware\src).Figure 6-62. Adding Files To The Project 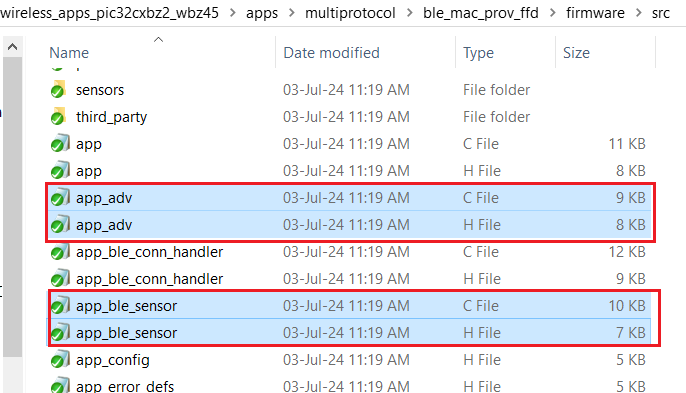
- Add the source and header files to the project as illustrated below
Figure 6-63. Adding Files To The Project 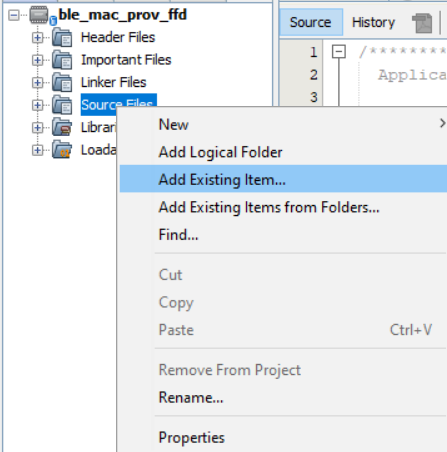
- Add the source file to the project as illustrated below
Figure 6-64. Adding Files To The Project 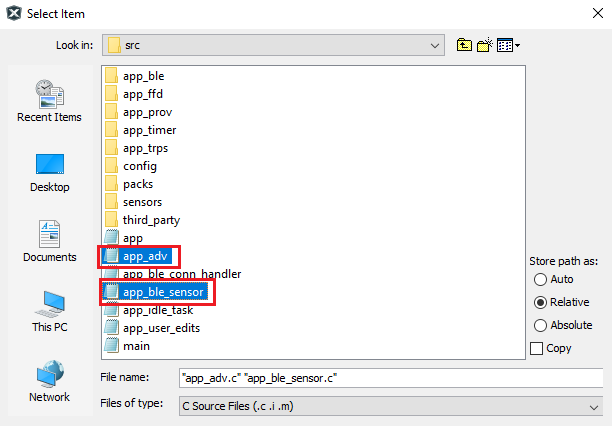
- Similarly add the header files to the project as illustrated below
Figure 6-65. Adding Files To The Project 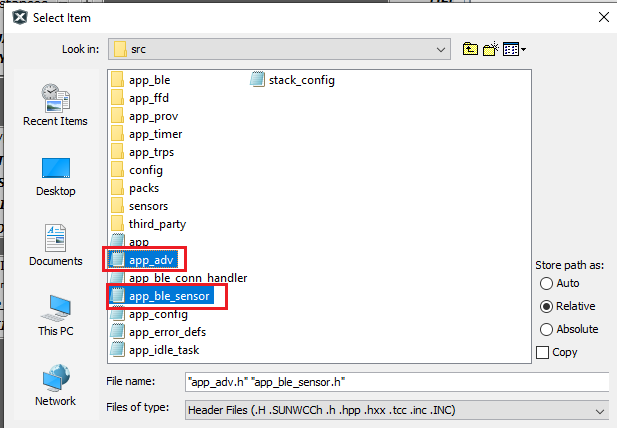
- Add the source file to the project as illustrated below
- Copy the “sensor folder” to the project directory (from
<Harmony Content
              Path>\wireless_apps_pic32_bz6\apps\multiprotocol\ble_mac_prov_ffd\firmware\src\sensor
) and add the “sensor folder” to the project location as illustrated below.Figure 6-66. Adding Folder To The Project 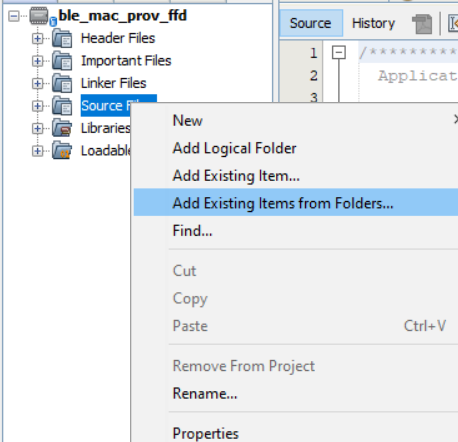
- Follow step 2 above to add the source and header files, respectively.
- To add this folder to include directory, select the Project
folder>ble_mac_prov_ffd>Set Configuration>Customize
Figure 6-67. Adding File to Include Directory 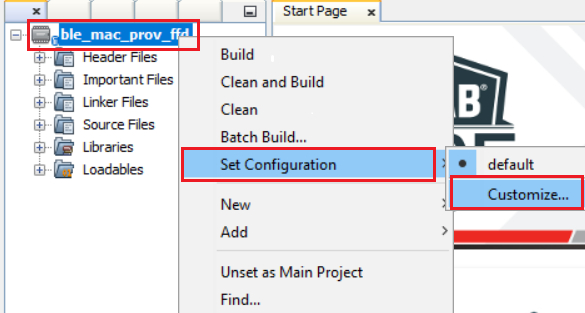
- Select xc32-gcc>preprocessing and messages>Include
directories>Browse>firmware>sensors>Open
Figure 6-68. Adding File to Include Directory 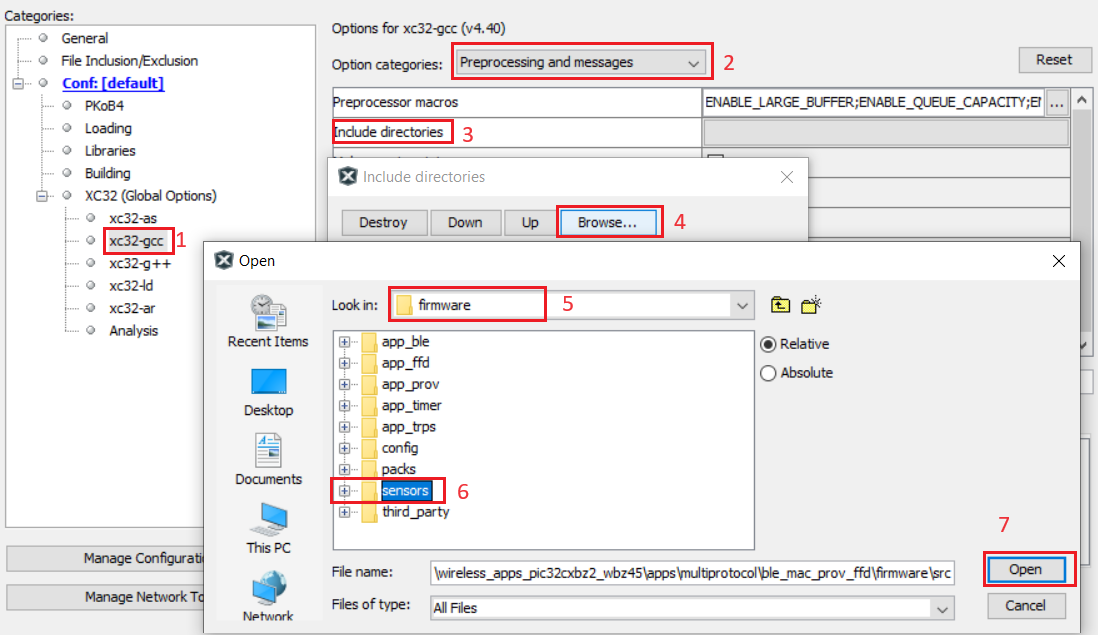
- Similarly, the
app_ffdfolder must also be added to the project. Copy the folder to the project directory. Follow Step 2 to add the source and header files, and Step 3 to add the files to the include directory
Code Modifications For FFD project
- Code changes in
app.hfileFigure 6-69. app.h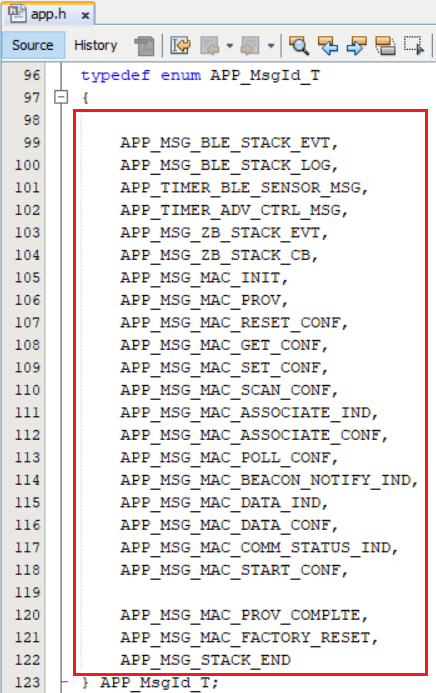
- Code changes in
app.cfileFigure 6-70. app.c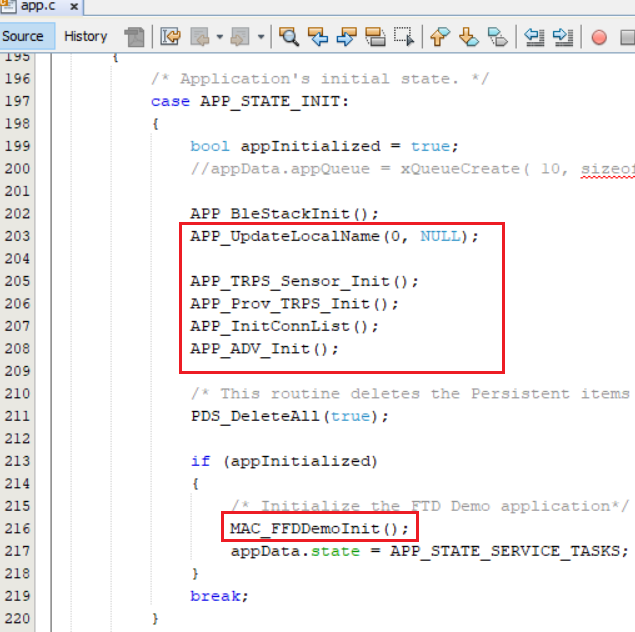
Figure 6-71. app.c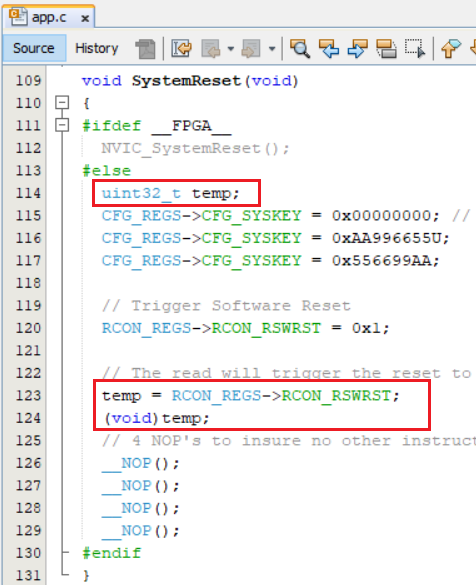
Figure 6-72. app.c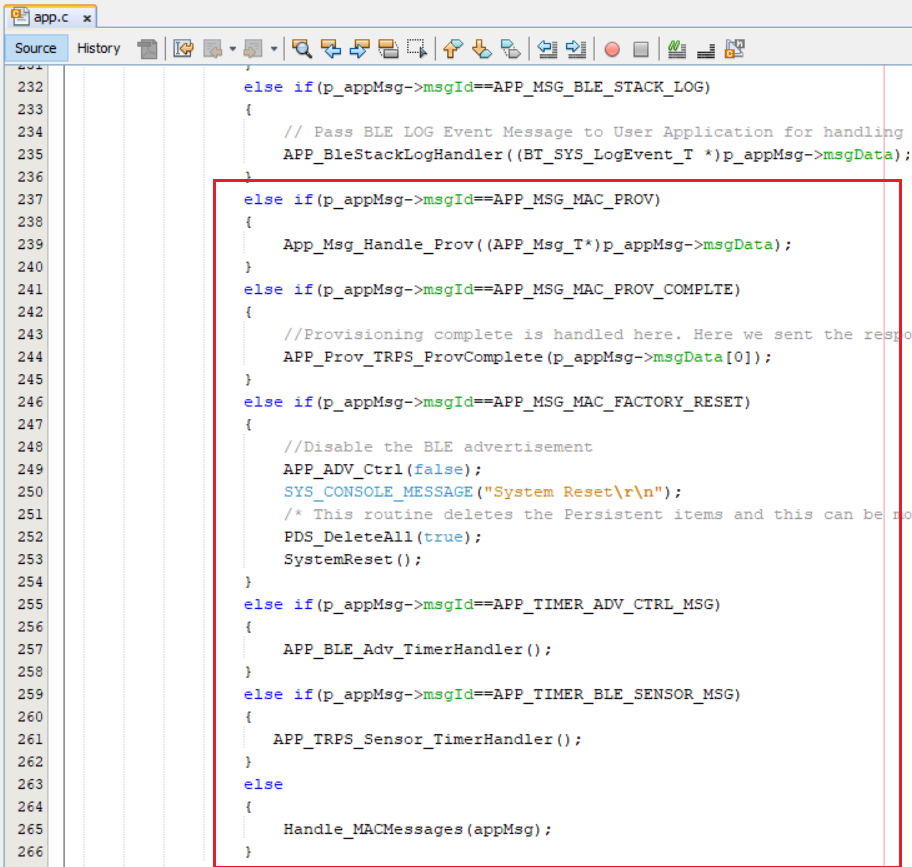
Figure 6-73. app.c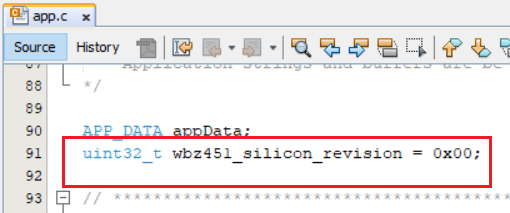
Figure 6-74. app.c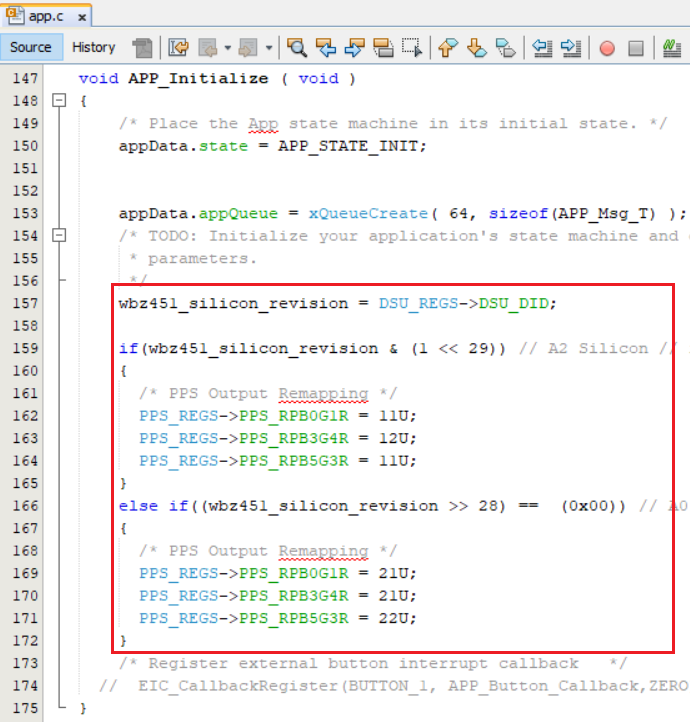
- Code changes in
app_ble_conn_handler.cfileFigure 6-75. app_ble_conn_handler.c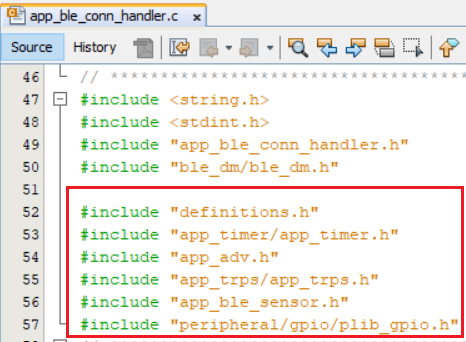
Figure 6-76. app_ble_conn_handler.c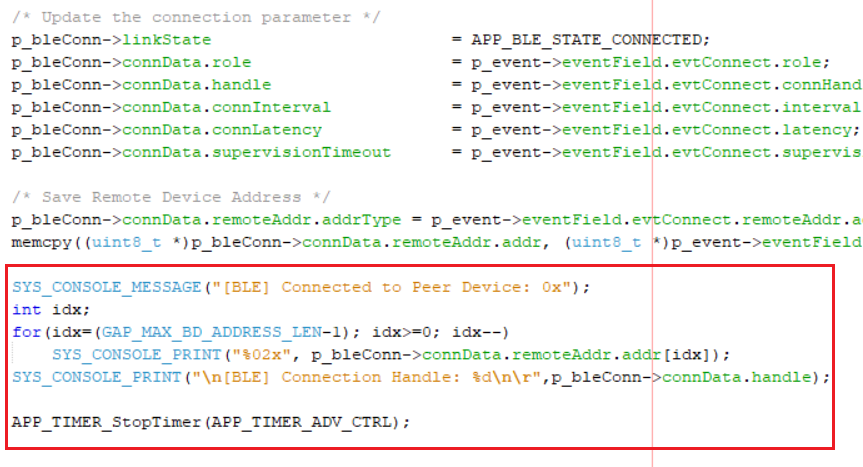
Figure 6-77. app_ble_conn_handler.c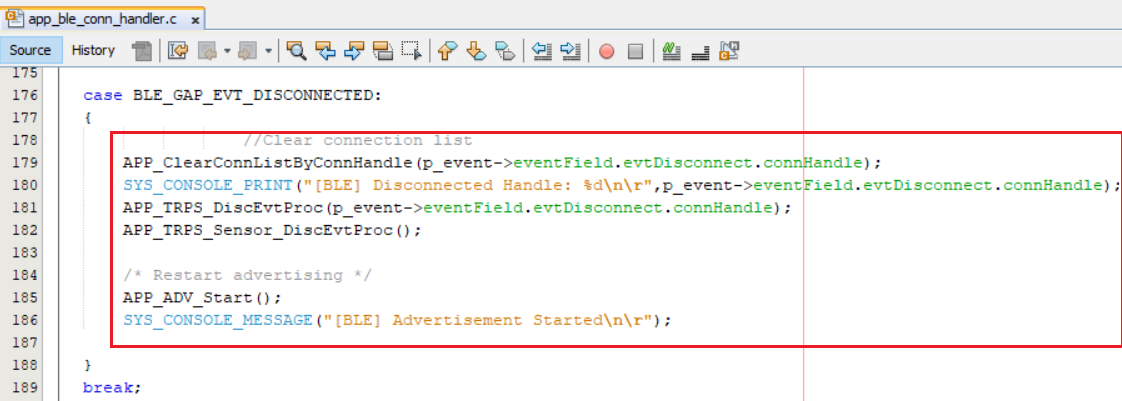
- Code changes in
app_trps_handler.cfileFigure 6-78. app_trps_handler.c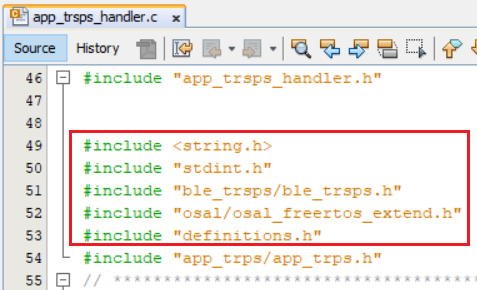
Figure 6-79. app_trps_handler.c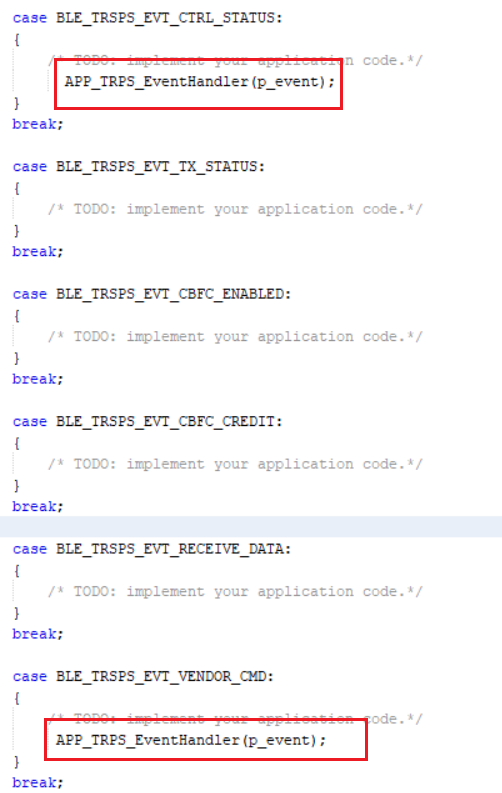
- Code changes in
app_ble_handler.cfileFigure 6-80. app_ble_handler.c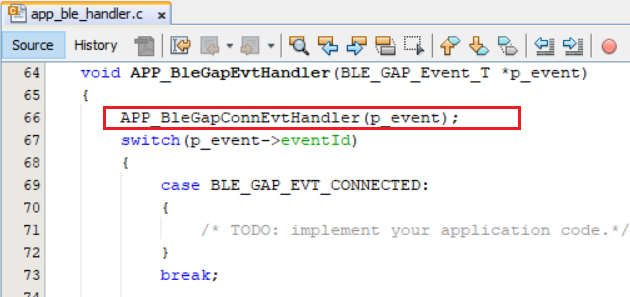
- Code changes in
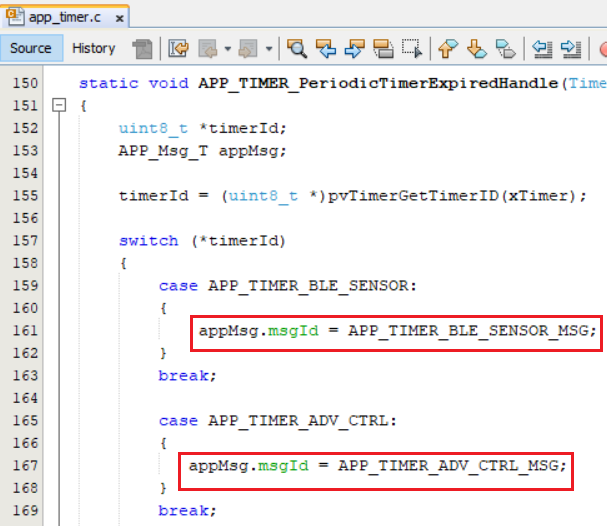
app.timer.cfileFigure 6-81. app.timer.c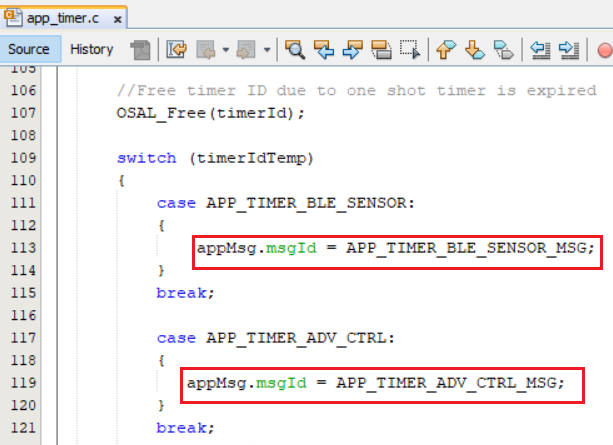
Figure 6-82. app.timer.c