
2 Interrupt and Callback Design Pattern
A structured and flexible approach to manage events without continuous CPU involvement is facilitated by interrupts immediately diverting processor attention to urgent tasks. Callbacks define specific actions to be executed in response.
In an embedded application, interrupt and callback control flow refers to a more efficient approach for handling events compared to polling:
- Interrupts: Interrupts are events detected by the MCU which cause a direct change to the normal program flow. Interrupts pause the current program and transfer control to a specified user-written firmware routine called the Interrupt Service Routine (ISR). The ISR processes the interrupt event, then resumes normal program flow, e.g. see 8-bit PIC® MCU Interrupts.
- Callbacks: Callbacks allow you to create flexible and modular functions and enable you to separate hardware and software operations. Since callbacks are software functions, they often define actions in response to an interrupt or another condition, but will not cause a direct change in the flow of the processor. You can use different callback implementations to reduce your code execution bandwidth and enable faster and more flexible response to any microcontroller pin or peripheral condition. Often, functions are passed as arguments to other functions.
2.1 MCC Melody Interrupt and Callback Design Patterns
Sometimes, events need to be handled quickly. Interrupts and callbacks ensure a given latency.
Callback Functions in C Programming
Callbacks are used heavily in MCC Melody to separate hardware interrupts and the handling of that event in your application code. It is best practice to keep Interrupt Service Routines (ISRs) very short, so that it is possible to react it another interrupt is triggered. MCC Melody therefore simply clears any relevant interrupt flags, then calls the callback function that the user has registered.
In MCC Melody, and in C programming in general, callbacks are implemented using function pointers. A callback function can be called within an ISR to handle specific actions when an interrupt occurs and provide flexibility in handling these events by allowing different functions to be executed in response.
- Brush up on C Programming Function Pointers (Microchip Developer Help).
- C Programming Callbacks Microchip University video course. Recommended!
The steps involved in using callbacks are as follows:

The code below registers a callback, then shows how to continuously polls whether a callback function should be executed.
- Callback registration is the process of initializing the function pointer address.
- The
callback_function(
                    )
will increment count when called. callback_test_condition( )checks if this is the fifth time the condition has been tested, if yes calls the function passed as a parameter (*fn).
// Callback registration: function pointer initialized to address of the callback function.
void (*functionPointer)fn(void) = &callback_function;

void callback_function(void)
{
    //increment count every time this function is called
    count++;
}

// Increment i, test condition, if equal to five call callback function (fn)
void callback_test_condition(void(*fn)(void))
{
	if(i++ == 5)
       {
          i = 0;
	   fn( );
       }
}

int main(void)
{
    while(1){
        callback_test_condition(fn);
    }
}
MCC Melody Interrupt-on-Change (IOC) Pattern
Following the same pattern, we examine how a pin change interrupt is handled in MCC Melody. The user is only required to write the callback function code.
-
Callback registration:
An API is created for registering the user callback. This can be called in
main.c:BUTTON_SetInterruptHandler(BUTTON_Press_Callback);
The implementation of this function is found in
pins.c:/** Allows selecting an interrupt handler for BUTTON at application runtime */ void BUTTON_SetInterruptHandler(void (* InterruptHandler)(void)){ BUTTON_InterruptHandler = InterruptHandler; }
-
Callback function:
void BUTTON_Press_Callback(void) { LED_Toggle(); BUTTON_PRESSED = true; } -
Calling execution function:
In this case, the ISR for the specific General Purpose Input Output (GPIO) pin is used as the function which calls the execution function. This is also implemented in
pins.c:/** BUTTON Interrupt Service Routine */ void BUTTON_ISR(void) { // Add custom BUTTON code // Call the interrupt handler for the callback registered at runtime if(BUTTON_InterruptHandler) { BUTTON_InterruptHandler(); } IOCCFbits.IOCCF0 = 0; }
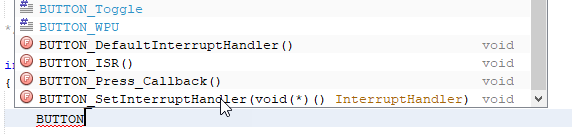
The following image shows the code that a user would need to write to toggle an LED ON/OFF every time a BUTTON is pressed. An Interrupt-on-Change (IOC) is configured on the edge transition associated with pressing the BUTTON.

Understanding the MCC Melody Generated Code
Quite a lot is handled behind the scenes by the MCC Melody generated code. When configuring interrupts in MCC Melody, an ISR is generated. In addition, a default callback is assigned once interrupts are enabled in a particular component.
In the example below, an IOC is configured for the negative edge on a button. In the
pins.c file, as part of the GPIO configuration, a default
callback is assigned.
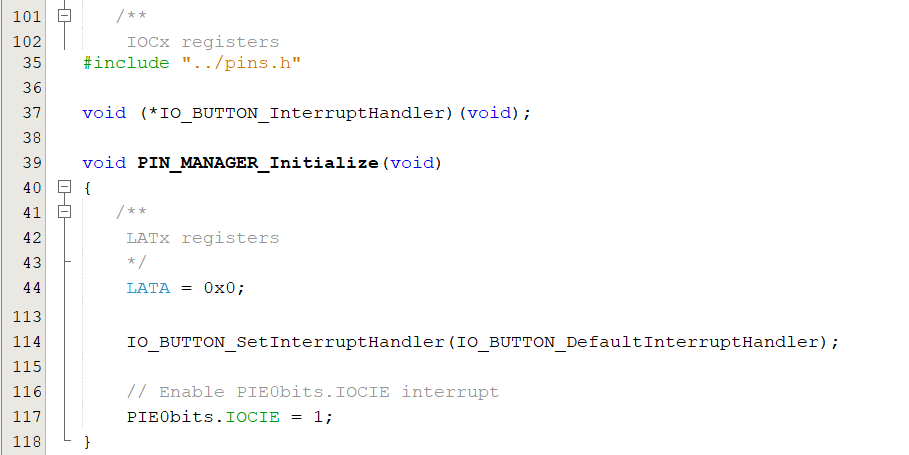
The IOC interrupt vector assigns an ISR. If the ISR is defined, a callback occurs and the interrupt flags are cleared.

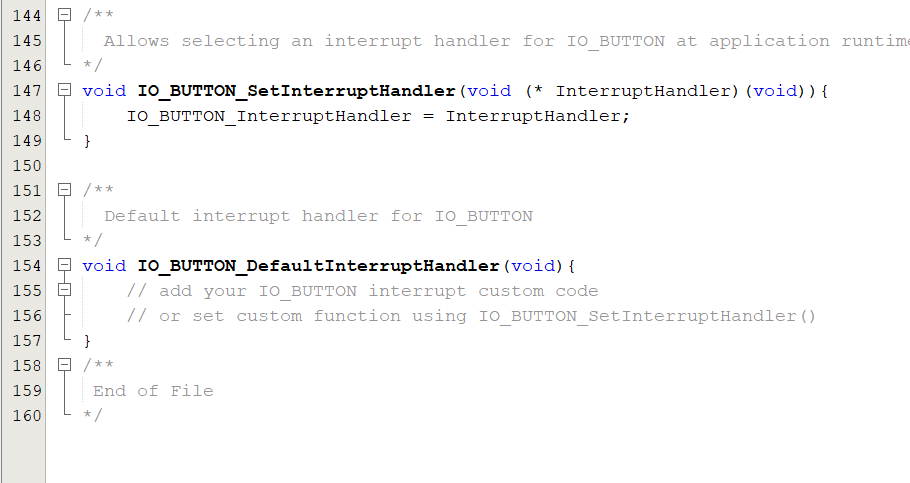
The SetInteruptHandler function takes in the pointer to the callback
function. While it is possible to write code in the default callback function, it is
recommended to rather register your own callback handler to avoid leaving any of
your application code in the MCC Generated Files folder.
2.2 Pin Manager Use Case: LED Toggle on Button Press (Callbacks)
An LED is toggled ON/OFF every time a BUTTON is pressed. An IOC is configured on the edge transition associated with pressing the BUTTON. Interrupts are disabled briefly to handle the BUTTON debouncing.
#include "mcc_generated_files/system/system.h"
volatile bool BUTTON_PRESSED = false;

void BUTTON_Press_Callback(void)
{
    LED_Toggle();
    BUTTON_PRESSED = true;
    INTERRUPT_GlobalInterruptDisable();
}

int main(void)
{
    SYSTEM_Initialize();
    BUTTON_SetInterruptHandler(BUTTON_Press_Callback);   //Find button pin for your board.

    INTERRUPT_GlobalInterruptEnable();

    while(1){
        if(BUTTON_PRESSED)
        {
            BUTTON_PRESSED = false;
            __delay_ms(50);  //Debounce delay for button
            INTERRUPT_GlobalInterruptEnable();
        }
    }
}
2.3 UART Use Case: Control Commands (Callbacks)
This example shows how to implement a basic Command Line Interface (CLI), a popular way of sending control commands to the microcontroller over the UART. An LED is controlled using commands from a terminal. Interrupts are enabled and a callback is set to process commands.
-
Send “ON” to turn the LED.
-
Send “OFF” to turn it off.
#include "mcc_generated_files/system/system.h"
#include <string.h>

#define MAX_COMMAND_LEN 8
uint8_t command[MAX_COMMAND_LEN];
uint8_t index = 0;
uint8_t read_msg;

void UART_executeCommand(char *command)
{
    if(strcmp(command, "ON") == 0)
    {
        LED_SetLow();
        printf("OK, LED ON.\r\n");
    }
    else if (strcmp(command, "OFF") == 0)
    {
        LED_SetHigh();
        printf("OK, LED OFF.\r\n");
    }
    else
    {
        printf("Incorrect command.\r\n");
    }
}

void UART_ProcessCommand(void)
{
    if(UART.IsRxReady())
    {
        read_msg = UART.Read();
        if(read_msg != '\n' && read_msg != '\r')
        {
            command[index++] = read_msg;
            if((index) > MAX_COMMAND_LEN)
            {
                (index) = 0;
            }
        }
        if(read_msg == '\n')
        {
            command[index] = '\0';
            index = 0;
            UART_executeCommand(command);
        }
    }
}

int main(void)
{
    SYSTEM_Initialize();
    UART.RxCompleteCallbackRegister(&UART_ProcessCommand);
    printf("In the terminal, send 'ON' to turn the LED on, and 'OFF' to turn it off.\r\n");
    printf("Note: commands 'ON' and 'OFF' are case sensitive.\r\n");

    INTERRUPT_GlobalInterruptEnable();  /* Remove for AVR, enable in System>Interrupt Manager */

    while(1)
    { }
}