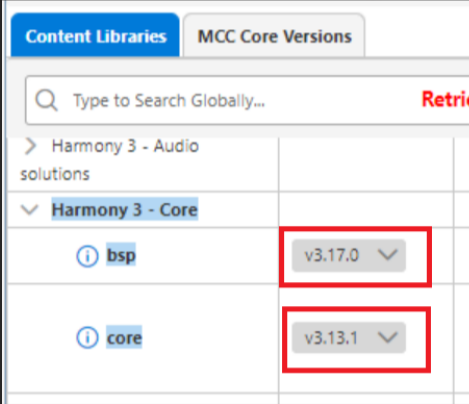
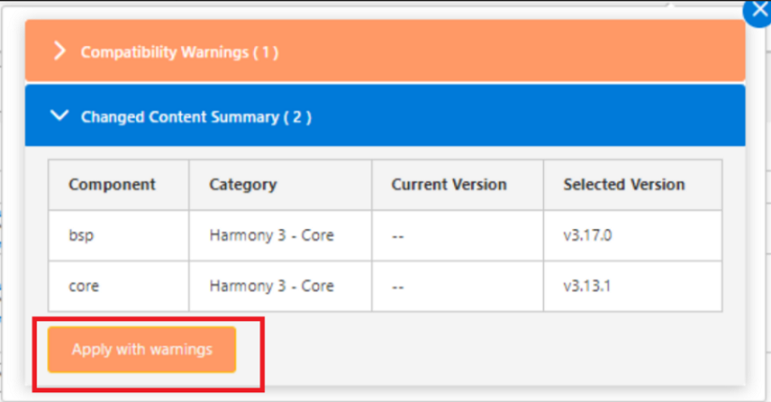
3.2.6 Creating a New Project

Figure 3-45. MPLAB X IDE Start-up Screen
  1. To create a new project, open MPLAB X IDE and click on File>New Project
    Figure 3-46. New Project
  2. In the “New Project” pop-up, click on Microchip Embedded>32-bit MCC Harmony Project>Next
    Figure 3-47. Choose Project
  3. In Framework Selection window, select the Framework path and click Next.
    Figure 3-48. Framework
  4. In Project Settings window, enter the folder name and project name and click Next.
    Figure 3-49. Project Settings
  5. In Configuration Settings window,
    • Enter a name for the configuration setting folder.
    • Select the target device name
    • Click Finish
    Figure 3-50. Configuration Settings
  6. Now MPLAB X Code Configurator Content manager will be launched automatically.
    • Click on Finish
      Figure 3-51. MCC Required Content
    • Under Device Resources, Click on the Content Manager
      Figure 3-52. MCC Content Manager
    • In the next window, select the below mentioned versions of repositories and click Finish.
      • core (v3.13.1 or above)
      • bsp (v3.17.0 or above)
      • wireless_apps_rnwf (v1.0.0)
      • wireless_system_rnwf (v1.0.0)
        Figure 3-53. MCC Components
      • Click on Ignore
        Figure 3-54. MCC Warning
      • Click on Apply with warnings
        Figure 3-55. Changed content summary
      • Confirm the changes by clicking on Yes.
        Figure 3-56. Confirm Changes
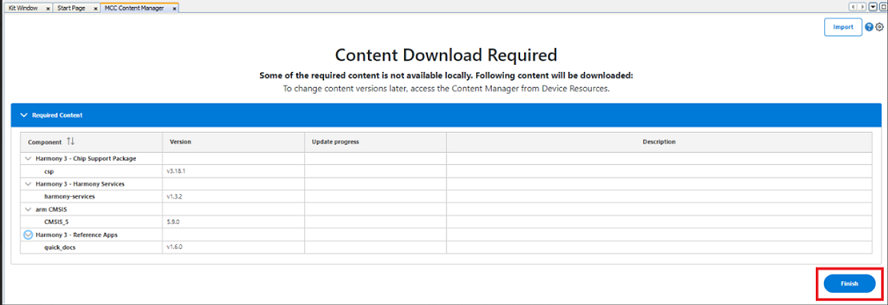
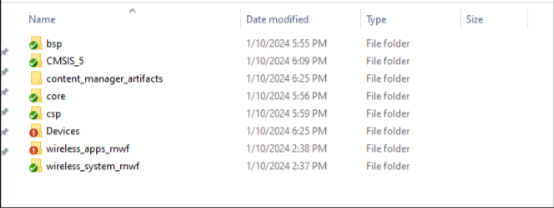
      • The MCC content manager will start downloading the repositories.
        Figure 3-57.  
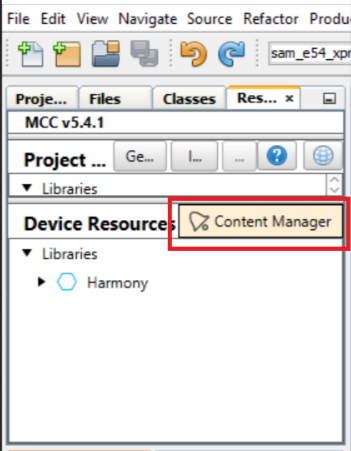
Downloaded repositories.