3 Installing on Windows
Note: You need administrator privileges to install
maxView Storage Manager. For details on verifying privileges, see your operating system
documentation.
- Open Windows Explorer or My Computer, then change to the directory where the Windows installer package is located (see Download the Installation Package for details).
-
Double click the setup program for your operating system version:
Option Description Windows 64-bit setup_asm_x64.exe The Installation wizard opens. -
Click Next to begin the
installation.
The License Agreement screen on the Installation wizard appears.
- Select I accept the terms in the license agreement option, then click Next.
-
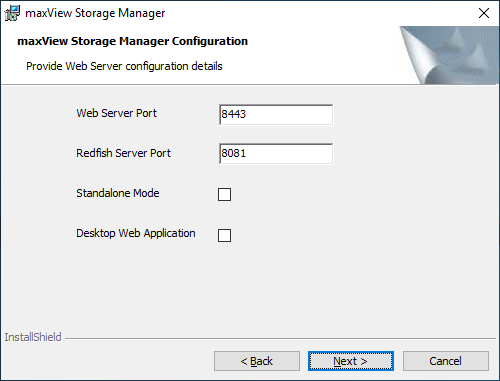
Accept or modify the default server ports in the maxView Storage
Manager Configuration screen:
- Web Server Port: 8443 (default)
- Redfish Server Port: 8081 (default)

-
To disable remote system management from the GUI, click
the Standalone Mode
check box.
Note: In Standalone mode, maxView Storage Manager displays the system name as "localhost" and events as "127.0.0.1/localhost".
-
To install maxView in desktop web application mode, select the
Desktop
Web
Application check box.
Note: In Desktop Web Application mode, there are no services installed. The remote system management from the GUI is disabled.
-
Click Next, then click
OK to verify the Web Server port and the
Redfish Server port numbers.
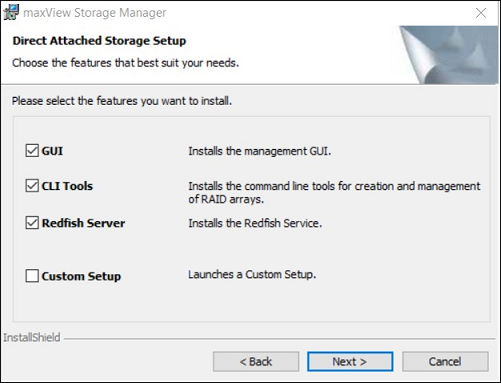
The Direct Attached Storage Setup screen appears on the Installation wizard.
-
Ensure that GUI and/or Redfish Server is
selected. Optionally, select CLI Tools. Click
Next.

- Click Install to begin the installation.
- Repeat these steps to install maxView Storage Manager on every Windows system that will be part of your storage space.
When the installation is complete you receive a confirmation message and the maxView Storage Manager icon is placed on your desktop.
