3.1 Windows PC Ethernet Setting
To access and modify Ethernet Settings on a Windows PC, follow these steps:
- Open the Control Panel on the Windows computer.
- Click on Network and Internet.
- Select Network and Sharing Center.
- Click on Change adapter settings on the left side.
- In the Network Connections window, right-click on Ethernet.
- Choose Properties from the context menu.
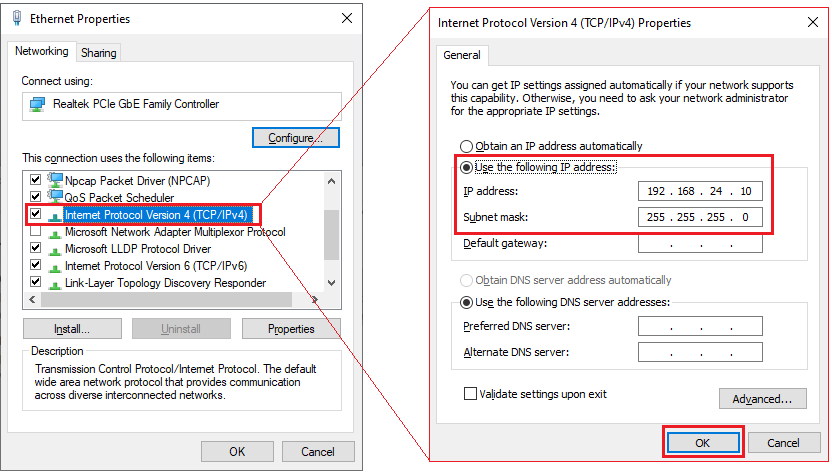
- The Ethernet Properties window displays.
To set a static IP address for Ethernet connection, continue with these steps:
- Double-click on Internet Protocol Version 4 (TCP/IPv4) to open settings.
- A new window opens for TCP/IPv4 properties.
- To manually set the IP address, select Use the following IP address.
- Type in the desired IP
address (for example, 192.168.24.10) and the Subnet
mask (usually 255.255.255.0). Then click OK to apply the
changes.
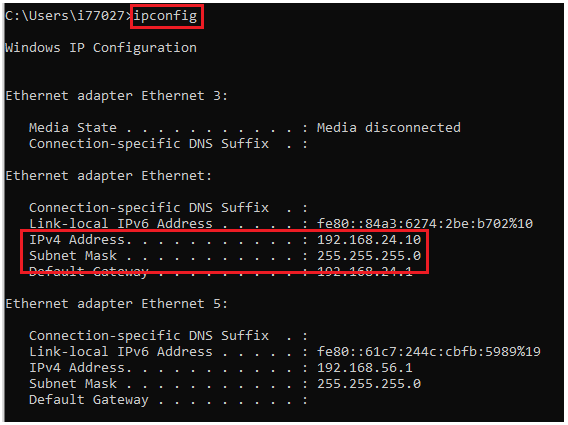
To confirm the IP address in Command Prompt:
- Open Command Prompt by typing cmd in the Windows search bar and clicking the app.
- Type ipconfig in the Command Prompt window and click Enter.
- Scan the output for the network adapter and locate the IPv4 Address for Ethernet to view the set IP address.