4.2 Setting the System Time, Installing Packages, and Connecting through SSH
(Ask a Question)To set the system time, install packages and connect it through SSH, perform the following steps:
- To provide internet access to the kit, connect an Ethernet cable to the Ethernet port of the kit and connect it directly to a router on the same network as your host PC. A direct connection to a laptop is possible with a static IP/bridged connection, but this is not documented in this guide.
- Before installing any packages or successfully using networking, time must be set correctly on the OS. Ensure the following timing related configurations:Note: If the time is not set correctly, some networking functionality may not work correctly.
- To check the current date and time of the OS, run the following command.
timedatectl - To correct the system time in the OS, disable the network time synchronization, set the time manually, and re-enable the network time synchronization. To perform these, run the following commands:
sudo timedatectl set-ntp false
sudo timedatectl set-time "2019-06-22 13:41:00"
sudo timedatectl set-ntp true
Note: Use an approximate local date and time in the format YYYY-MM-DD HH:MM:SS.Now, the system time synchronizes automatically.
- To check the current date and time of the OS, run the following command.
- To install the net-tools package, run the following commands.
sudo apt update
sudo apt-get install net-tools
Note: As an alternative to installing the net-tools package and using theifconfigcommand, Ubuntu supports running theip addresscommand out of the box without requiring any additional packages. - To determine the IP address of the kit, run the
ifconfigcommand.Note: "end0" corresponds to the Ethernet connection to the kit and the "inet" entry corresponds to the IP address.Figure 4-3. IP Address of the Kit 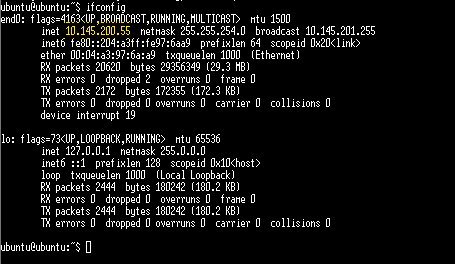 Note: As an alternative to installing the net-tools package and using the
ifconfigcommand, Ubuntu supports running theip addresscommand out of the box without requiring any additional packages. - Open a terminal or command prompt on your host PC. Ensure the host PC is connected to the same network as the kit.
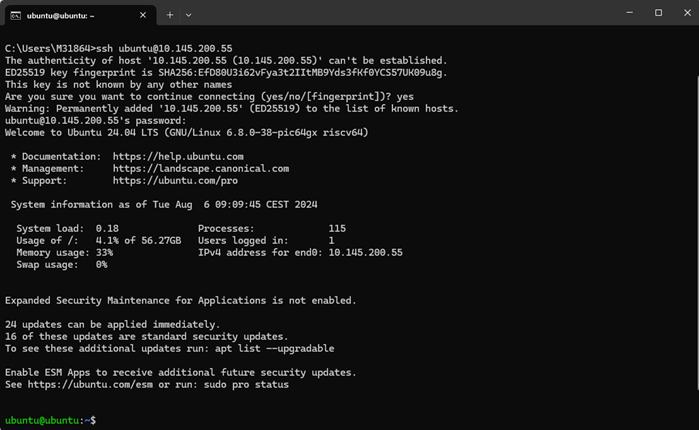
- To access the kit using SSH, un the following command on the terminal that was opened in the previous step on the host PC:
ssh ubuntu@<IP ADDRESS>.Note:- You might be prompted to add the kit to a list of known hosts through a warning which says "The authenticity of this host 'xxxxxxx' can't be established.' 'Are you sure you want to continue connecting' - this is normal, ensure you have used the correct IP address of the kit to avoid attempting to connect to an unknown host! As seen in the following figure.
- You are prompted to enter the password that was configured for the kit.
Figure 4-4. Accessing Kit Using SSH